The brainstorming process:
First things first, the brainstorm:
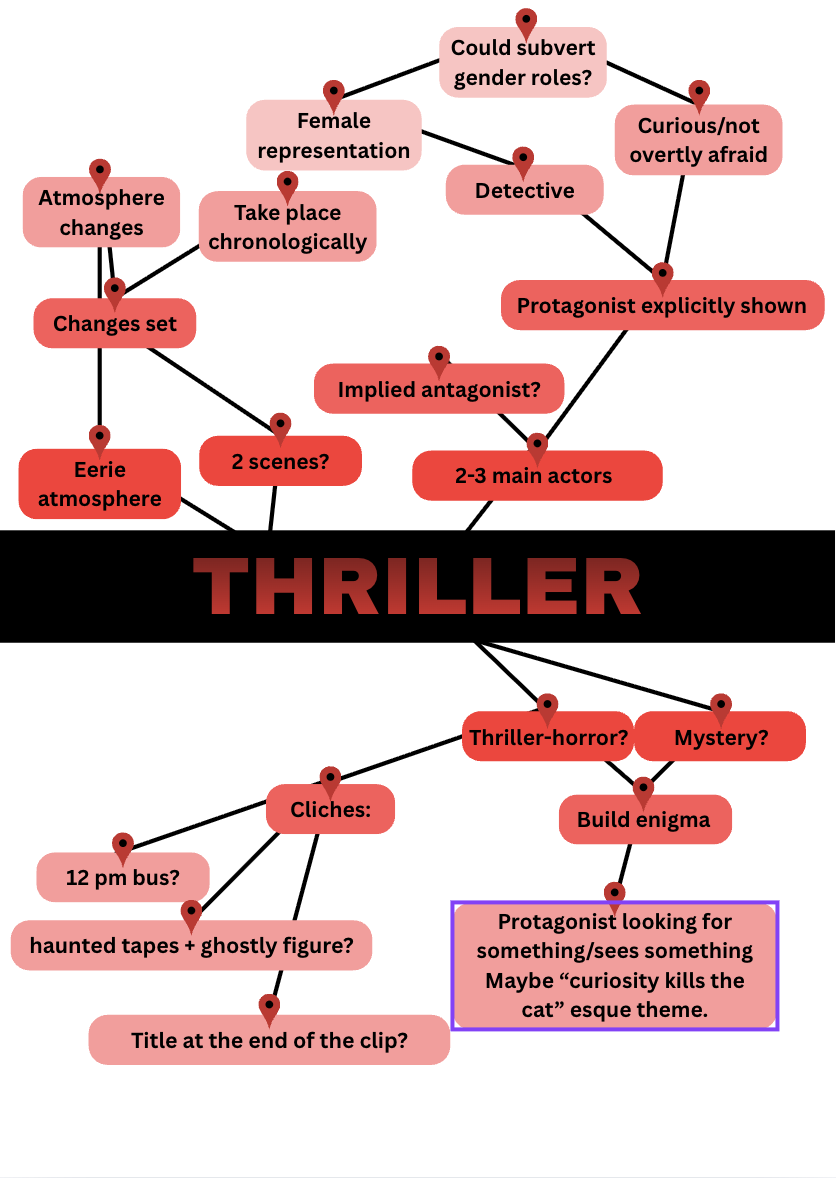
As a public brainstorm can substantially improve the flow of a project like this, we decided to opt for a mind-map type brainstorm on ‘Canva.’
Furthermore, my team and I already knew we wanted do to a thriller going into the project, which streamlined the process considerably.
We started with a very basic brainstorm (as seen on the top right,) we had some ideas that we thought could be interesting going into the project, but at this stage we just wrote a bunch of ideas down to see what would stick.
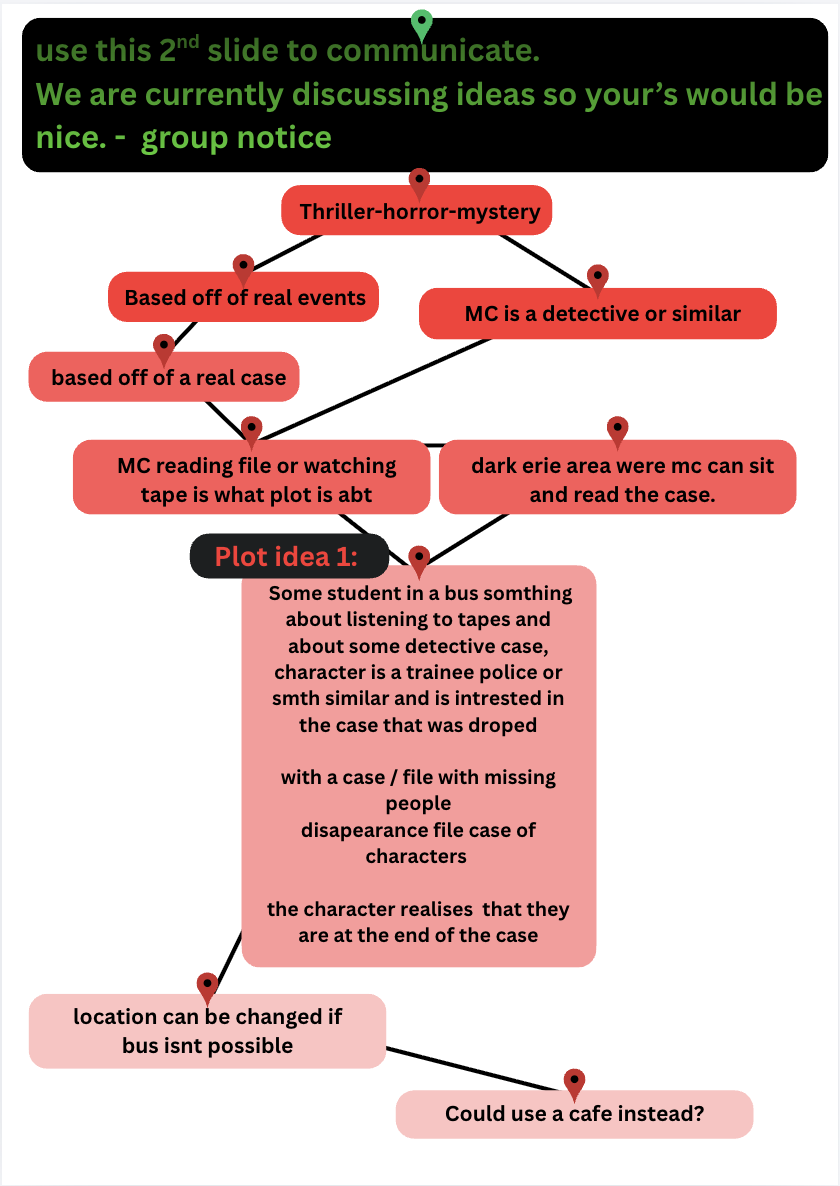
In the next class we further refined the ideas into another planning document, In this we decided on the general plot. We wanted to go for a mix of horror-thriller and mystery, following a detective trainee looking at a missing persons file.
The scene will be split into two parts, a very short start, and a longer end.
Our first draft of the plot goes as follows:
The first part will have a detective trainee (yet to be named)
get off of their shift at a police station,
noticing and taking home a ‘cold case file.’
In the next part, they take the bus on their way home,
out of curiosity they open the file, as they look at the description of one of the missing persons,
as they do, a person who matches the descriptions to an uncanny degree walks onto the bus, the protagonist assumes it to be a coincidence, and keeps flipping, but it keeps happening, until ultimately she flips onto a page of herself.
On reflection, there are several issues with this first draft, namely the problem of the bus – which would be logistically difficult, as recording people entering at each stop would require extreme coordination, and furthermore, it would be unsafe (last I heard standing up with fragile equipment on a moving bus that can stop at any moment isn’t overly safe.) The second problem is that this would simply exceed the 2 minute limit of the film opening. So in future iterations we need to solve these problems.
Next up, the moodboard.
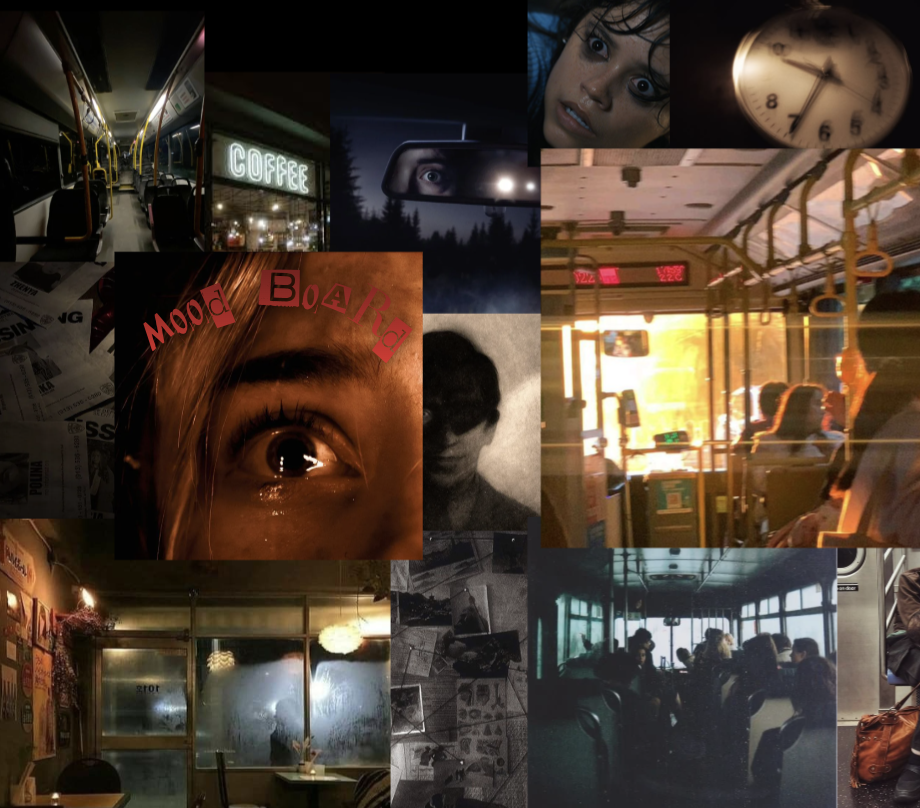
I must preface that I was not the leading member in charge of the moodboard, although I did provide suggestions to my other two team members who worked on it.
Based on our brainstorm, we knew we wanted to build a strong dark and somewhat uneasy atmosphere. This can especially be seen in the use of warm lights.
At the time of creating the mood-board we were also still unsure over whether or not the bus would be the primary set (We later decided it wouldn’t be) thus many images involved a bus in some capacity. The mood-board proved to be an effective anchor in keeping the atmosphere of the piece on track – (and would be useful in colour grading much further down the line.)
Production roles
Any good film needs to have co-ordinated positions for every member (although with only 3 members this is limited,) thus in class my team and I discussed who would do what…
Here are the results:
Casting director: Yantong
Great people skills, knows the drama club (better than I do).
Health and safety officer: Bruce
Cares about the wellbeing of his group members, making him an appropriate fit.
Storyboarder: Joel (me)
I have good knowledge of micro-elements and how they can be used to create effect, I also have quite a bit of free-time after school, making this a good role for me.
Script writer: Yantong
Has a good vision for how the scene will play out, made the initial plot which later developed into the final plot, thus has the best idea of character motives/personality. It’s worth noting however that it isn’t fully certain whether we will need a script or not.
Location scout: Bruce & Yantong
Having two people discuss locations allows for us to refine our selection to align it as close to the plot vision as possible.
Costume/prop designer: Joel (me)
As previously mentioned, I have reasonably good knowledge of micro-elements which includes Mise-en-scene and costume design. I will also likely do the editing as I have the most experience with adobe premiere pro.
Storyboarding the plot
This storyboard was made both in class and at home, it was made with the intention of nailing down the plot and giving my team some direction, I was entirely responsible for it’s creation and personally made all of the rudimentary yet hopefully effective stick figure pictures.
(NO A.I IN ANY FORM)
I would recommend looking at the ‘Deeper Breakdown’ below each storyboard section
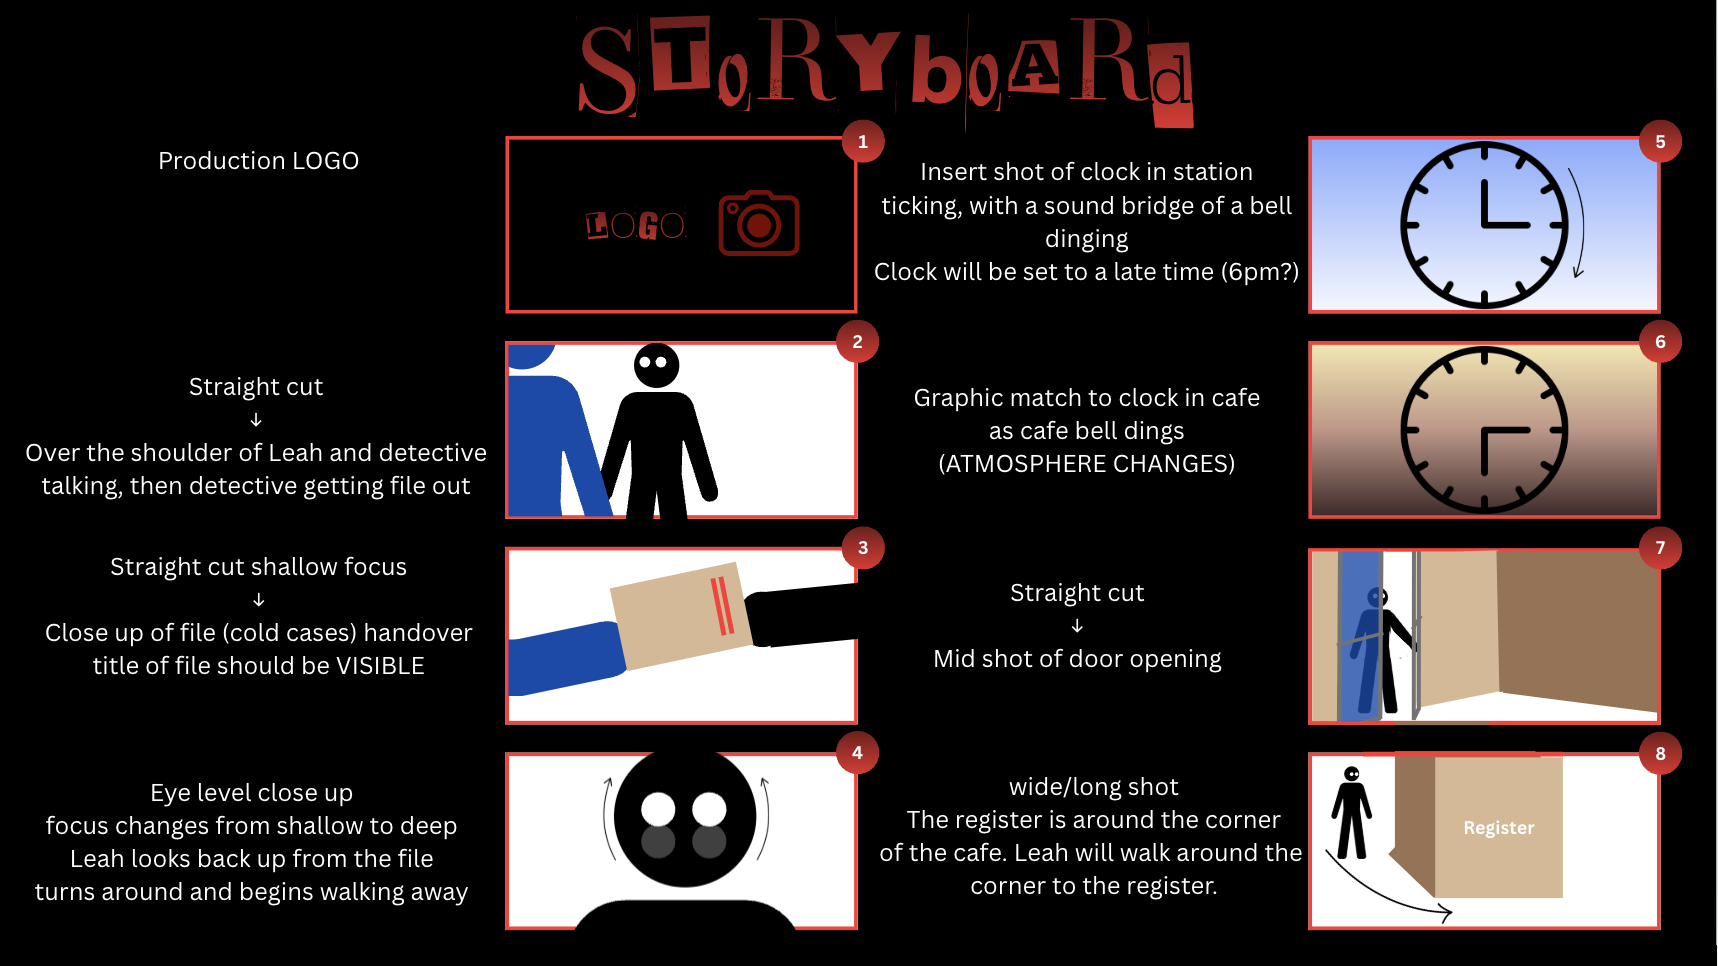
For a deeper breakdown of shots 1-8 click here
*Unless mentioned otherwise assume that all shots are composed in a linear manner with straight cuts*
**Also I didn’t use A.I at all, full stop**
1: The production logo will be at the very start of the clip, likely a black backdrop to align with the mystery genre. Notably this is JUST the production logo, not the title of the movie/opening. We decided to place that at the very end to break the climax and leave the audience wanting to know what happens, effectively a hook.
2: Jumping straight into the scene with a straight cut, the audience is immediately introduced to the protagonist Leah, as to avoid confusion over the relevance of the characters, the police officer/her trainer’s face will not be shown, the police officer will also be taller than Leah by a noticable amount to establish her position as a trainee or amateur detective.
3: An insert shot of the file being handed to Leah, I am not working on the script as that is not one of my roles, but I would expect dialogue to be spoken over the top of this shot and the adjacent shots (2 & 4.) The title of the file will not yet be emphasised but the insert does hint at it’s importance.
4: An eye level close up of Leahs face as she looks upward from the file works to further introduce her character – and importantly her appearance to the audience (which will be important later)
5: Insert shot of the clock just shows the time this scene takes place during.
A dissolve would then work as a fluid graphic match into:
6: An insert shot of a hopefully identical clock if prop finding works out well, except the lighting and time will be different, ideally this graphic match gets the idea across, that the events of the rest of the opening take place later that night. Bell motif (Imagine a typical café bell that might play when you open the door) is introduced here.
7: Mid shot of Leah as she walks into cafe through front door, the association with the bell motif can now be made, i.e. when you hear the bell somebody has entered the cafe.
8. wide shot of Leah walking towards the register, not much else to say, tells the audience that this is a café I suppose?
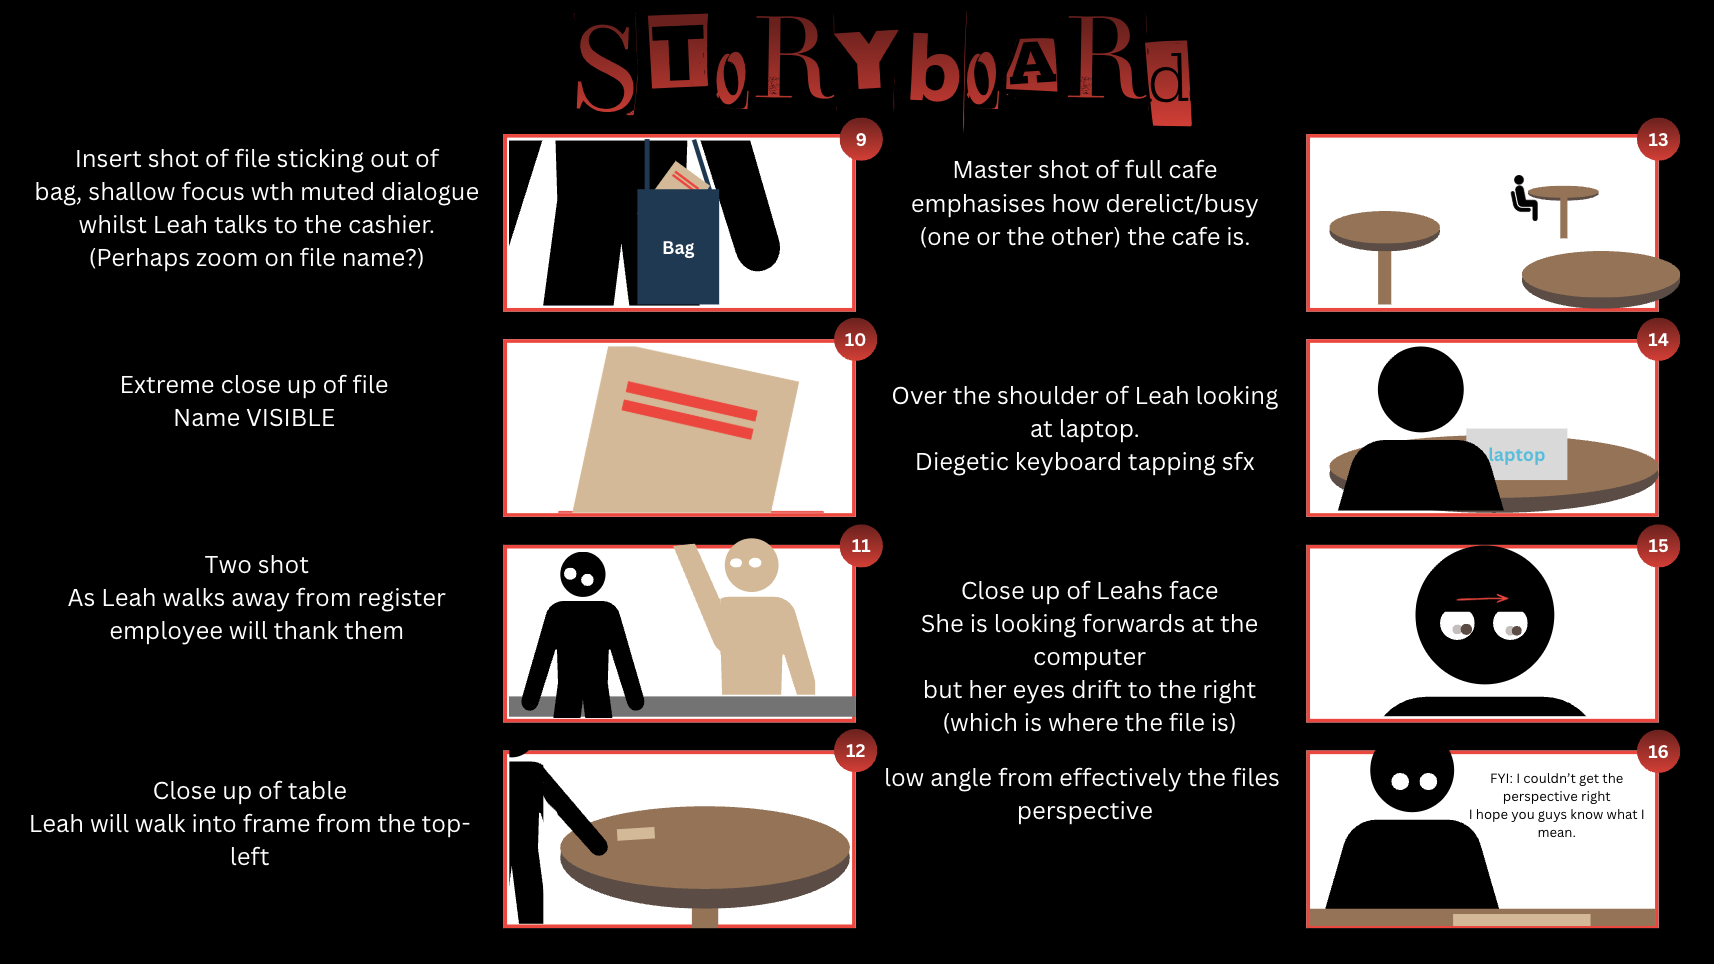
For a deeper breakdown of shots 9-16 click here
9: An insert shot of the file sticking out of the bag further emphasises the important role it will play, and now is where the emphasis on the title (“Missing persons cases”) is placed, as this shot will zoom (or cut) into:
10: An extreme closeup insert of the title of the file, audience should read the name at this point. Throughout 9-10 there will also be muffled yet non-emphasised dialogue between the barista and Leah as she makes an order, this isn’t really supposed to be important but will be a plot device in future scenes.
11: A two shot of Leah walking away from the register, barista is clearly visible to avoid any confusion about the missing persons who will be introduced later.
12: Close up/mid shot of table as Leah walks into the frame and sits down, she will remain here for most of the clip so it’s important to show this now
13: Master shot of the cafe, shows that Leah is more or less alone, apart from the barista who will be either barely in frame or doing something in an non visible backroom. Also shows the scene of the cafe, note that the police station did not receive an establishing shot (at the time of writing) because it was NOT the focus of the opening , whereas the cafe does, making it seem more important (because it is.)
14: You can see Leah doing work, or at least beginning to do work, the over the shoulder nature almost makes the audience feel as though they are in the scene, and watching her, which may start a sense of unease which will hopefully be maintained.
15: Close up of Leahs face, emphasis on her eyes drifting towards file, shows her curiosity as she would rather look at it than do whatever she was doing on the computer.
16: Low angle of Leah looming over the file from the perspective OF the file, this is quite a common troupe in the mystery genre and makes Leah look as though she is towering over the file as her hand comes to grab it, also further shows the importance of the file.
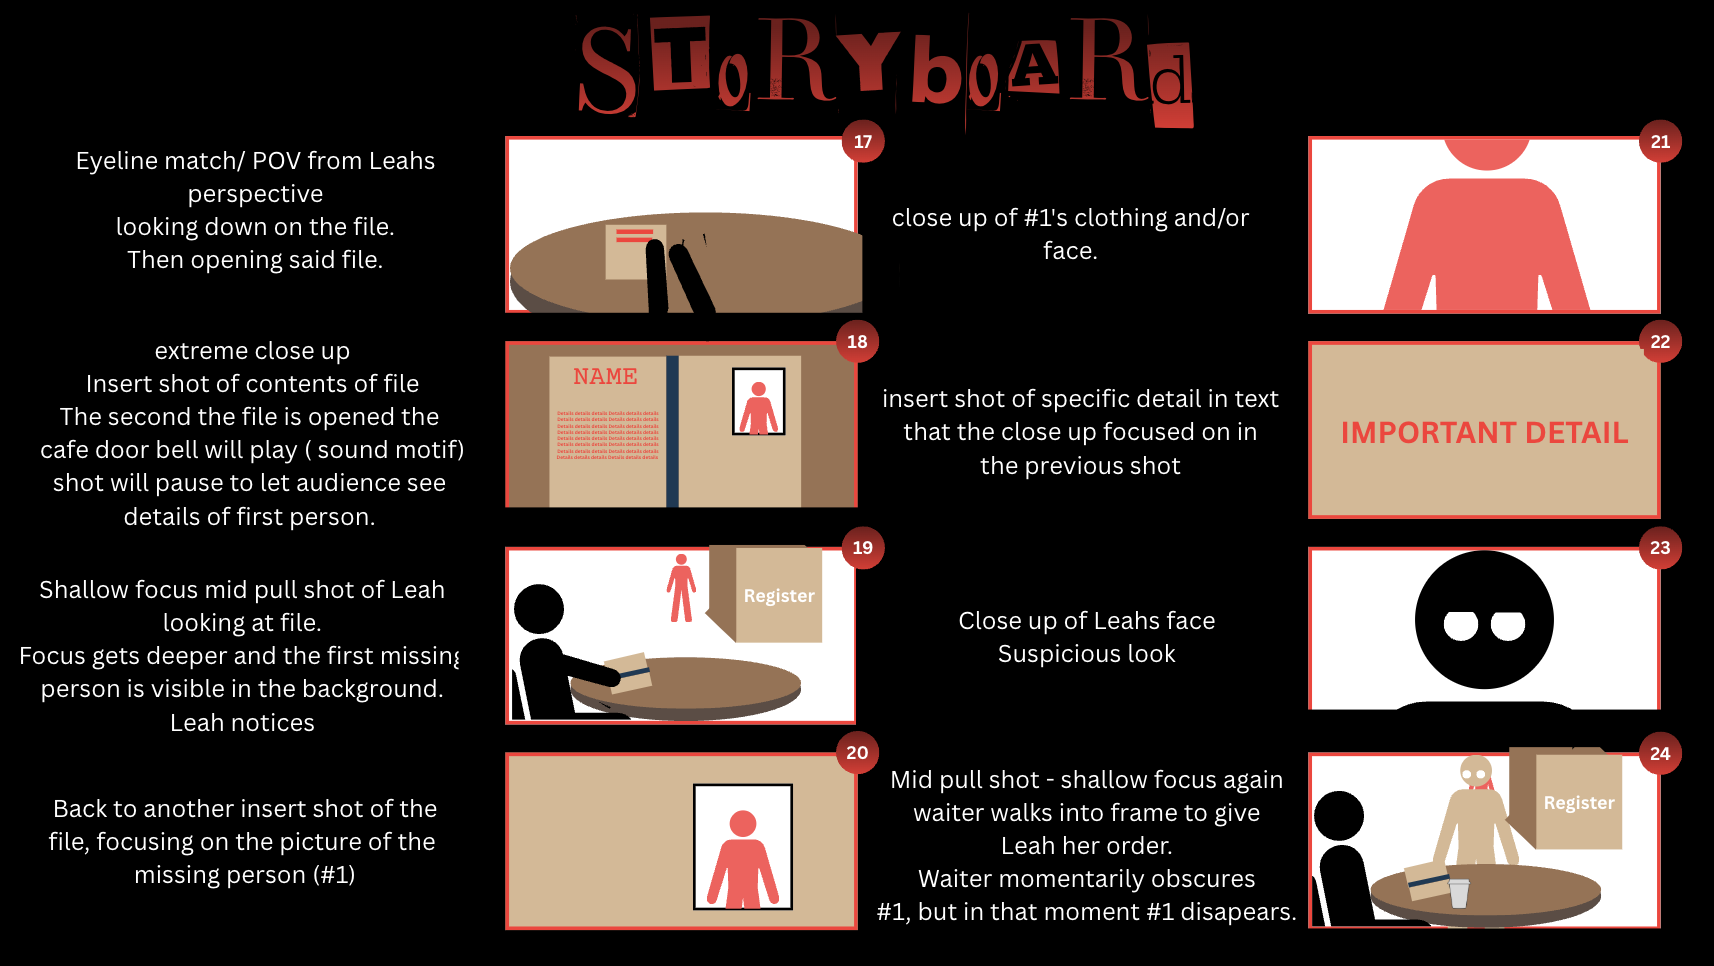
For a breakdown of shots 17-24 click here
17: An eyeline match as Leah opens the file, also serves to place the audience into Leah’s perspective, like a POV.
18: Extreme close up of the files contents, the photo should be the most important content of the file and will thus be made noticeable – through a red border or something? That is TBD at the time of writing. Note that as the file is opened the bell motif can be heard.
19: Shallow to deep mid pull shot of Leah looking up from the file possibly in response to hearing the bell noise. This is where the first missing person will be introduced, hereby named “#1.” #1 will match the appearance of the missing file picture to a T (hopefully,) if the audience was paying close attention they may notice this, and the pull shot should draw attention to them.
20: Either way, Leah looks back towards the file, and a SUPER extreme close up takes place, as the camera focuses on specifically the photo, at this point the audience should make the connection.
21: A quick close up to #1’s face/clothing perhaps in a graphic match style should further reinforce this connection
22: Back to the file, the extreme close up is now on a detail – such as “last seen wearing XXXXX” – which matches the appearance of #1, thus, the audience should now be skeptical that this is not a coincedence.
23: A close up of Leahs face with a look of suspicion, should make the audience relate to this feeling.
24: A reverse pull shot of the focus going from deep to shallow occurs as the barista interupts the tension, giving Leah her order, this will be the opposite of 19. Providing a brief respite from the now rising tension for Leah and the audience. However, as the barista walks away #1 will no longer be present.
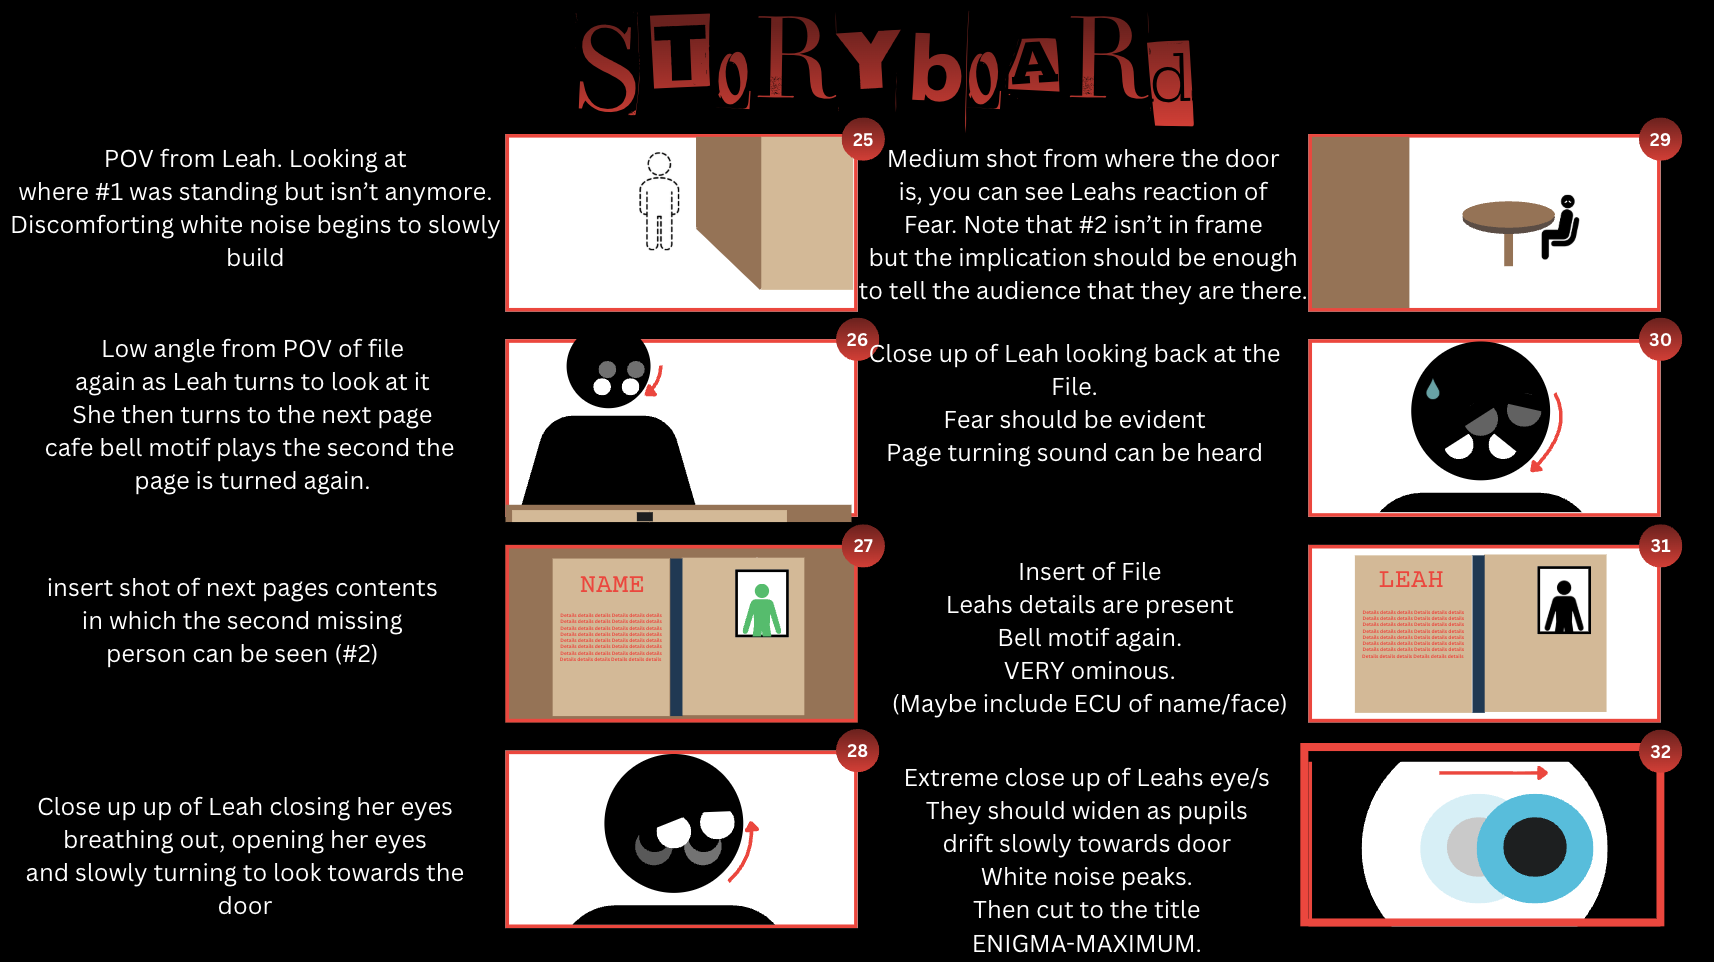
For a breakdown of the final shots click here!
25: A POV of Leah looking at where #1 was standing. But they aren’t there anymore. This is intended to feel somewhat paranormal.
26: Another low angle from the POV of the file looking up at Leah, her hand will be visible turning the page, parrallels when she first opened the file.
27: an insert shot of the next page, before audience can adjust to what they are looking the bell motif should play again, heavily foreshadowing what is happening. It may be wise for us to use a distressing photo or at the very least switch up the age demographic, because #2 will not be fully visible, just strongly implied to be present.
28: Close up of Leah now starting to look scared as she returns her gaze to the doorway. This should be somewhat slow and reluctant to show fear
29: Medium shot from perspective of where #1 was standing (now where #2 is standing) looking back at Leah. Note that this breaks the 180 degree camera “Line of action” rule, this is intentional, as it helps to make the audience think that something is wrong, or at the very least feel unnerved or disoriented at a sub-conscious level.
It is very important that this makes it into the final cut as I do believe that it will serve as a great show of camera knowledge!
30: Another close up of her face as she avoids eye contact with presumably #2, fear should be very very visible at this point. Out of perhaps a morbid curiosity, Leah will be heard turning the page one final time. This sound will be audio mixed to be very noticeable.
31: A final extreme close up of the next page, where Leahs own face will be visible, for those with a keen eye/ rewatching, it may be noticeable that her last seen with clothing will be what she is currently wearing. Of course, the bell jingle will play, having harrowing implications that will build an incredible amount of engima and tension
32: An extreme close up of Leahs eye/s looking towards where the door is, as a droning sound gets louder and louder. but before they make it to where the door is, a cut to the title. This is the climax
33: Not present on the storyboard, but this shot would be the title, which breaks the tension that has been building up to this point, leaving the audience in a state of shock, hopefully hooking them to want to watch more of the movie!
In the end I think the storyboard is reasonably well done, if I had any criticism the 2d art style makes it difficult to understand the framing of several of the shots, also this storyboard is quite strict and I am fully aware that many aspects are subject to change in the future. I do think I made the plot reasonably clear, and my detailed breakdown of every shot should show some awareness of techniques and assist me in the future for my CCR questions as well as, of course, the actual filming of the opening.
I also believe that the knowledge I gained in my research on the thriller genre was a very big help in coming up with ideas for the framing of the storyboard.
Prop/costume design
Prop/costume design was one of the jobs that I was allocated in this project, and as such quickly made a list of props I would need to create or find to match the storyboard.
(Props labelled with an asterisk are not completely necessary and could be changed or swapped out on the day)
– A laptop*
– The folder
– The files in the folder
– The outfits of Leah, #1 and #2.
– The outfit of the barista or equivalent
– Coffee or some sort of drink*
– An appropriate bag for the file to be in.
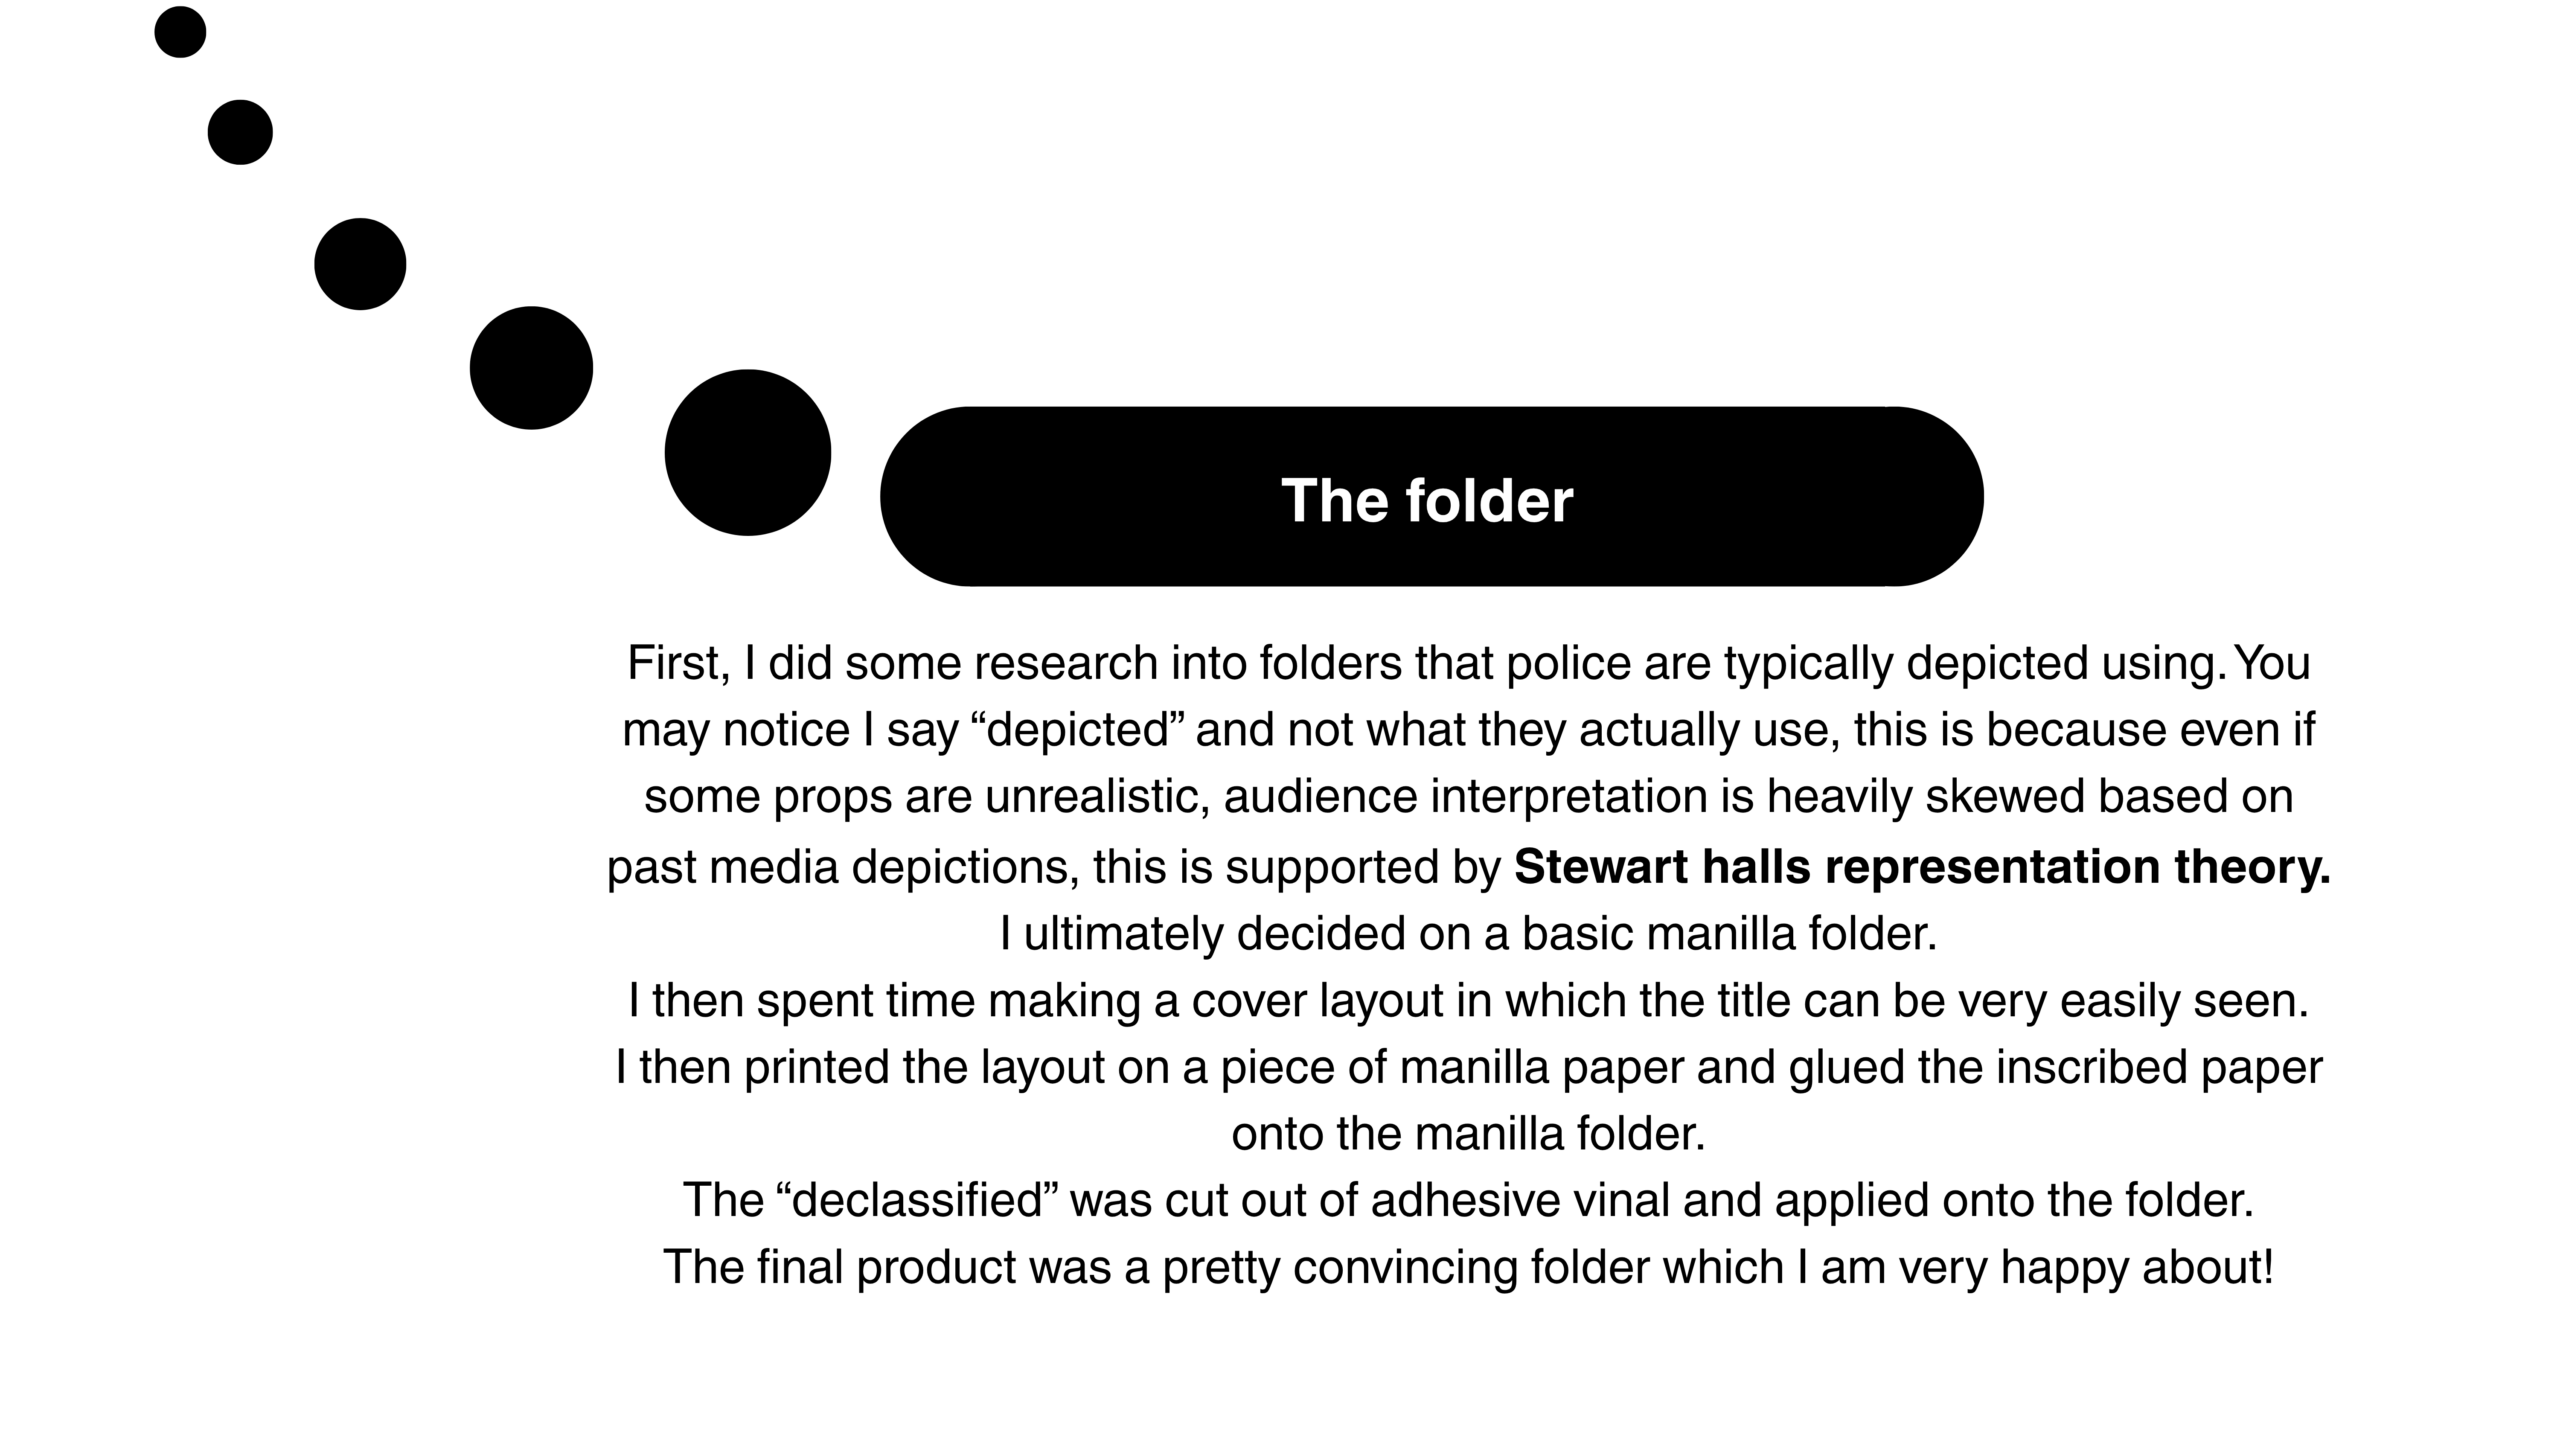
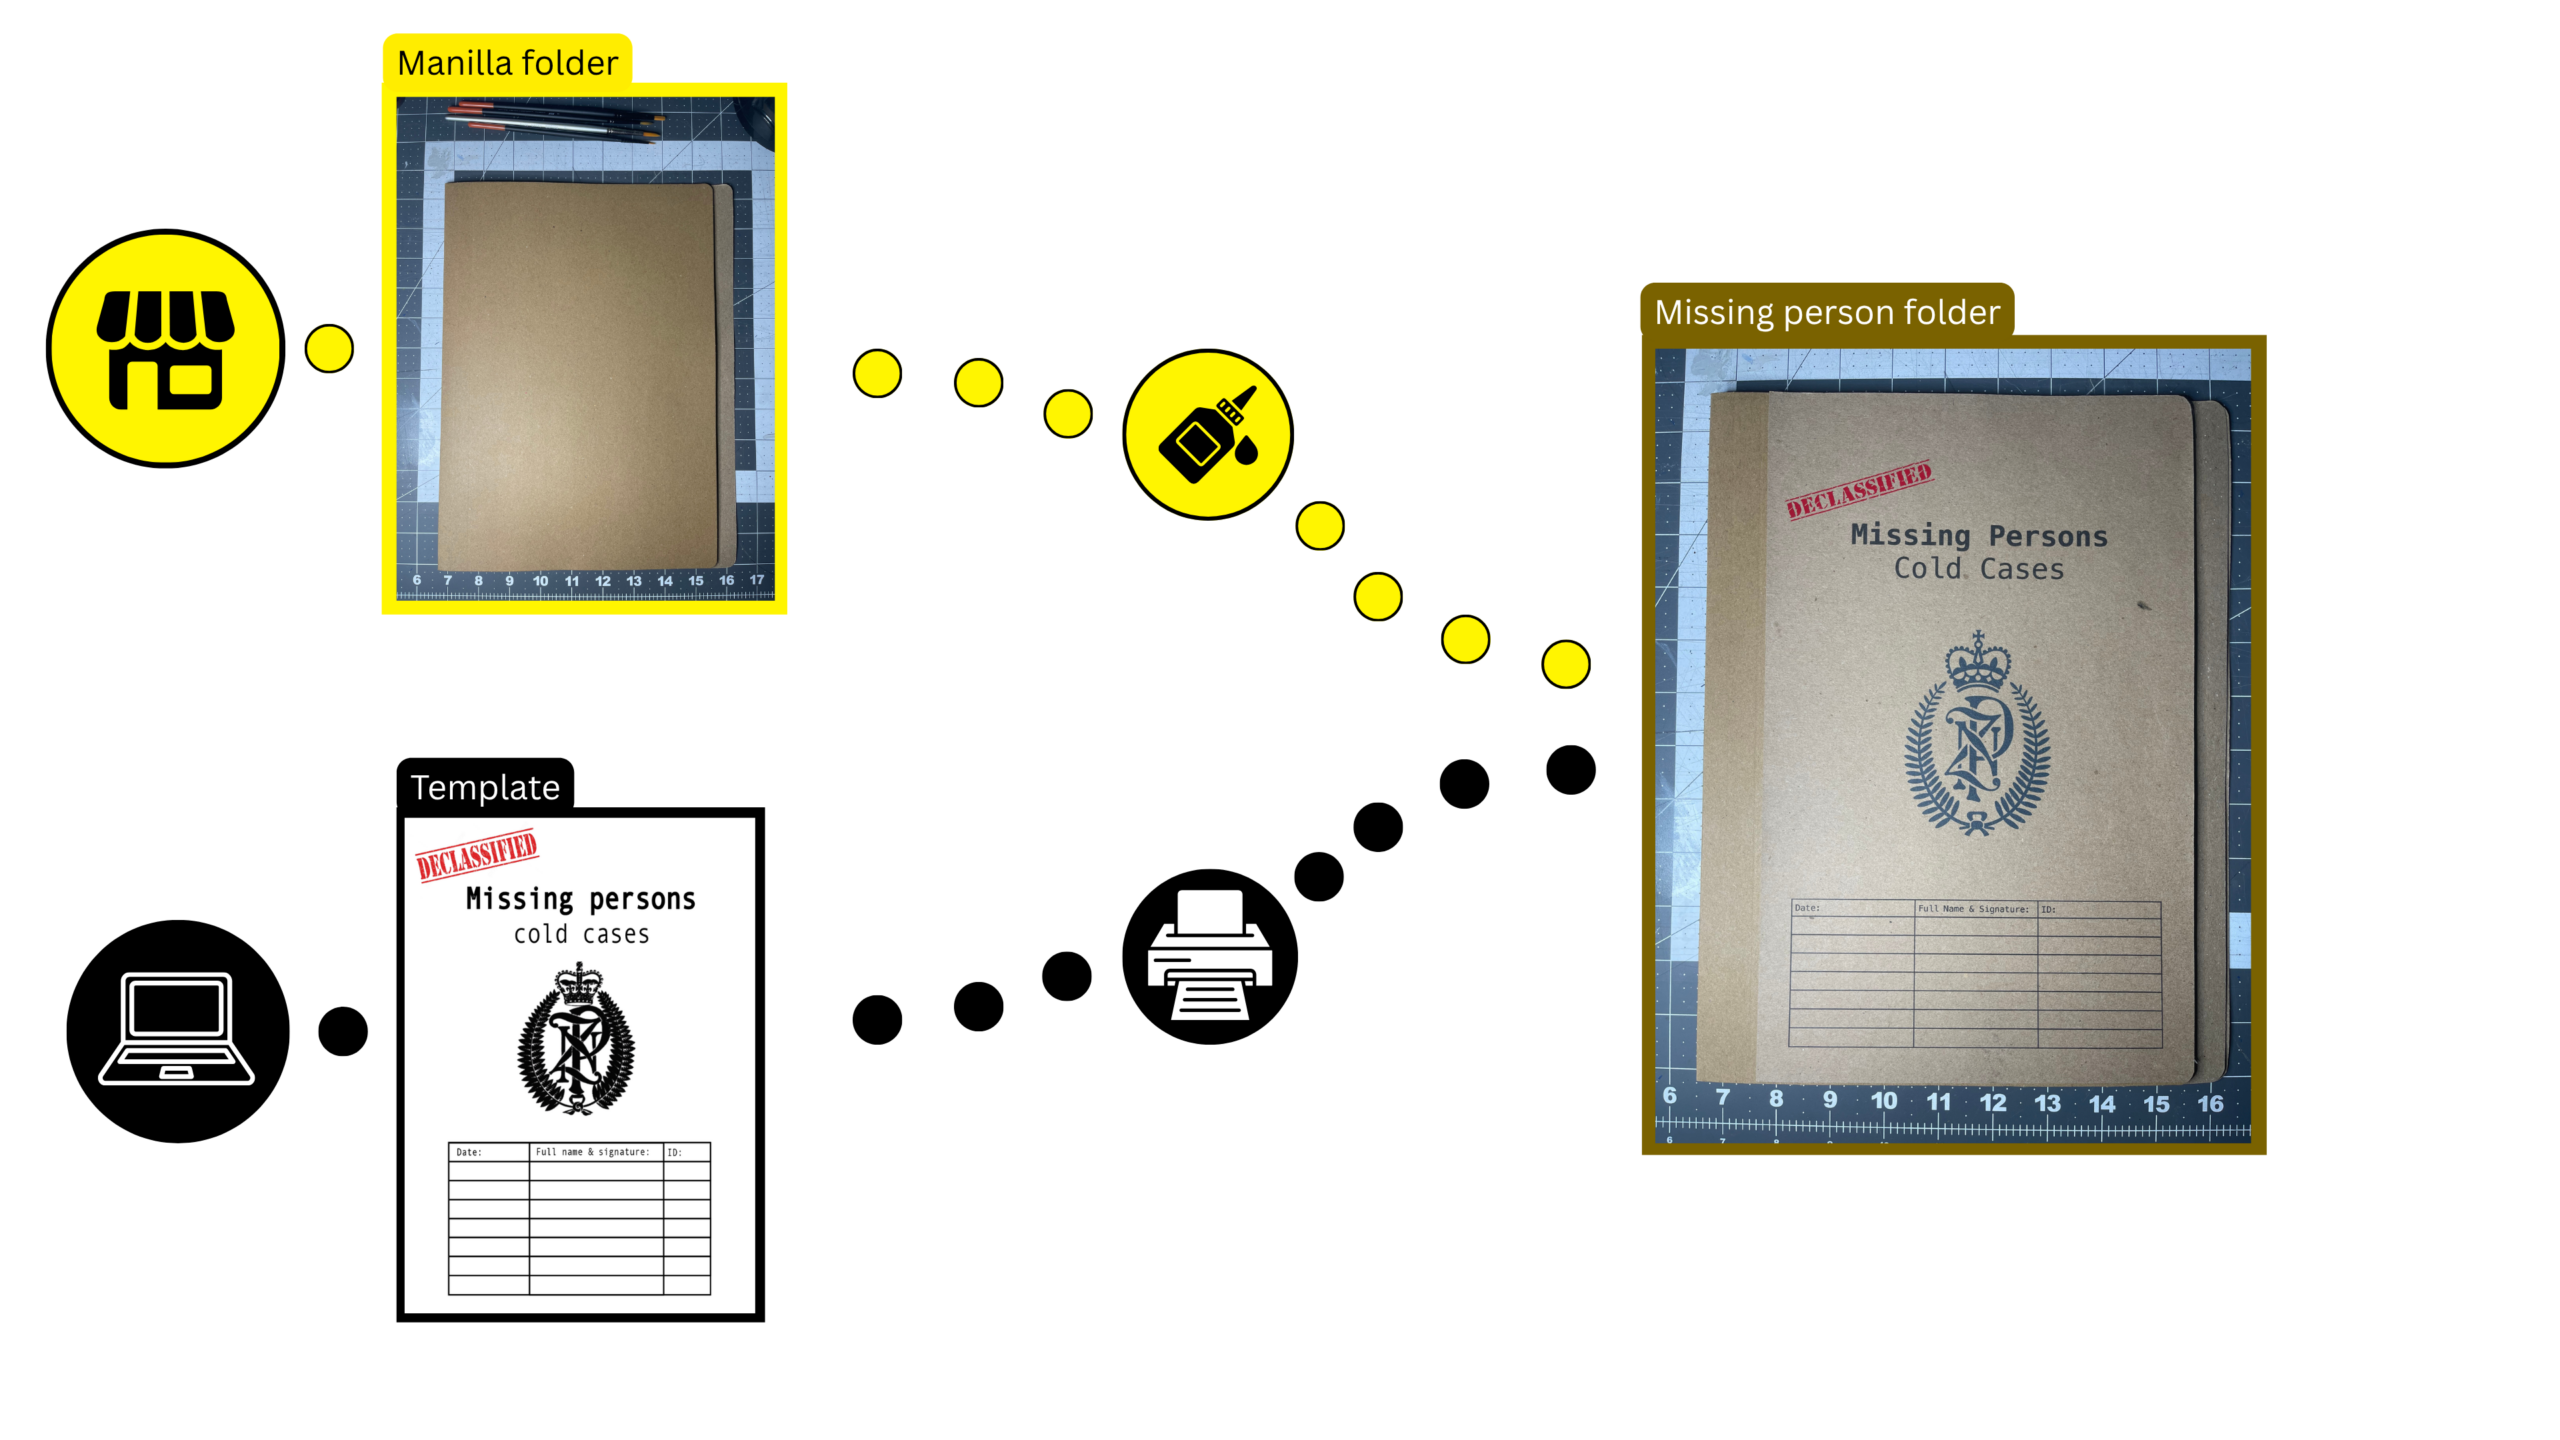
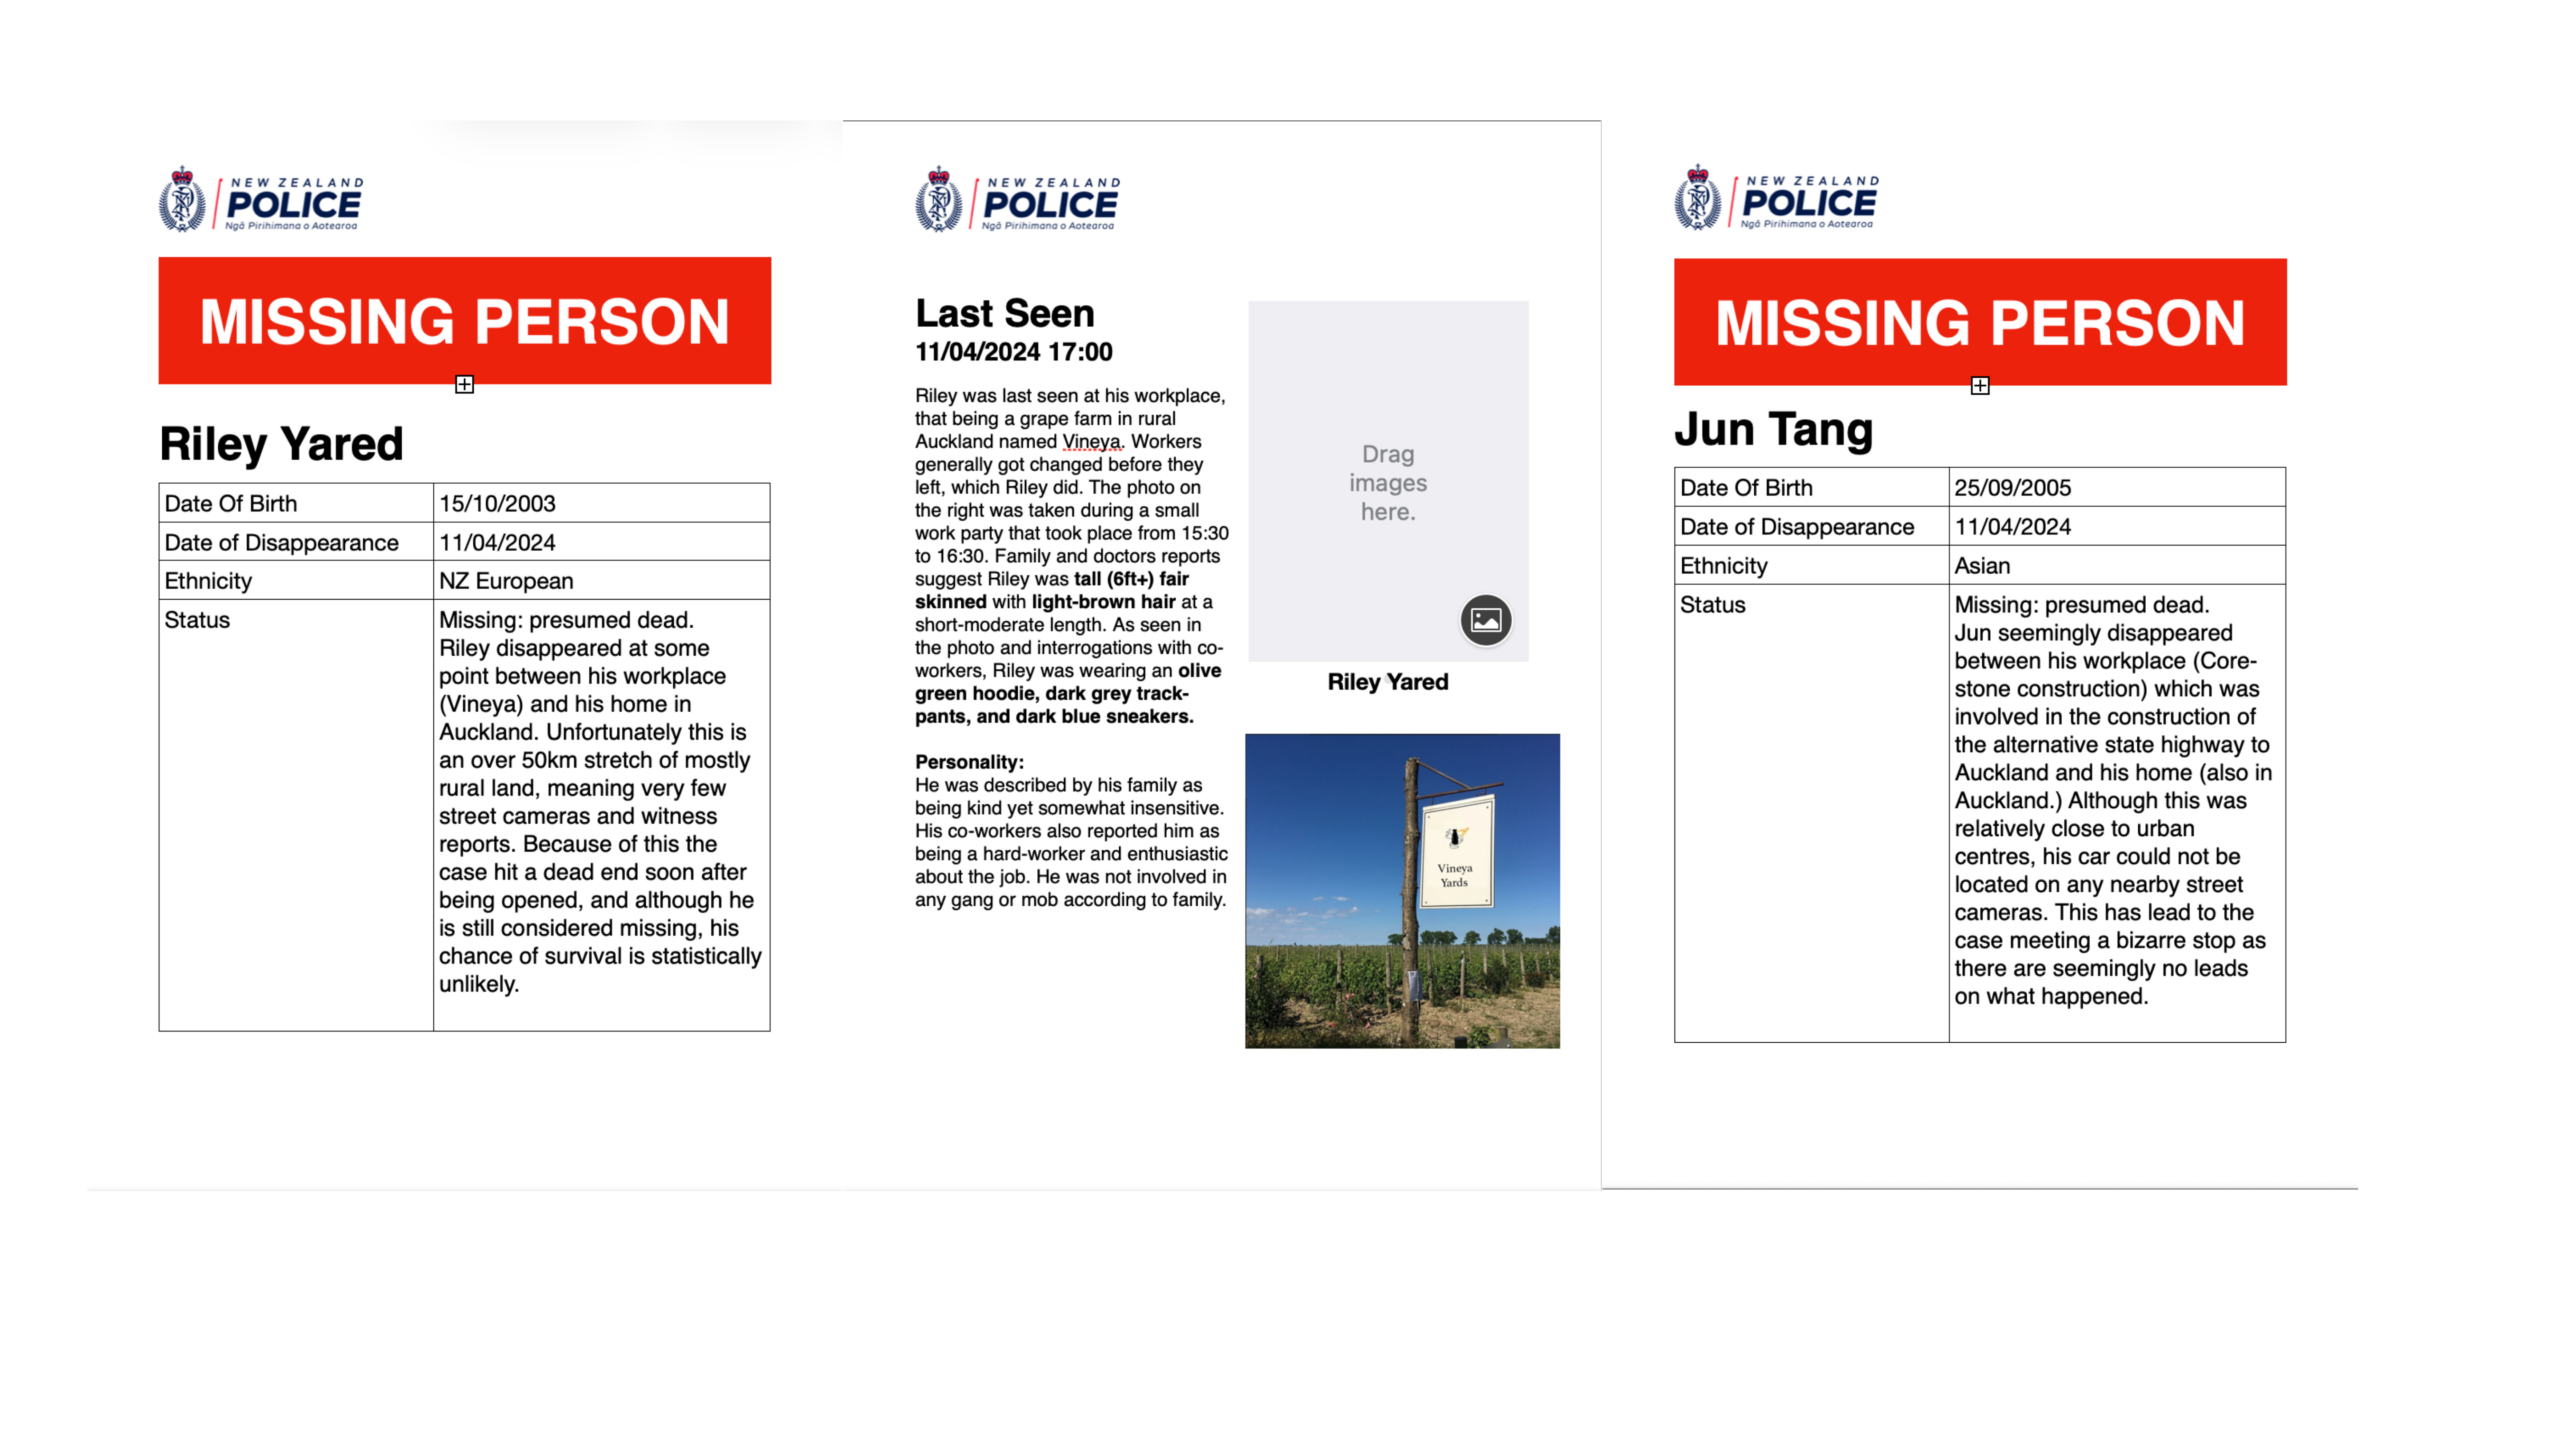
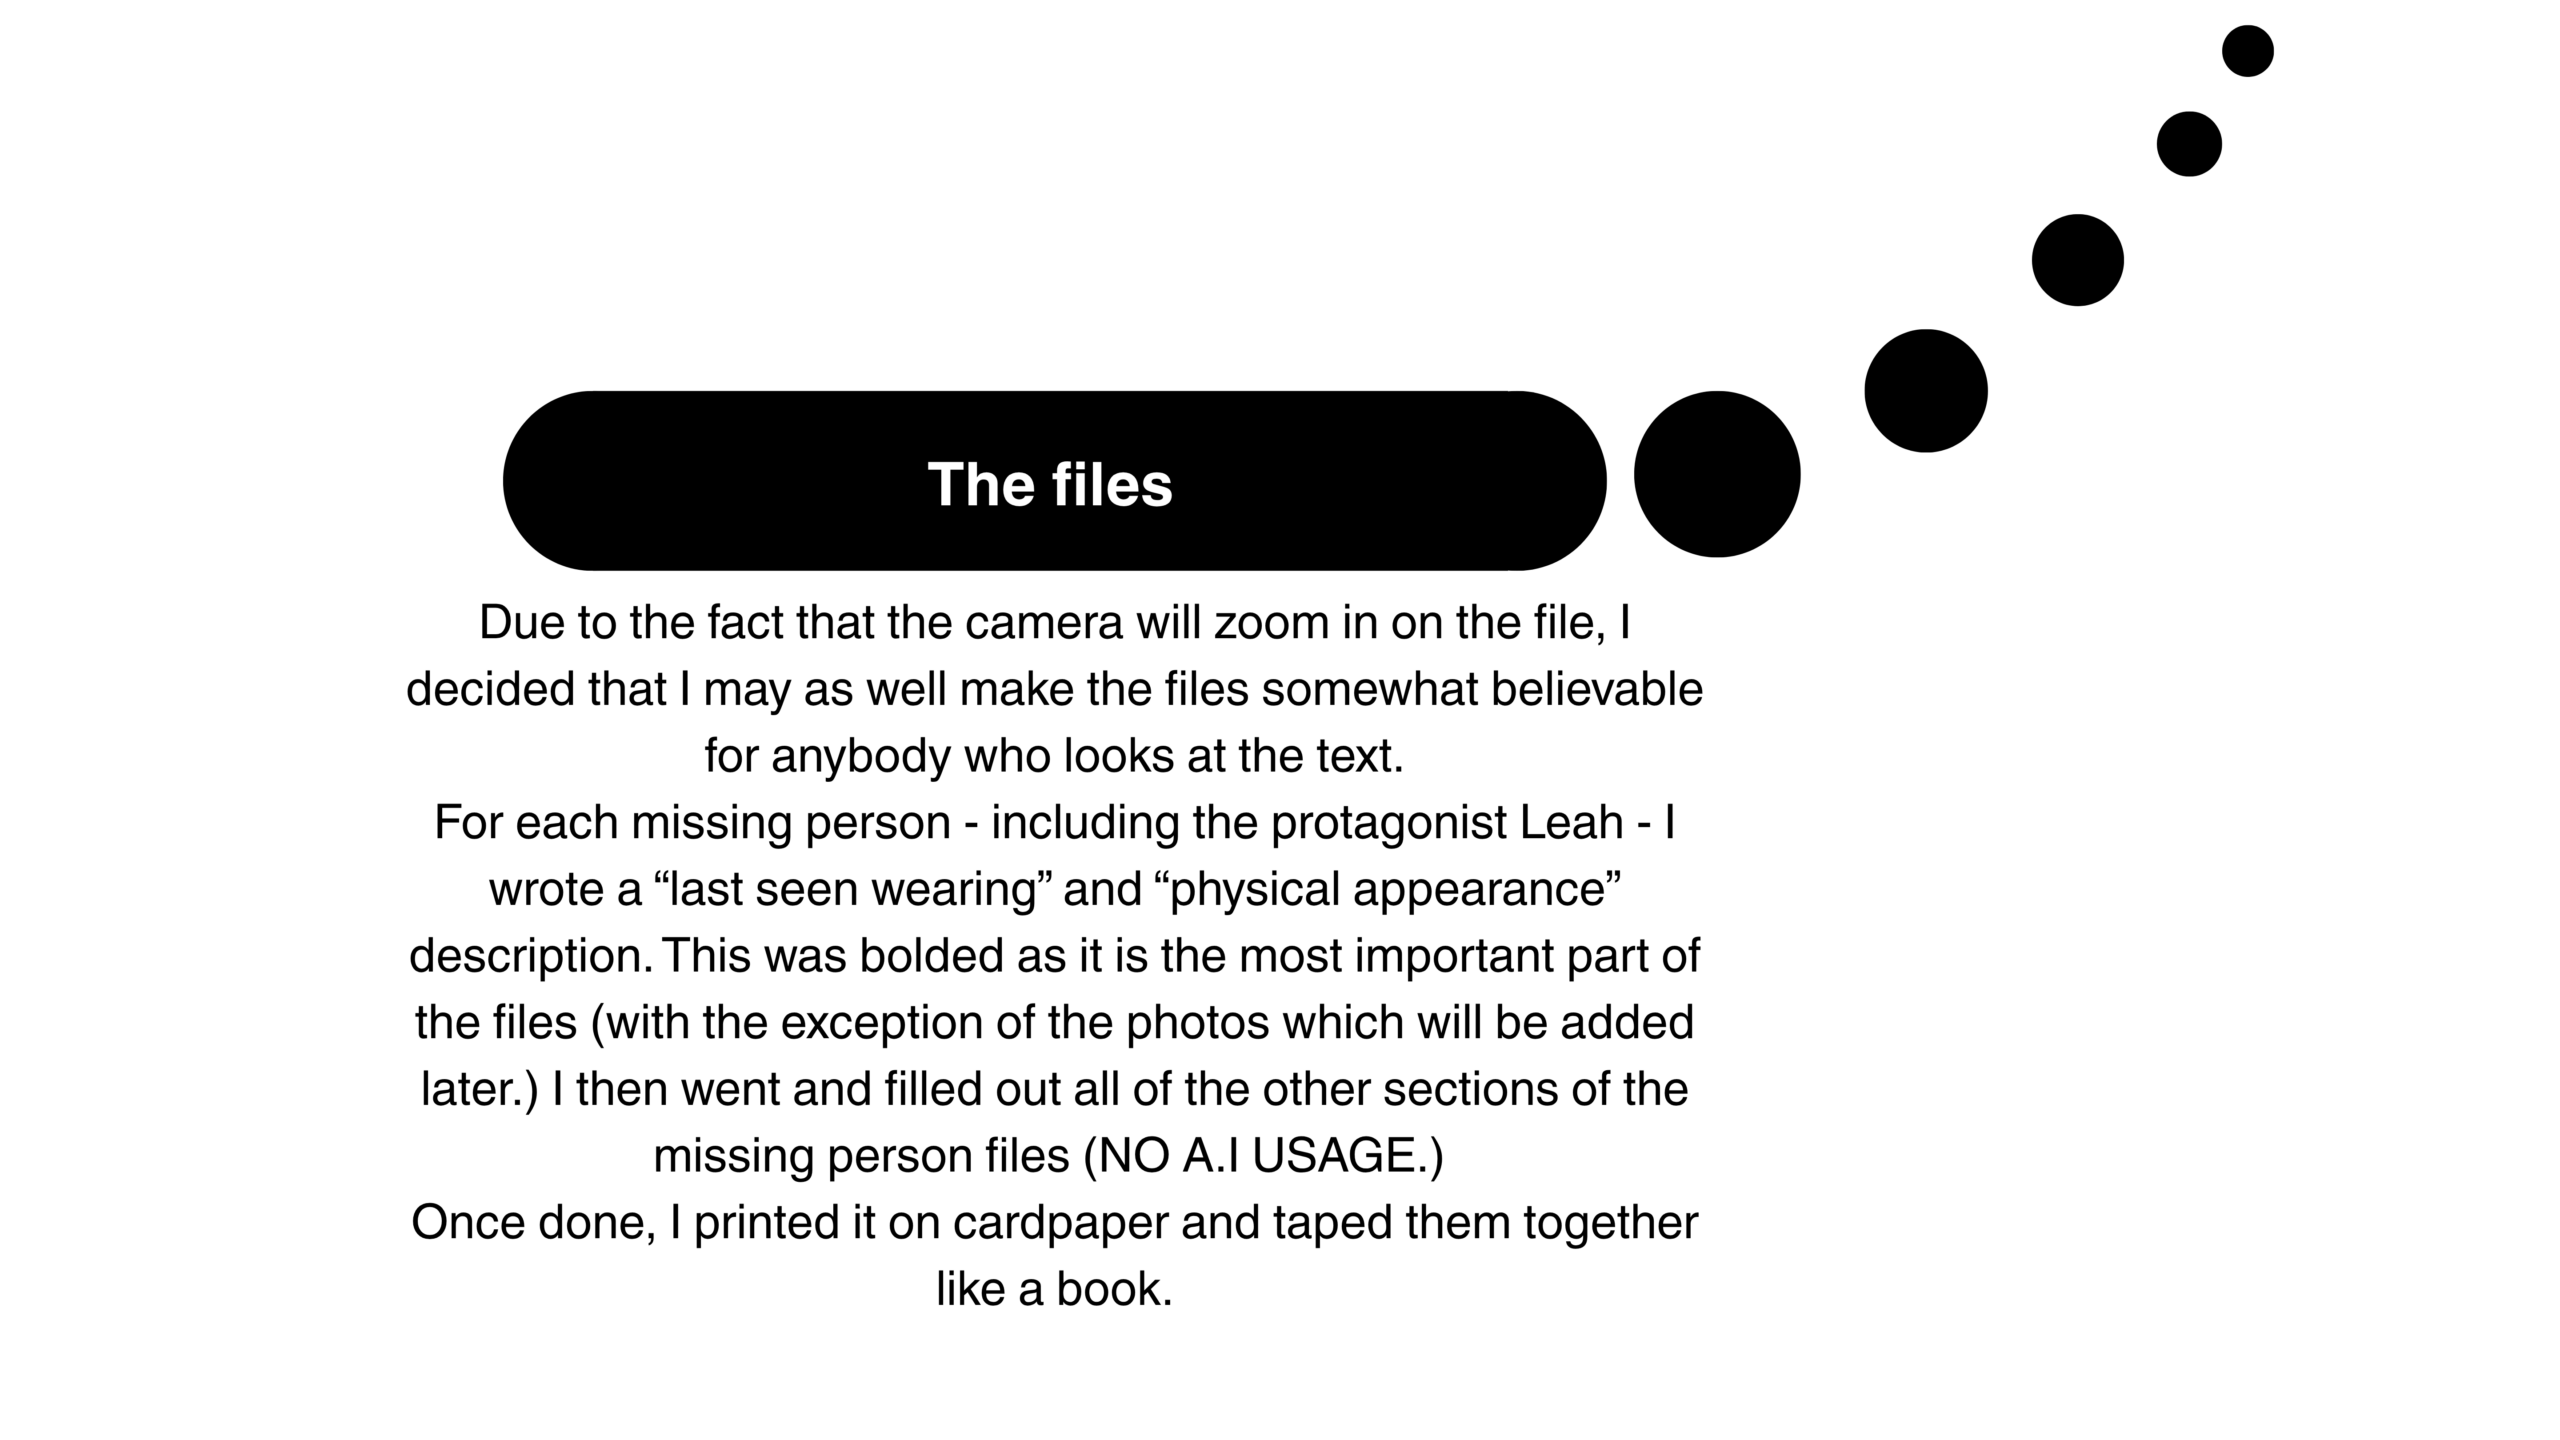
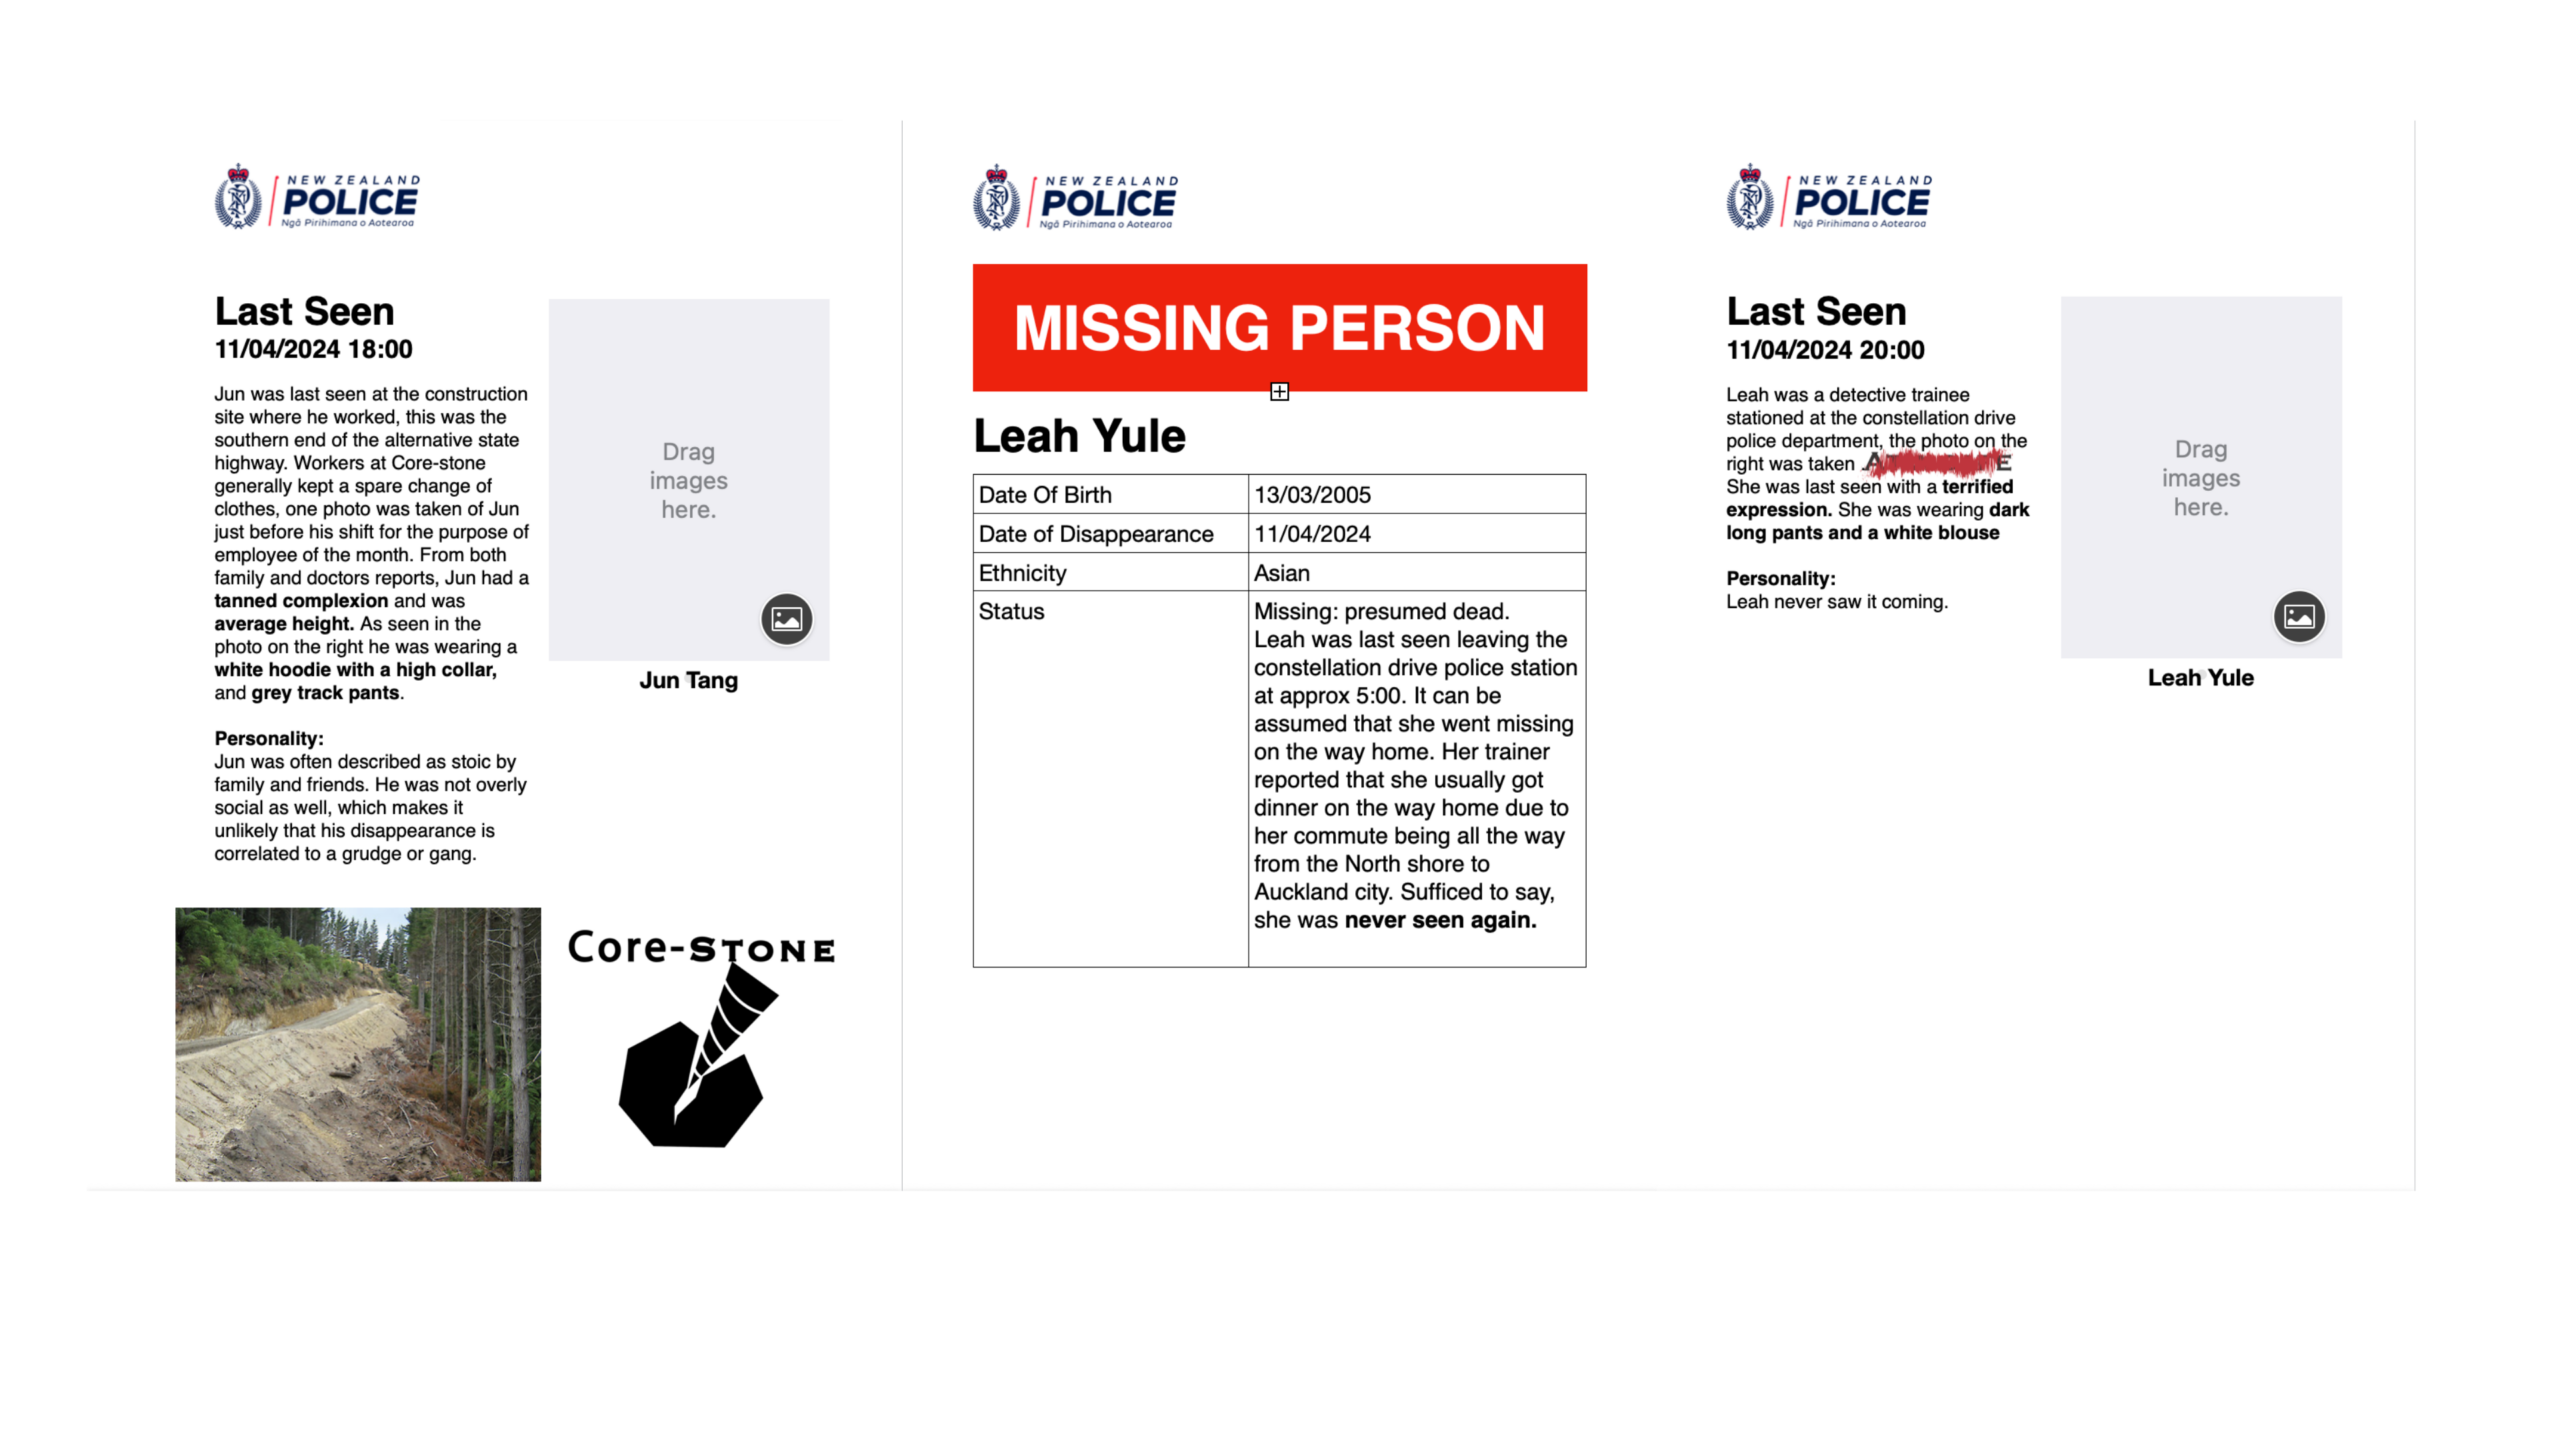
INSPIRATION:
The designs for the missing persons files were loosely based off of the NZ Police Departments actual public files. The design for the folder was based off off of the hyperbolic detective show Columbo (1971), which had some amazingly stereotypical detective props including Manilla folders with mono-text.
Costume design
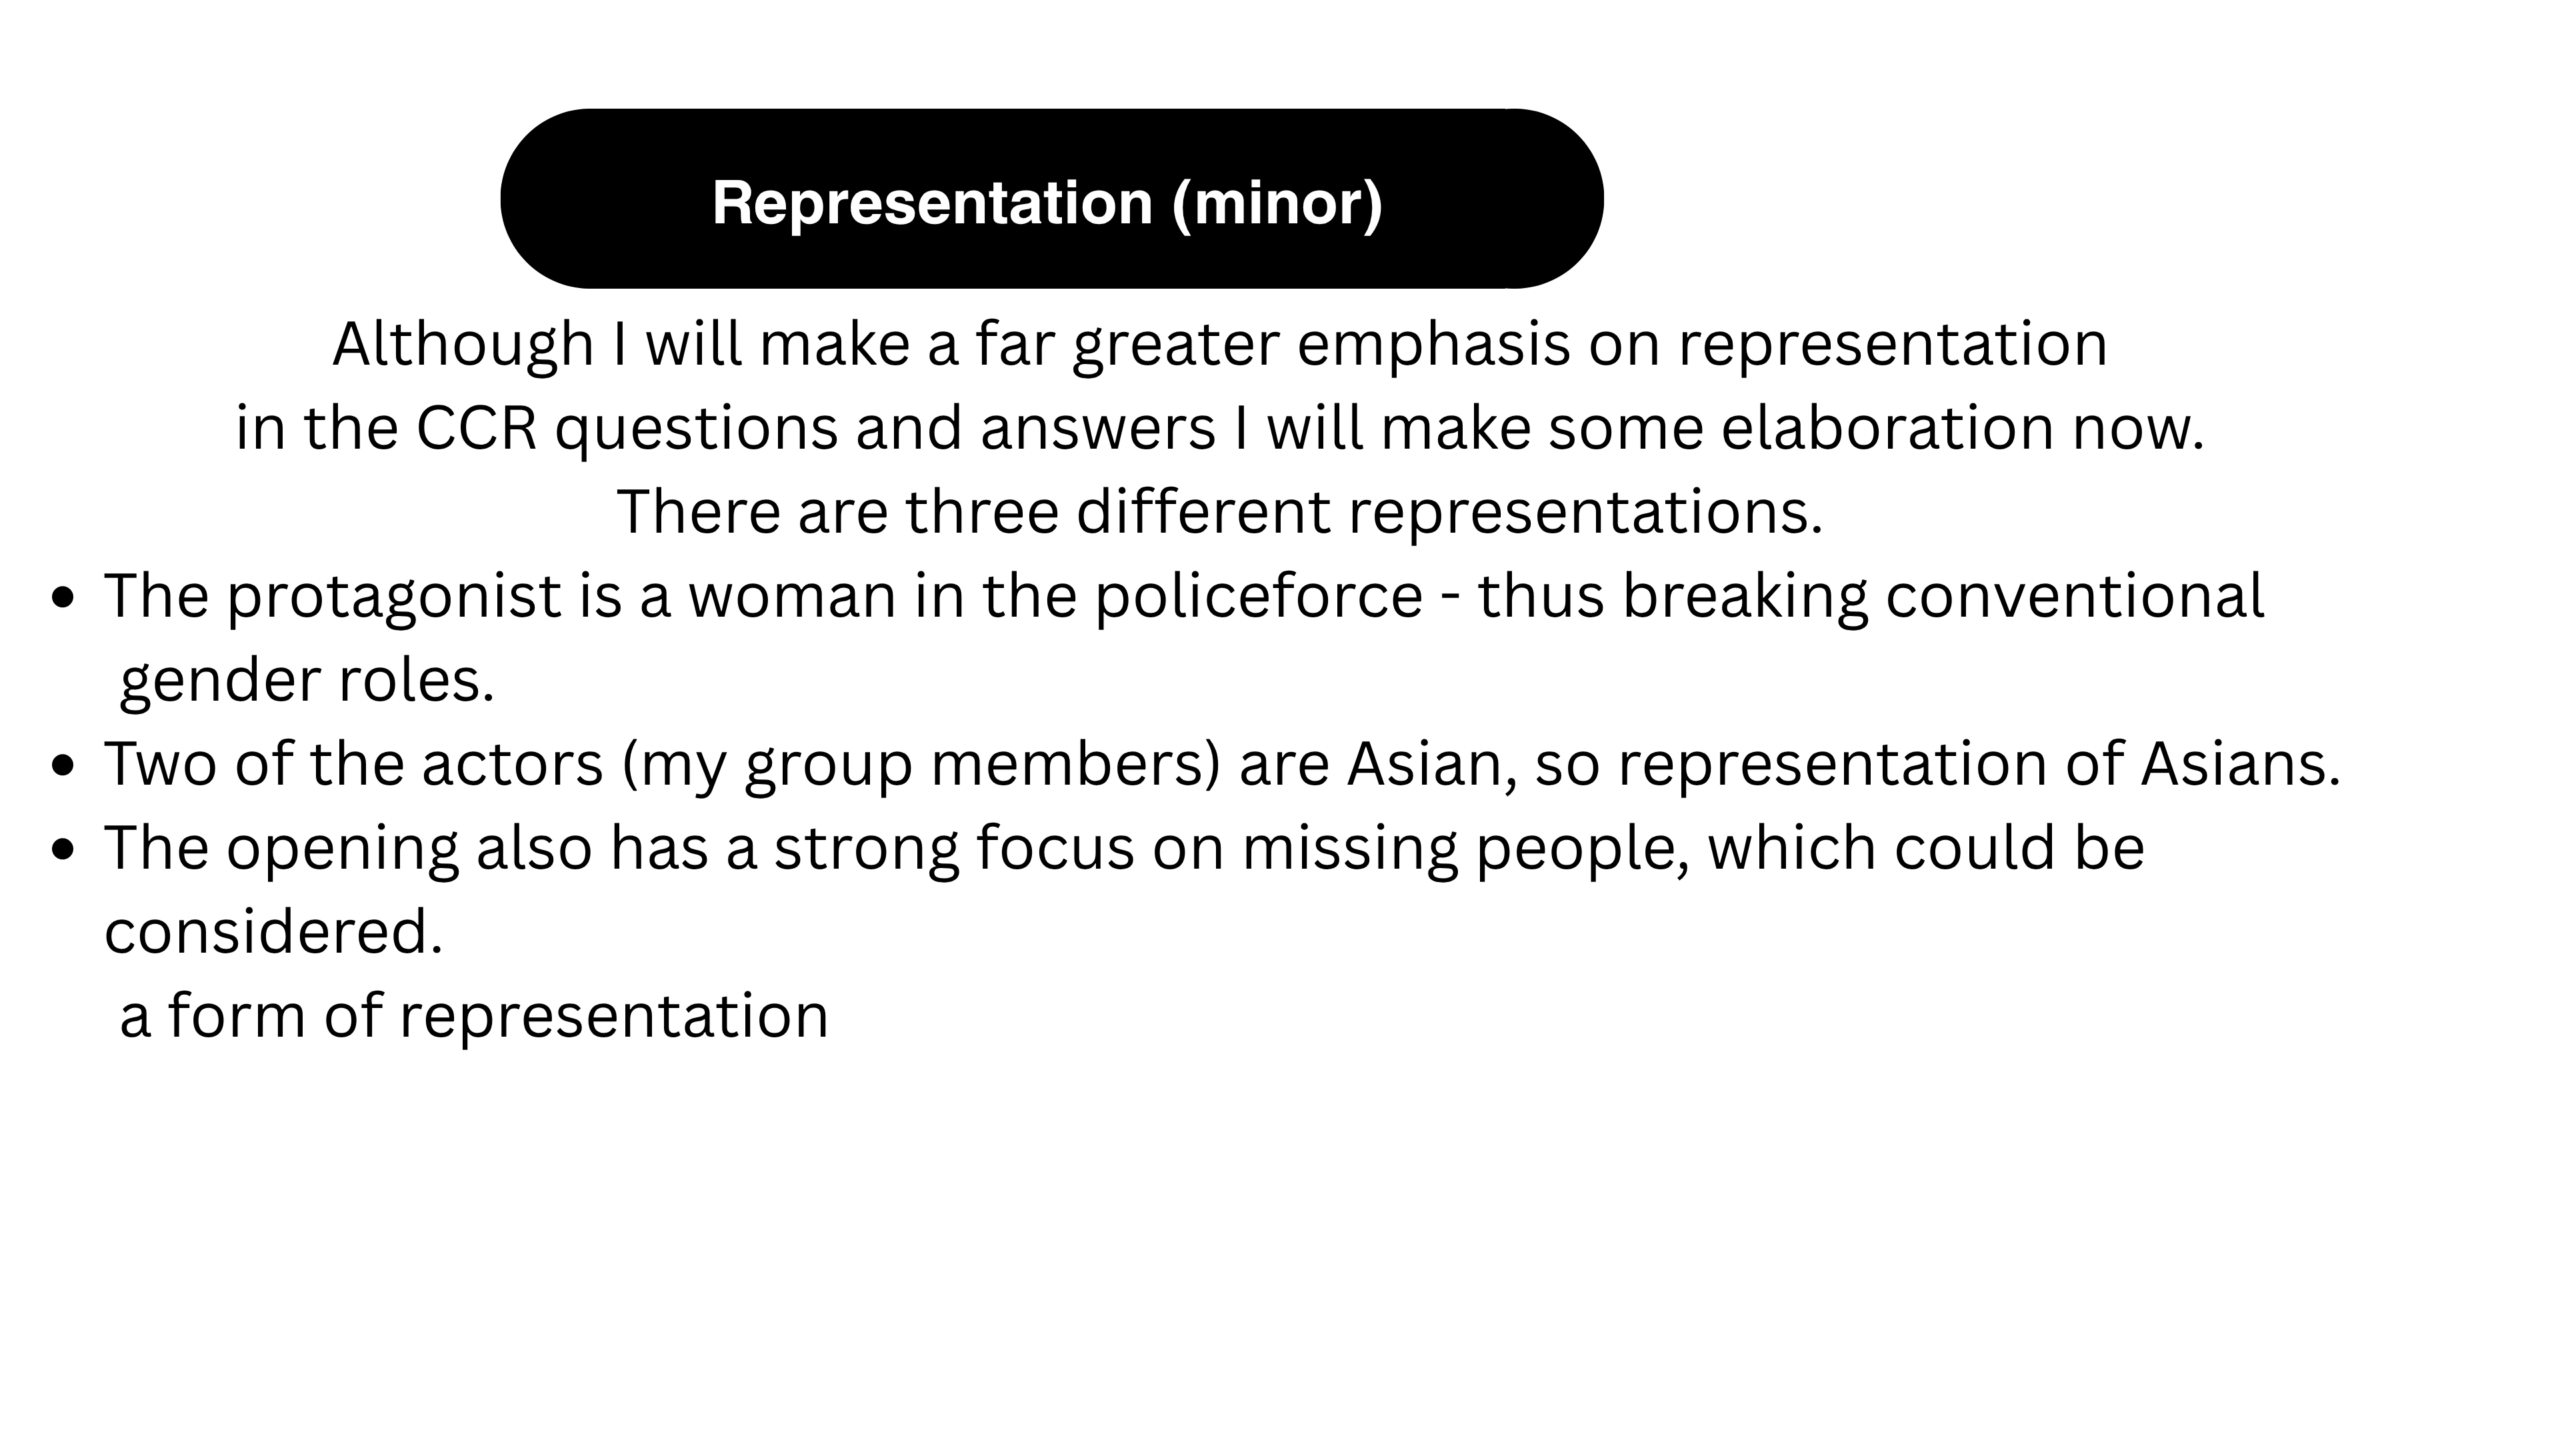
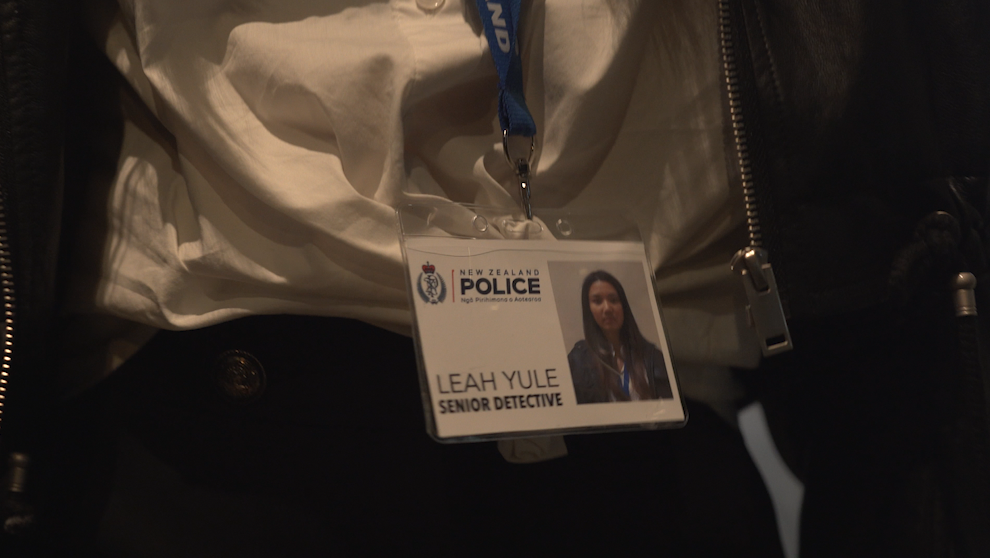
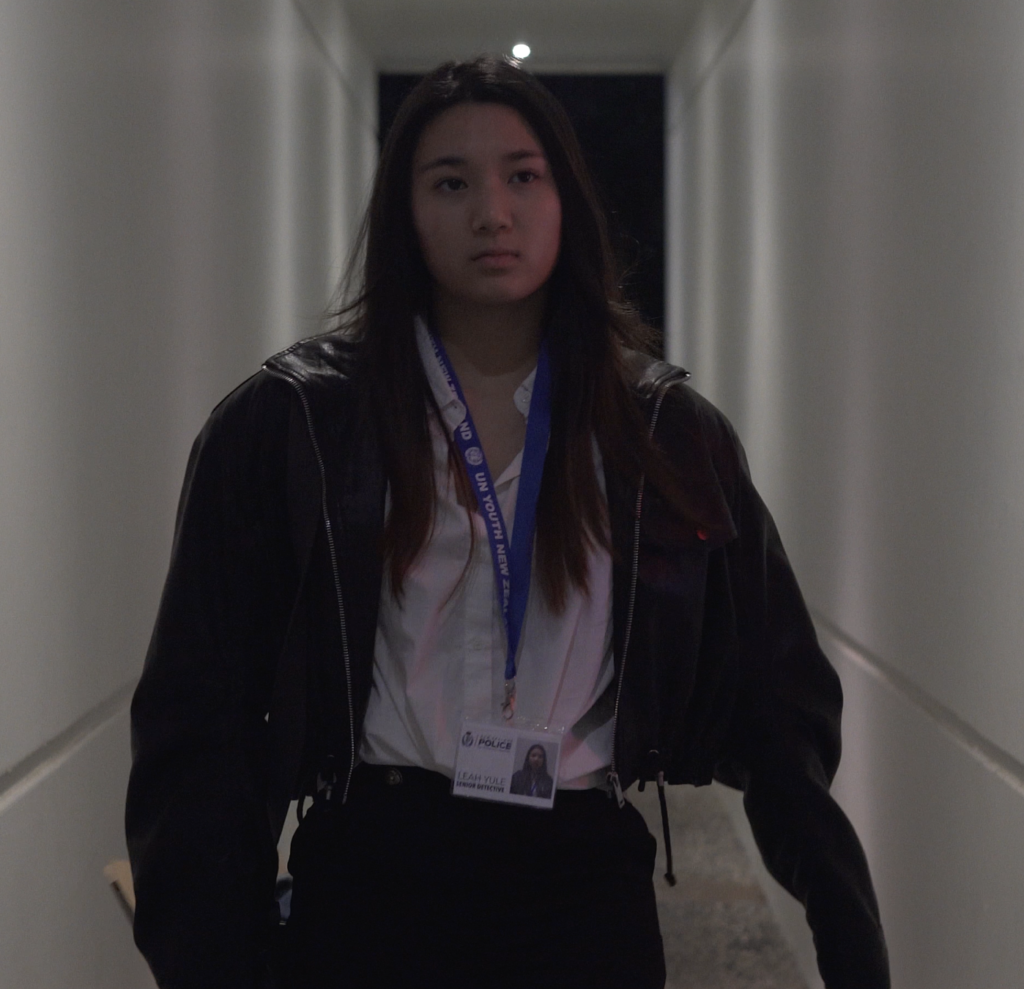
This opening/film is supposed to be set in the modern era, so I have dressed the missing people appropriately with casual wear. As for Leah, I wanted to make sure it was very clear she was a detective even without the context of the first scene, so she is wearing a smart jacket/fit with a lanyard featuring the NZ police logo (which we made from scratch) and if you can make it out the title of “Senior detective” which is a bit of a retcon from the original idea but I think it works better.
Reflection
This was certainly an enjoyable process, if I had any criticism of myself, its that this was probably a bit of a poor usage of time, seeing as I was making this just before the mock opening, and I didn’t really need to give every missing person a backstory, it wouldn’t be incorrect to say it caused unneeded stress. I also didn’t notice at the time of making the lanyard, but the UN Youth is very visible, so I might need to edit that out in post.
Yet, I am very very happy with how this turned out, and it looked absolutely awesome with the polaroid photos in place, in my opinion this was a worthwhile DIY project that enjoyed. The costume design was pretty much perfect, and I’m glad my teacher agreed.
Mock opening/final plan
A week before our actual shoot we thought it might be a good idea to practice doing a shoot at the location
(No costumes, no sound.)
We did this and successfully made a mock opening.
We didn’t have enough time to completely finish it but we were close.
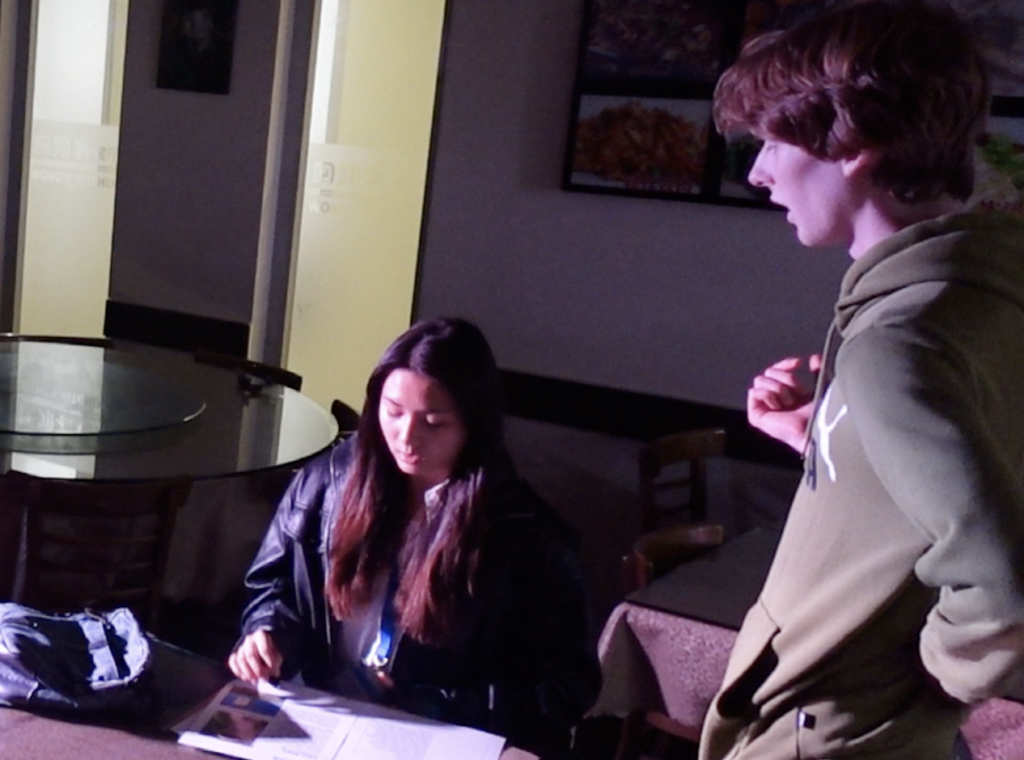
In terms of things we did successfully in this practice, we got a good idea for the camera angles that we wanted to use in the final opening, I was also pretty happy with the creepiness factor of the missing people standing at the door.
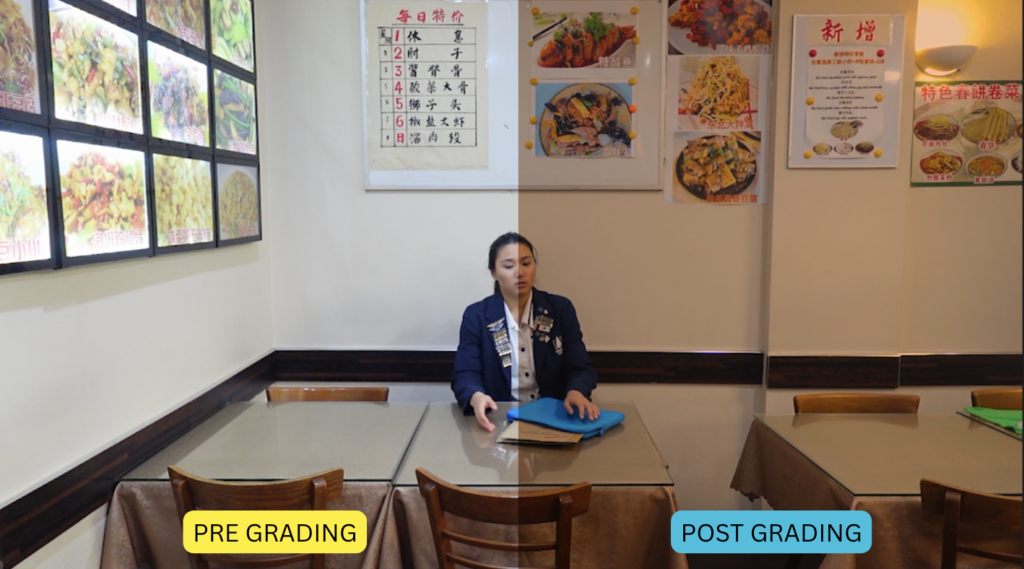
In terms of improvements? The editing process, was… interesting. The location we are using required ludicrous colour grading, which we should try to avoid on the actual day by turning off ALL of the lights and bringing our own.
This was a vital experience for us and taught us that we should probably prepare shots in advance before the actual day. She also didn’t wear a costume, and obviously we wouldn’t have random people in shot. We also are considering tweaking where she sits in the final opening.
On that note, here is the complete shot-list that I made.
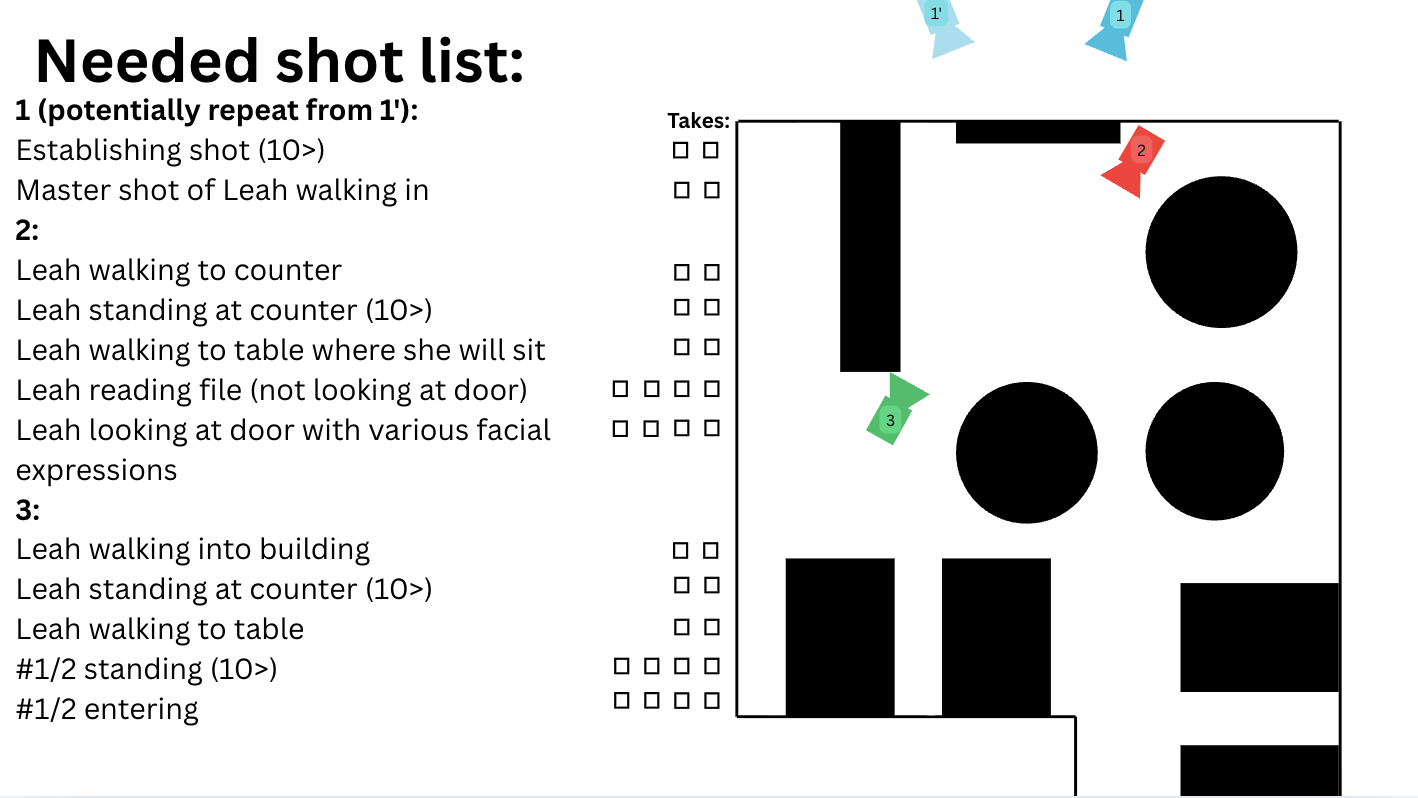
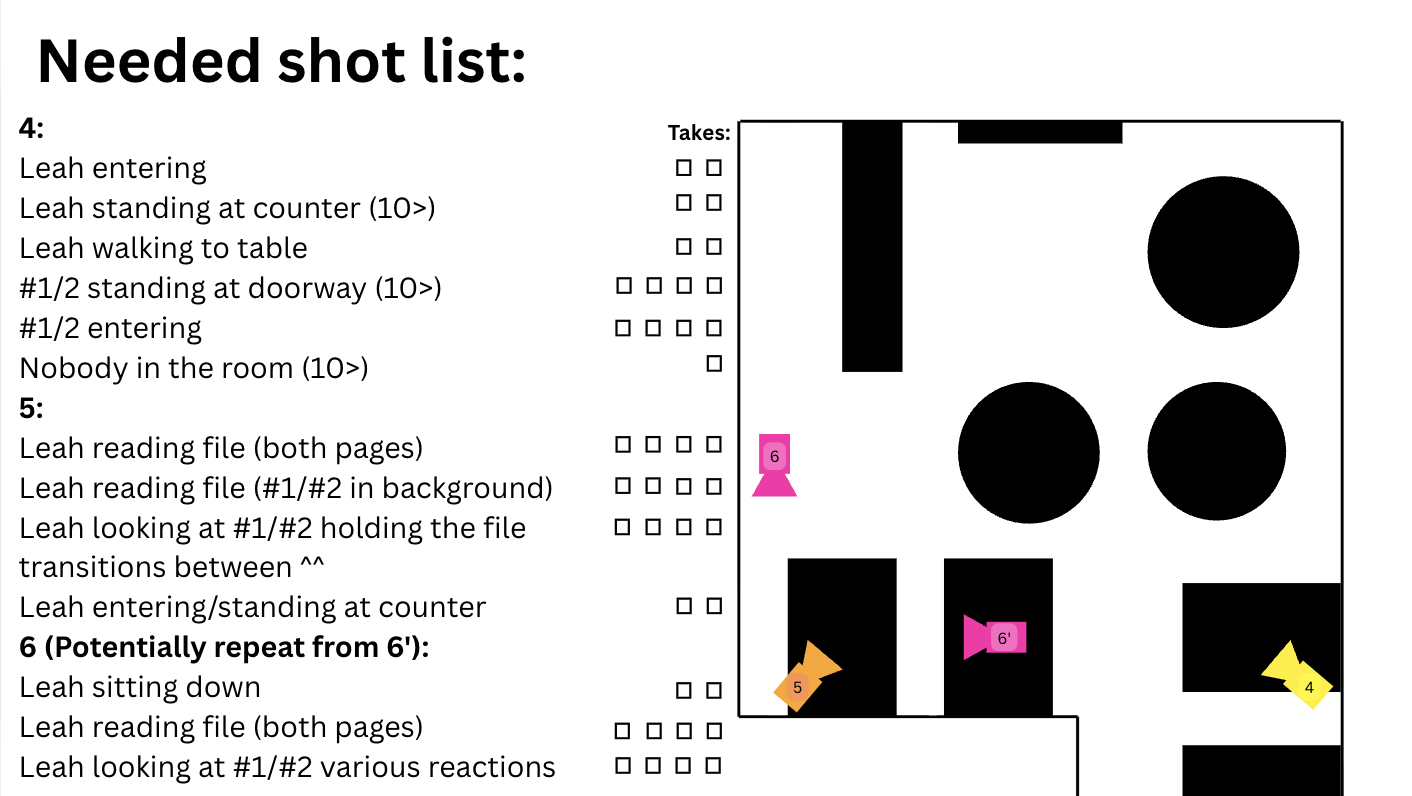
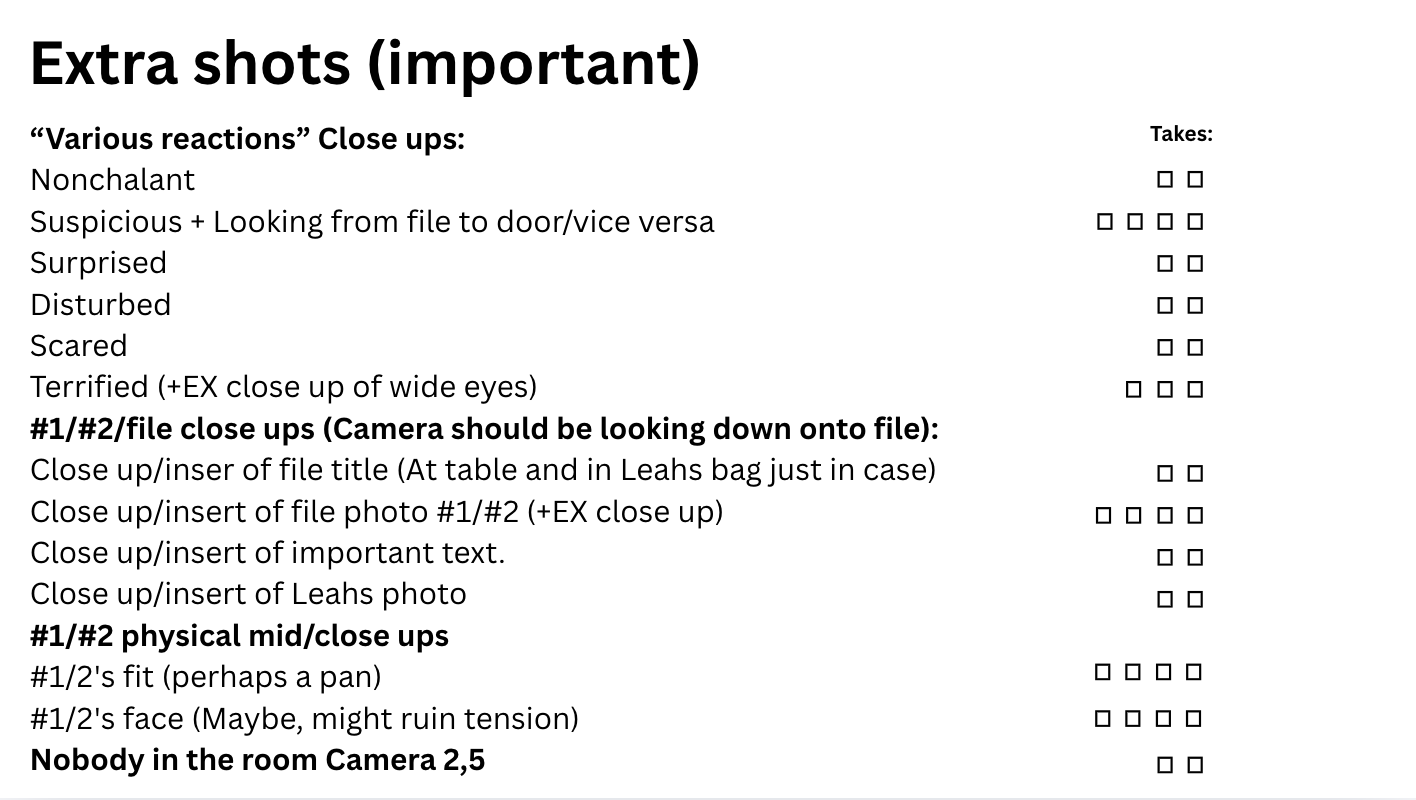
We also realized due to timing issues (The incomplete mock was already sitting at 1:10), that we would likely either have to heavily shorten or outright remove the starting detective scene (in the police station.) Instead we may have to find an alternative way to provide the context that she is a detective/adjacent. Perhaps a montage of her walking from the police station to the restaurant as the day gets closer and closer to night.
Despite all of these issues it is needless to say that this was a great experience which will without a doubt help us when it comes to final filming day!
Location scouting + Casting
Seeing as these are not my roles I will provide a brief overview but not elaborate further. Also After the mock filming we decided we wouldn’t have dialogue, invalidating the need for a script writer.
Casting :
This was Yantong’s role, this was actually done before the Mock filming but it felt better to place it here. We had some logistical discussions and decided it would be best if we just casted our group members and perhaps family members if it came to it.
Here’s the casting:
Leah/MC – Yantong
Riley/#1 – Joel
Jun/#2 – Bruce
Waiter – Perhaps one of our parents
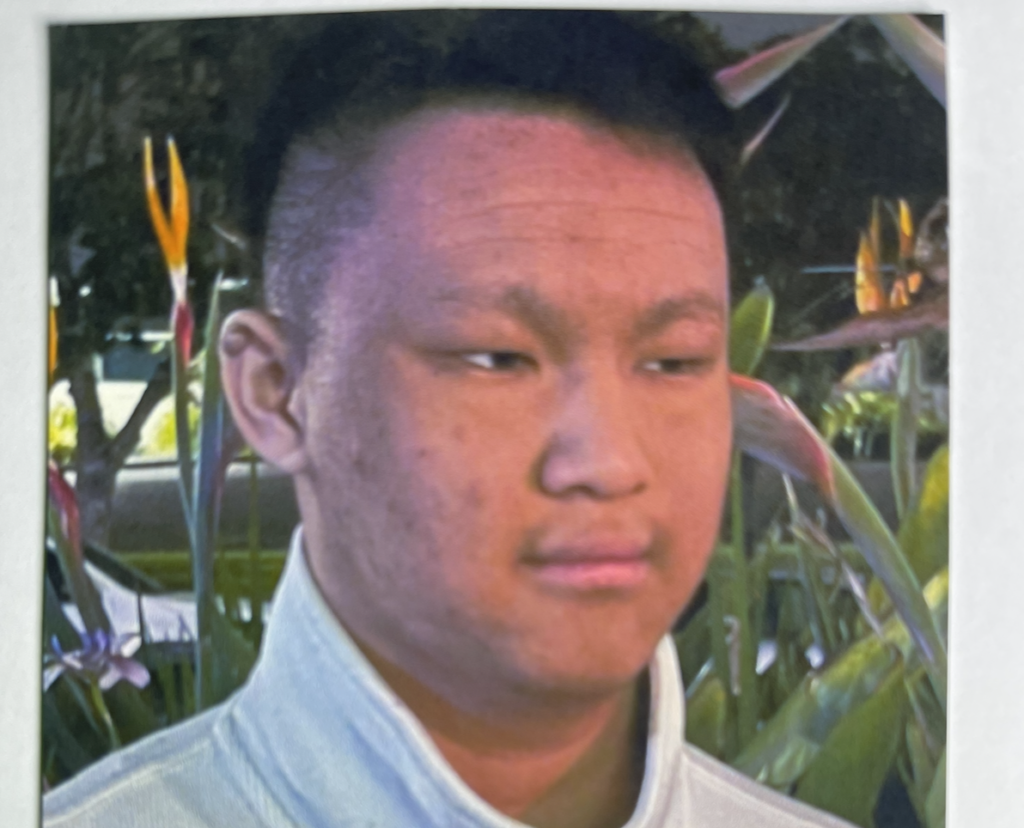
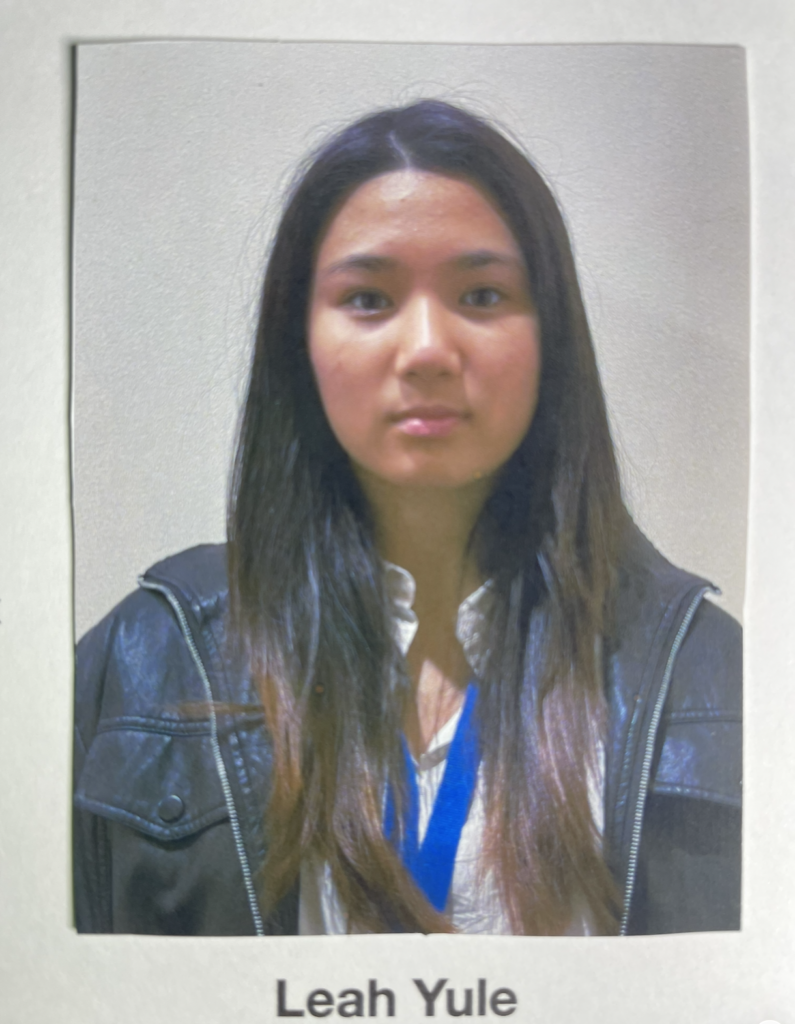
Location scouting:
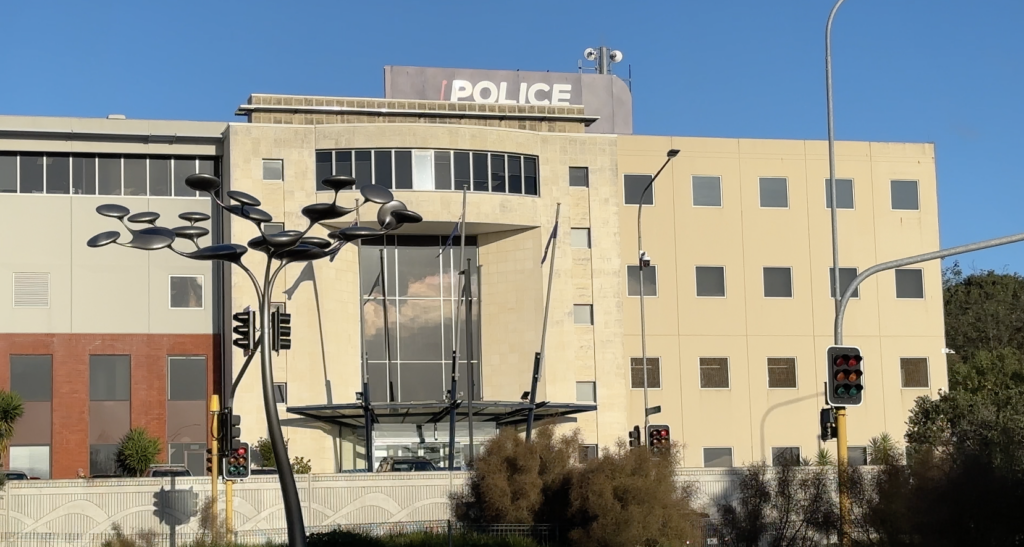
Originally we had done some location scouting for a police station
yet as previously mentioned we ultimately decided to scrap that idea, I was actually the one who took the photo so here it is:
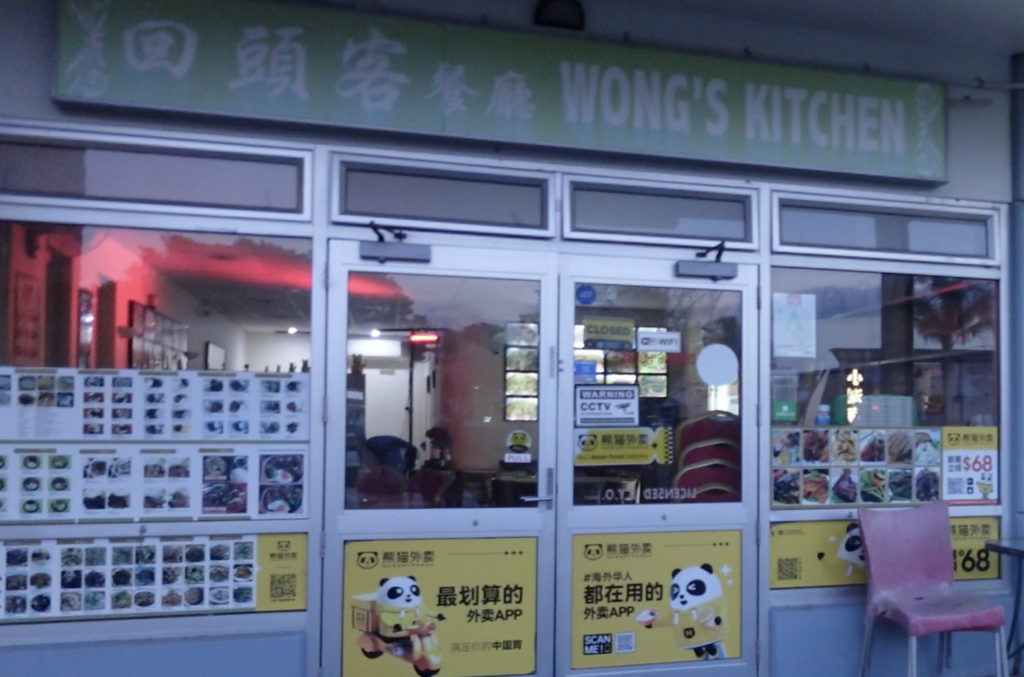
For the cafe/diner, Yantong used family connections to ask a friend if we could use their family diner on one of it’s off days (MONDAY.) The name of the diner is Wong’s Kitchen, and all though the mood is admittedly not amazing upon first glance I am certain we can make it work!
The interior has a pretty bright fridge and some… obnoxiously bright displays, so here hoping we can turn them off (WE COULD.)
You have made it to…
Filming day
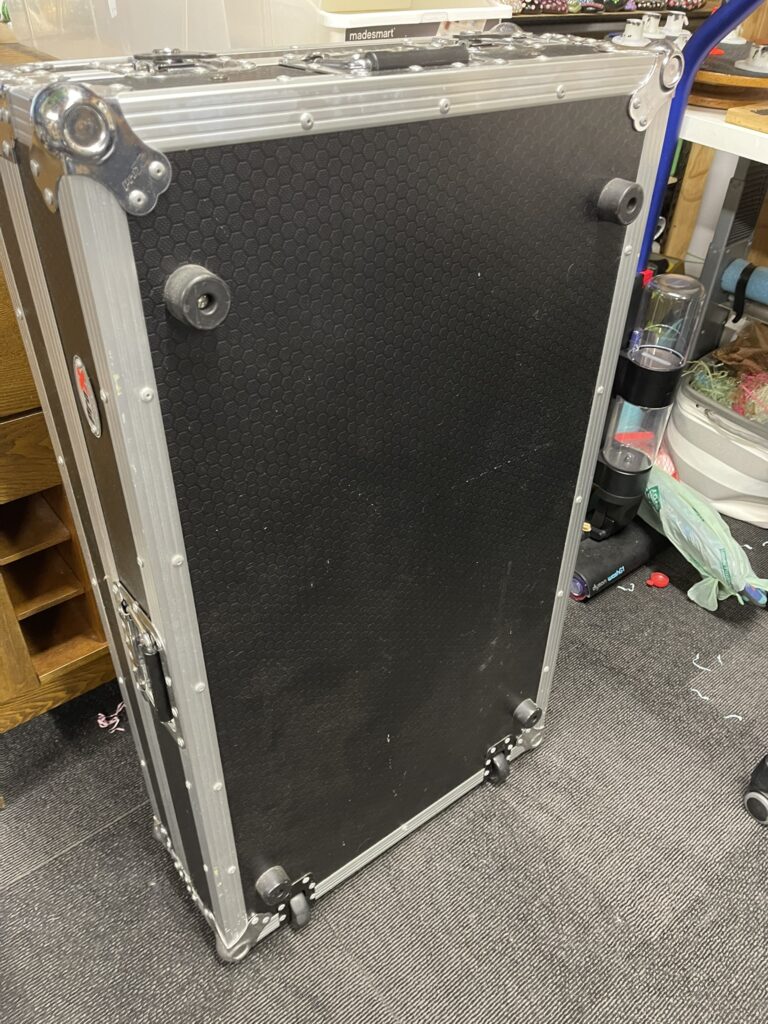
We agreed to arrive at the location at 5:30 on a monday, as that was the only day that the diner wasn’t open (counter-intuitively.)
Seeing as I was the prop designer, I brought…
– The file
– A bag
– The camera
– My laptop
– The lighting rig
– The smoke machine I had at home
– A printer (yes seriously) because one member hadn’t sent me the photo to make a polaroid of and put in the file.
Also Yantong brought her uncle (or I guess the other way around?) and I brought my dad, as he knew the safety protocols for the smoke machine, so I would like to thank both of them for there support, and seeing as we planned on casting a family member as the waiter this was convenient.
My dad ended up being the waiter.
Next up we waited till about 6:00 just discussing what order we would like to follow the shot list.
Now for the filming, this whole process lasted us till 9:30 PM, but we got many MANY shots from just about every angle which should make editing almost a breeze. In terms of equipment the lighting rig + smoke machine combo was absolutely amazing, and enhanced the atmosphere of the diner by orders of magnitude
Health and safety
Again it’s not my role, but this is where it really comes into play, I had a discussion with Bruce about this, here was his analysis of the health and safety situation.
The main risks were the wires on the floor which were often well concealed by smoke, and served as a tripping hazard. The solution was to apply tape to make sure they didn’t rise off of the floor, as well as informing the group about the issue.
Next was the smoke machine overheat, as after it produced smoke it was very very hot for a minute or two, the main solution really was just to warn people, as the smoke machine actually had a light that turned red during overheat – how convenient!
Finally, the cleaver, this really wasn’t much of an issue, but of course, sharp object, pretending to swing it, could be dangerous. The solution was up to me to solve in editing. We just recorded the part where the cleaver is moved toward Leah very slowly and I sped it up in post to give the illusion of a swing.
The improvisations
Some of the best ideas we had ended up being improvisations.
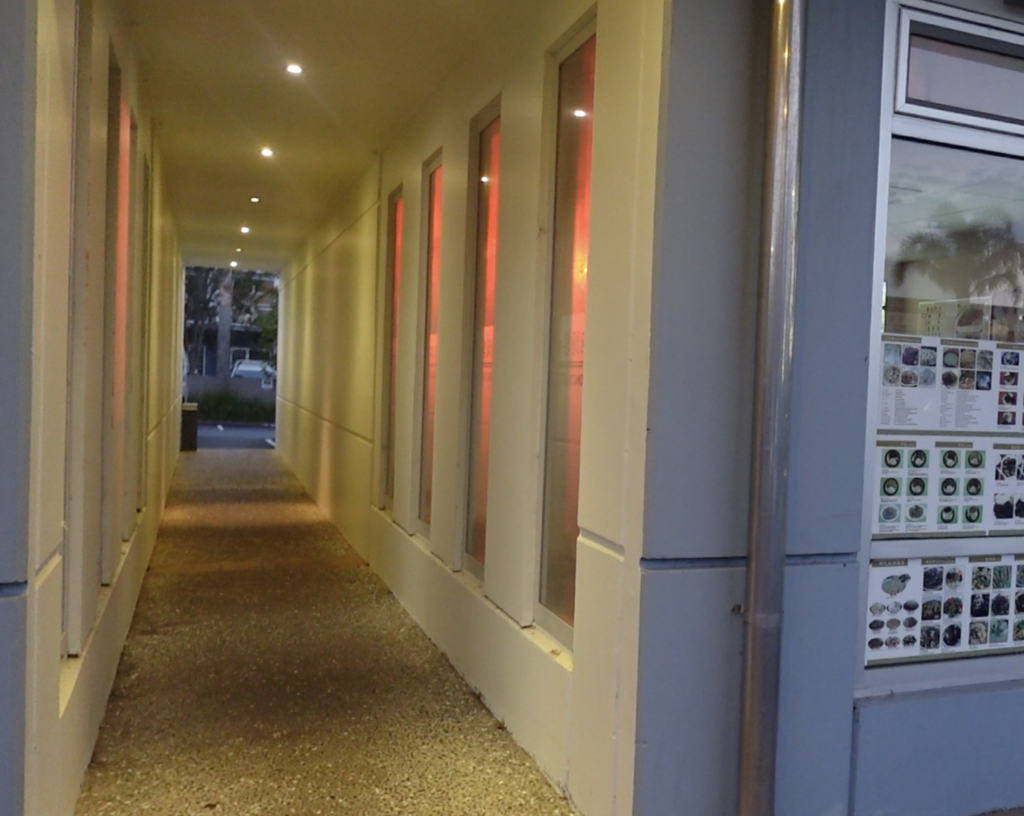
Firstly, the hallway, next to the cafe was a pretty nice atmospheric hallway that we realised would be great for the opening, we tried it, and my verdict? Great!
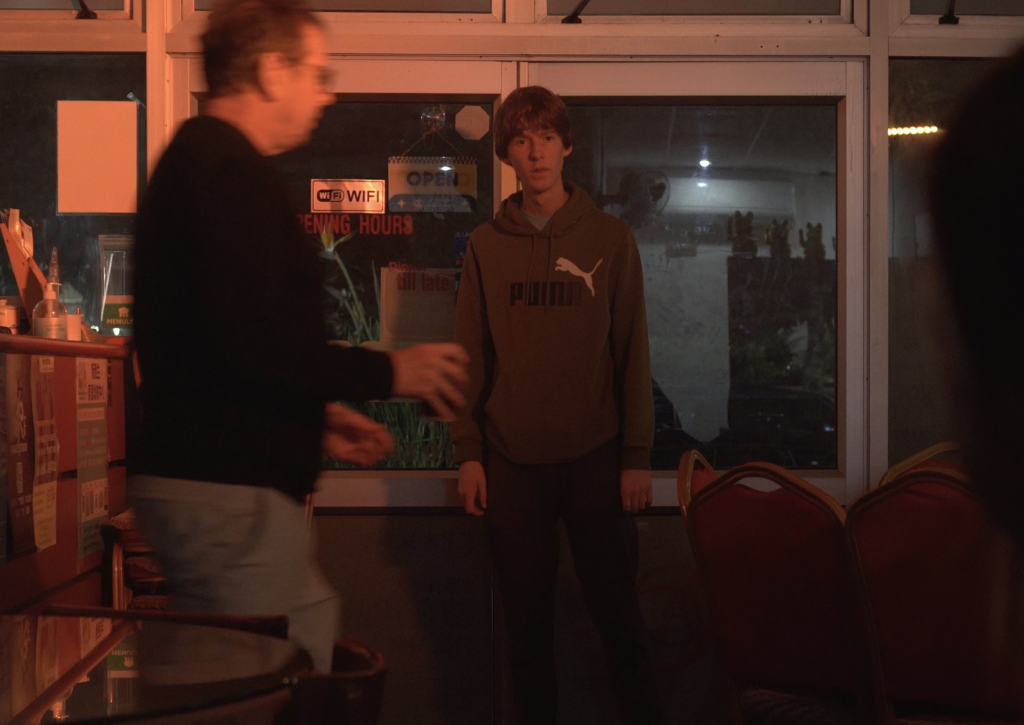
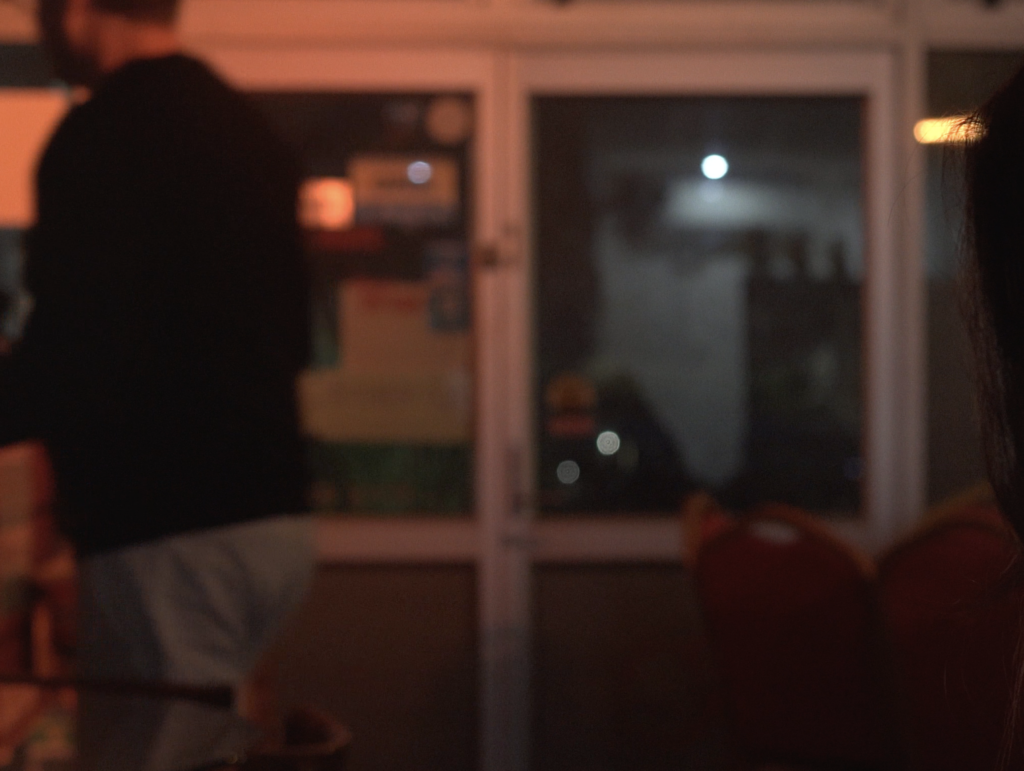
Next up, the “disappearance” we had a very interesting idea during filming that we wanted to give a shot, during the scene where I was standing at the door, we had planned for the waiter to interrupt Leah as she was watching, what we instead did, was have me seemingly vanish as the waiter passed Leahs line of sight (I just jumped underneath a nearby table) but it was surprisingly convincing and I am only barely visible for one frame if you look REALLY hard.
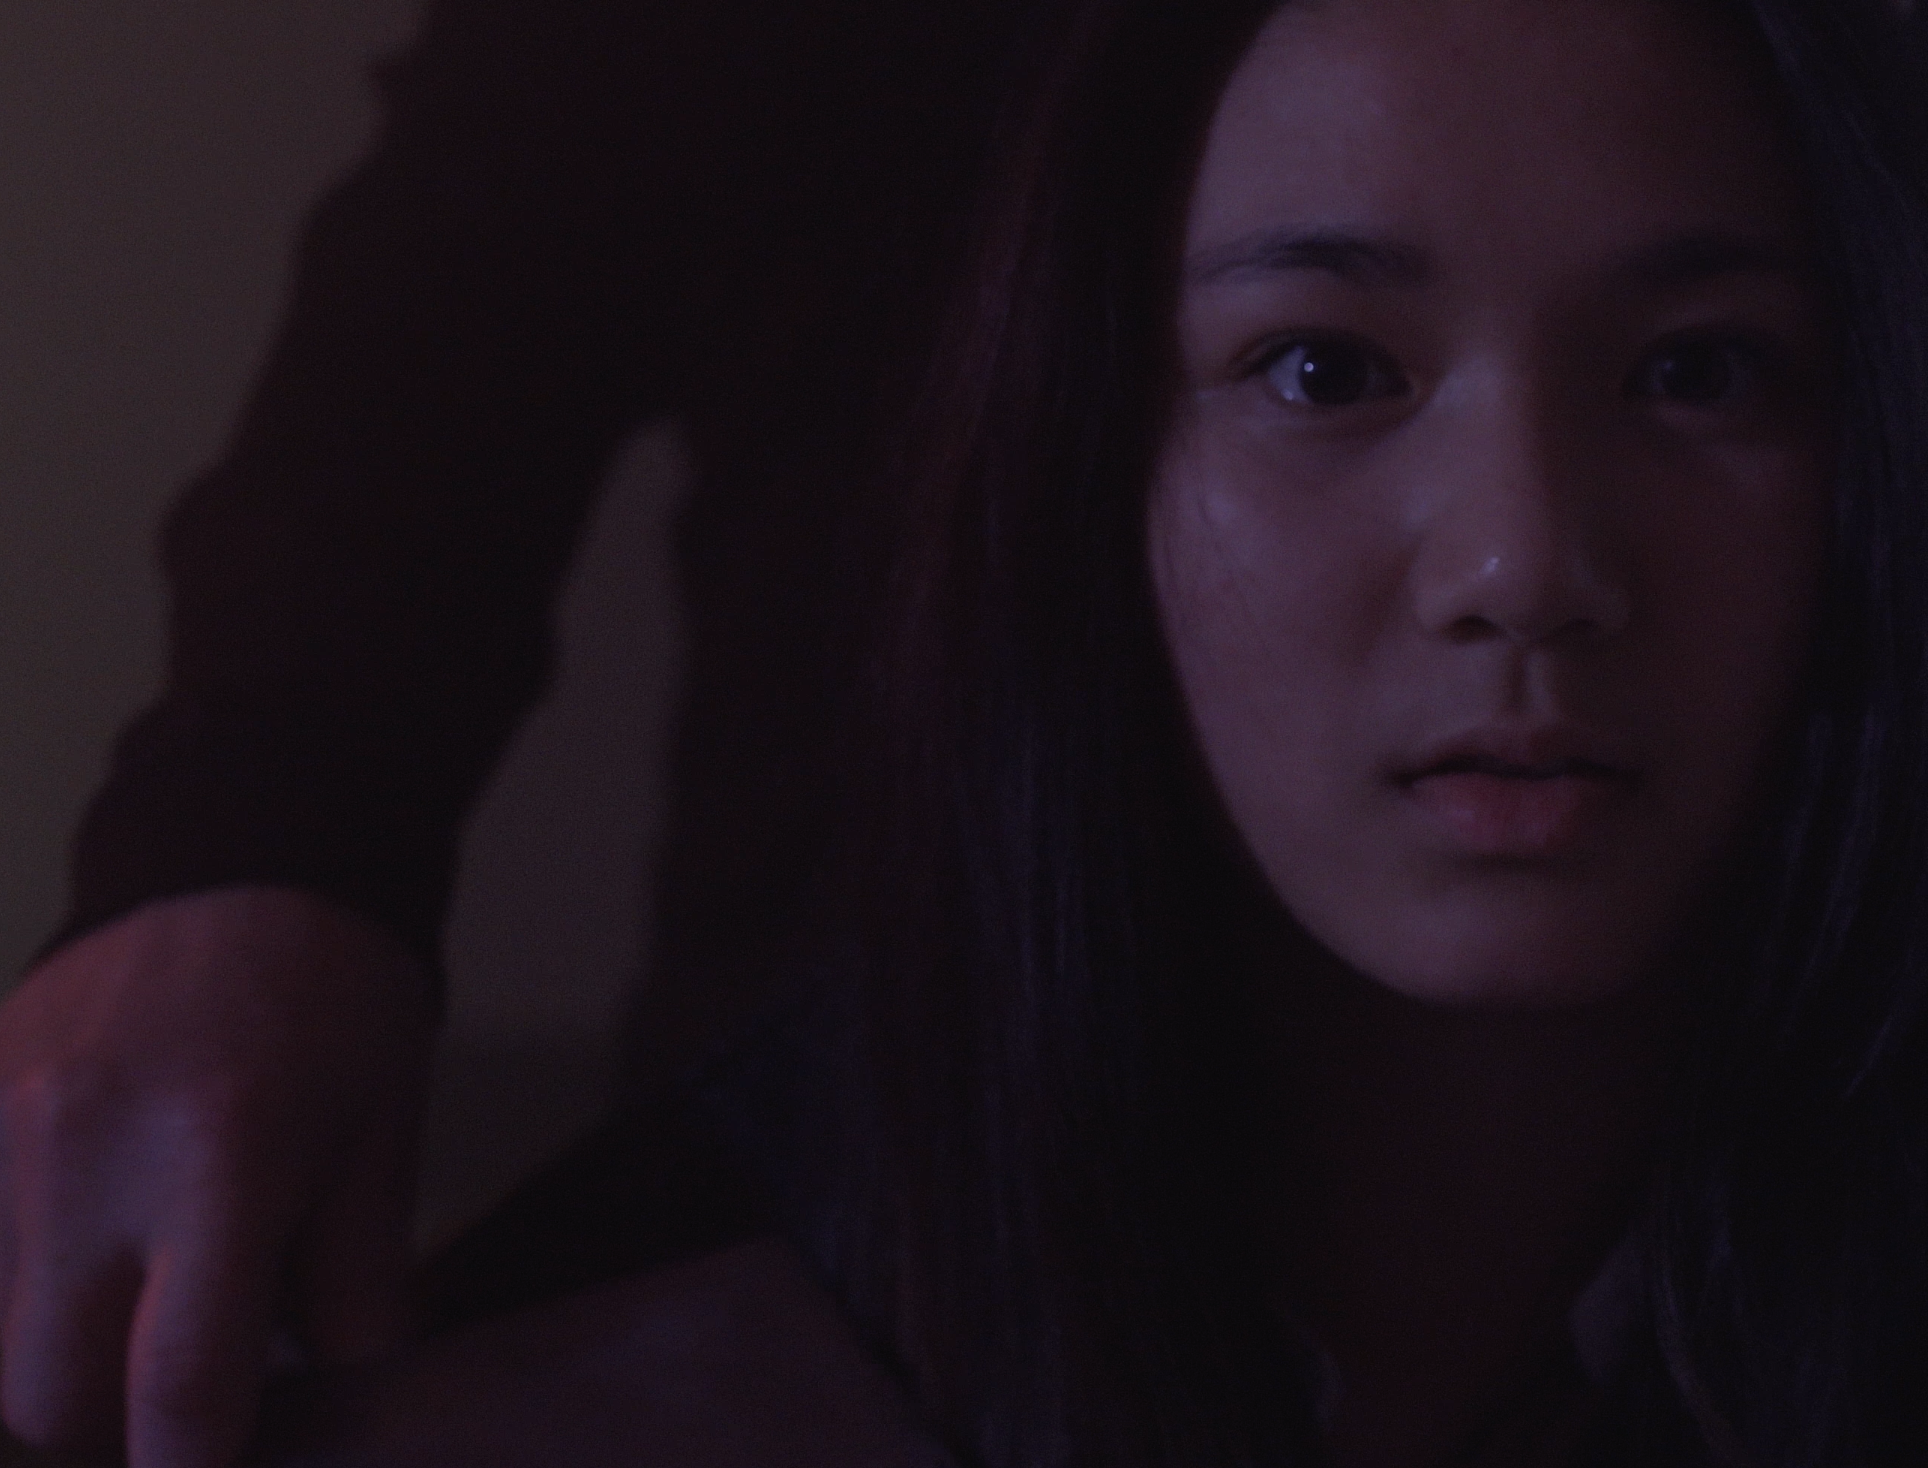
Finally, Yantong suggested we add a scene with somebody standing right behind her at the very end and attack her, I was reluctant… but it turned out really well. So it will most certainly be visible in the final cut.
Reflection
First off, this was one of the most memorable experiences I have had at school and was really enjoyable. Anyway, in hindsight I feel as though not bringing clothes for my dad (as a waiter) was quite the oversight, as he does look out of place as a waiter. I also wish we had recorded more insert shots of various things in the room, to use as tension breaks – although I am not sure we had the time for that.
We also did not follow health and safety protocols as well as we could/should have, not Bruce’s fault, we just didn’t really think about the wires until halfway through, which as I previously established could serve as a tripping hazard. Also, I really should not have had to bring a printer, because I did email the group member asking them to send me a photo in advance… yet they didn’t. So perhaps we could have worked on communication a little more, one of the group members was very difficult to reach outside of school due to having extra-curriculars. The solution to this would probably be to designate time weeks in advance to communicate/talk about issues.
Overall, however, it went great, we got about 50GB of footage spanning more than an hour and a half from multiple angles and locations, this will give me way more freedom for editing and only really makes the ‘choosing what footage to use’ part harder. Every single one of the improvisations turned out really cool, and were executed well. And importantly, I think everybody had a good time, which is great for team motivation, as although I can’t speak for the others, some level of stress was mounting over when/if we would be able to film this.
Editing
Making the production logo animation!
I did not take the camera with the footage home, thus, I could not start actually editing the footage until a few days later. What I could do however, was create an animation for the production logo. The process of creating the production logo is better detailed in the research section.
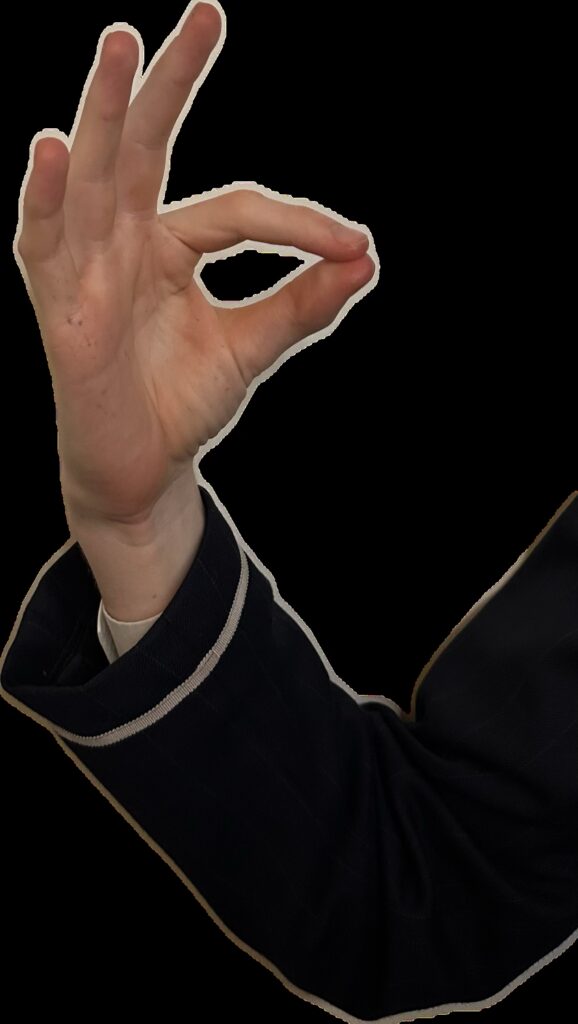
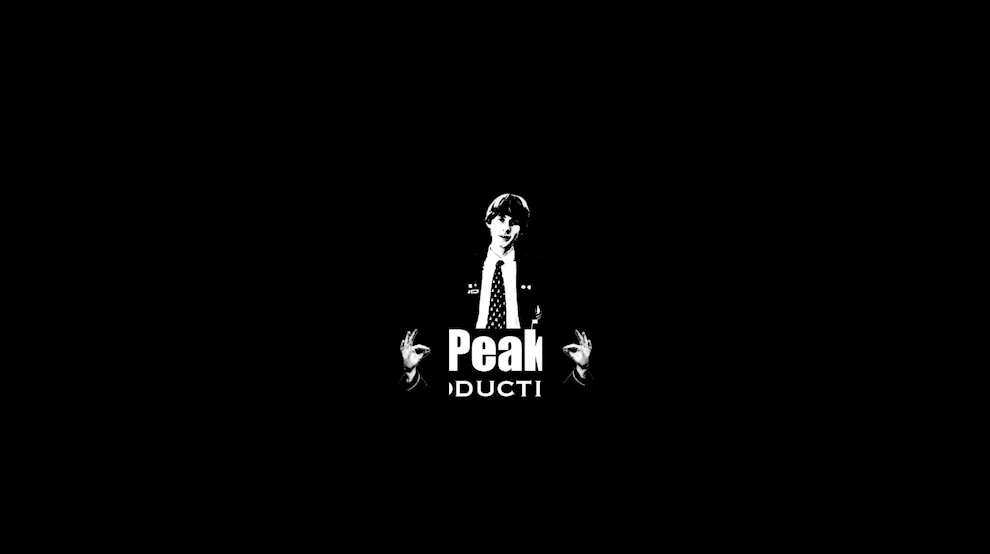
I am pretty happy with how this turned out. I first thought of the idea pretty much on a whim, due to the humanoid nature of the logo I wasn’t sure what animation would work, but moving the hands seemed right. I had to take photos of my hand in various positions which I then filtered through a gray-scale on canva, tweaking contrast and saturation (look at images on left and right). Then, I had to use animation software, Adobe Animate in particular. I wasn’t quite sure where to place this but I did learn adobe animate to do this. I didn’t spend nearly as much time learning this as I did Premiere Pro, but it did take about 4 hours nonetheless. I struggled a lot in particular with motion tweens, as it took me FAR longer than it should have to figure out easing, which the final animation made immense use of (mostly cubic easing). Unfortunately the files for adobe animate corrupted almost immediately after I exported the animation, so, no timeline for this one (But I will show the timeline for the title animation!)
We also got some feedback from the class through a form, and the results were very good! Can’t complain about a 4.4/5.0 .Many said they believed it fit with the horror-mystery vibe we were going for, with the low frame rate animations of the hand being uncanny (in a good way.)
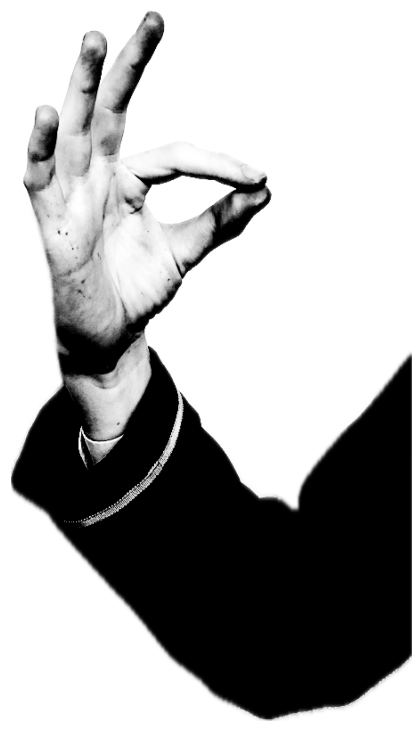
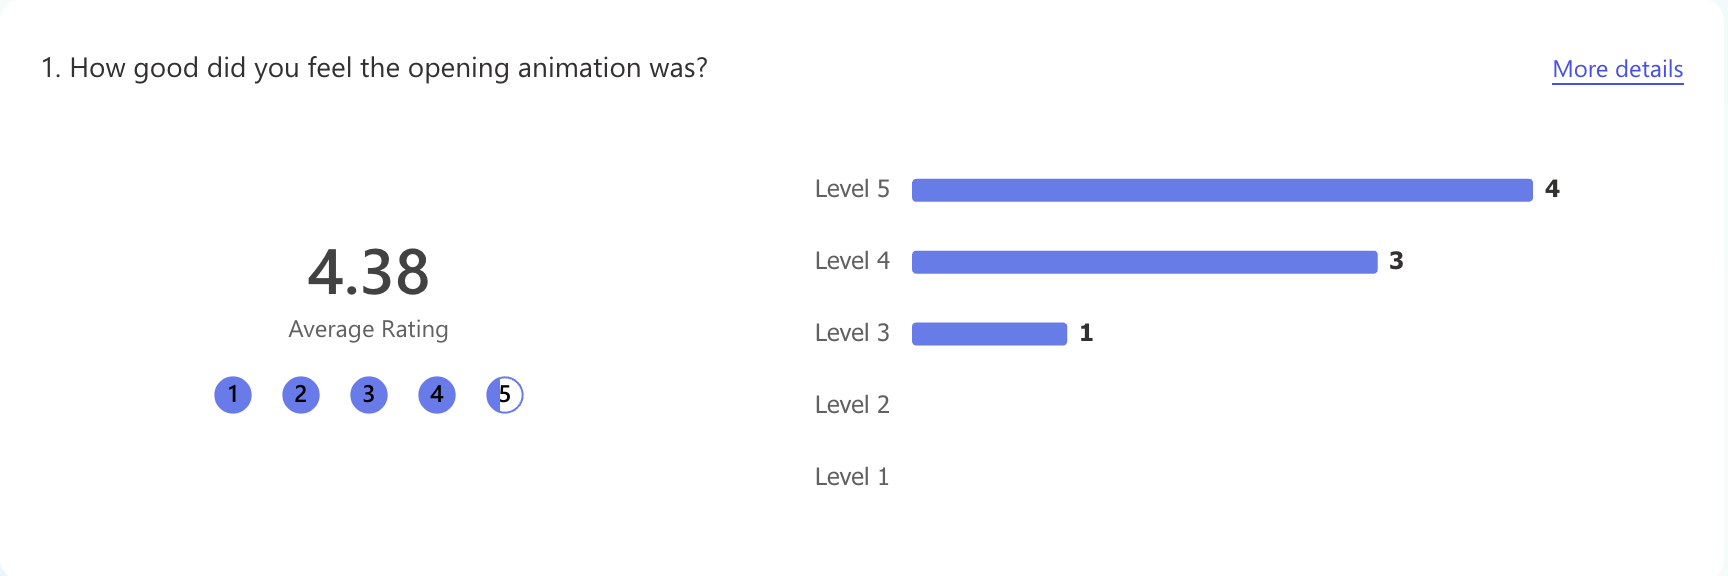
Overall, I am very happy with how the production logo turned out, I think it fits the genre reasonably well and also provided me with animation experience that I will use for making the title animation later. In terms of improvements, I think that sound will definitely enhance the animation, but I’m going to address that in the “sound portion” of the editing process. The animation is also quite unconventional, with the way the hands change sprite being almost stop motion esque, which is very unique when compared to well known horror production studios like Blumhouse and A24, which I believe gives the production company more of an identity.
INSPIRATION:
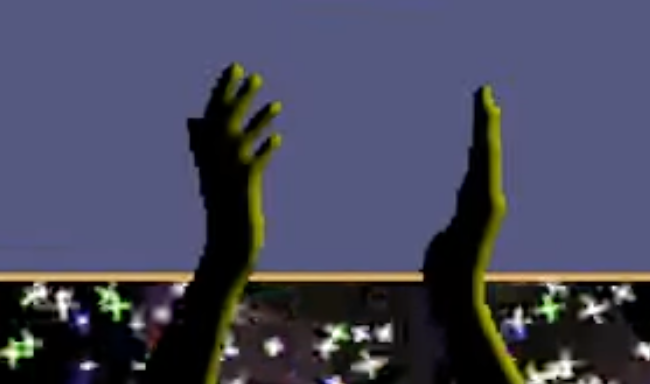
The animations particularly for the hands are actually heavily inspired by a similar animation that plays in the video game ‘Vampire Survivors’ (2022.) This animation includes bizzarely photo-realistic hands that only appear in the secret endings to the game, the hands show up jarringly and contradict the otherwise pixelated artstyle of the game. I found this unsettling but engaging hand animation to be an interesting idea that brings some character to the opening.
Selecting the video!
Our group opted to use shared google drives to send each other memory heavy content, seeing as Yantong had the video files, she was the one who sent all of the footage to the group. Naturally the first thing I did was download all of it for backups sake, and to allow for offline editing. All of the content ended up being spread over 3 different google drives due to size limitations.
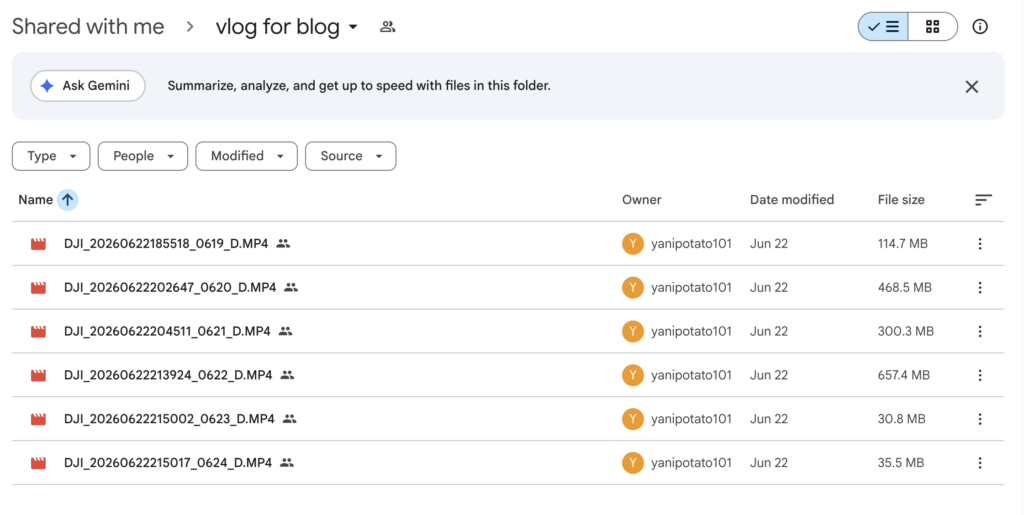
Of course having the video files are one thing, but I need to narrow down what I am going to use in the actual timeline, as more than half of the content is second or third takes.
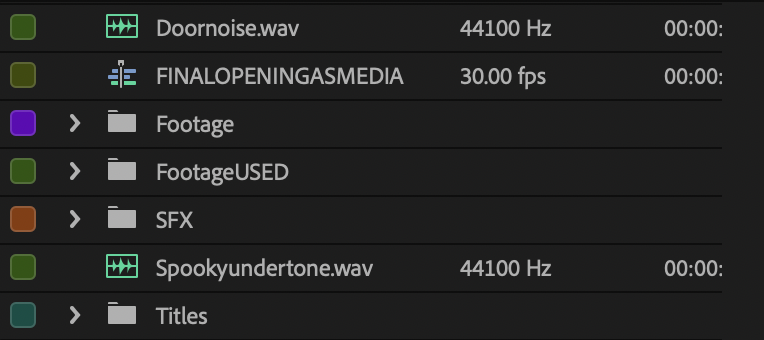
Firstly, I put the videos into folders based chronologically on when they took place in the timeline, as well as an extra folder for things that didn’t fit into the timeline cleanly (insert shots/some establishing shots.)
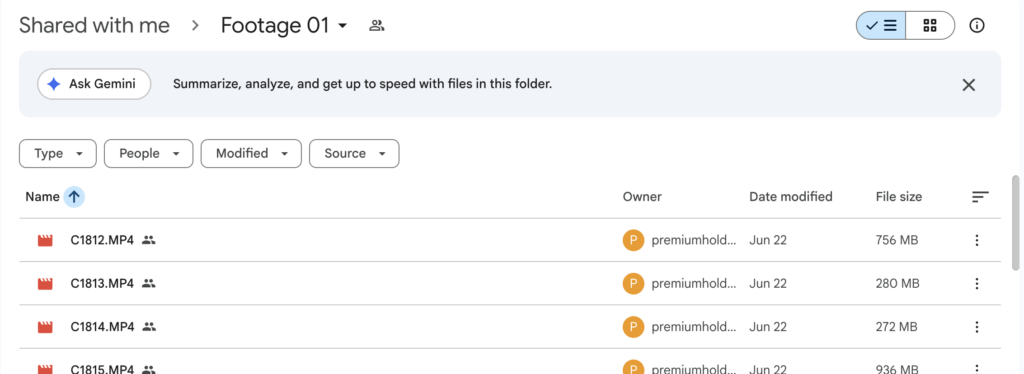
Next, I created a premiere pro project and inserted all of the files as bins into the media browser. As seen on the right, I also made an SFX (please ignore the yet unsorted various SFX I had prepared) and title bin.
All in all, I don’t really have any qualms with how the sorting turned out, I suppose if I have any feedback for myself I probably could have sorted the photos by camera angle instead of chronologically, but either approach would be fine. I can say for sure that this was a very very good decision for creating the timeline which I started doing immediately after sorting video
Creating the timeline!
In accordance to the storyboard I started putting the plot together. Here is the final plot that will be presented in the final film opening:
Leah walks down hallway
Leah enters the building and sits down
Leah opens file and begins reading page 1
#1 Walks into cafe and ominously watches Leah before vanishing
Leah flips to page 2
#2 walks into building and ominously watches Leah
Leah flips to final page of the file and sees herself
Leah is then attacked from behind as she looks at the camera in panic.
Or to put it into less words-
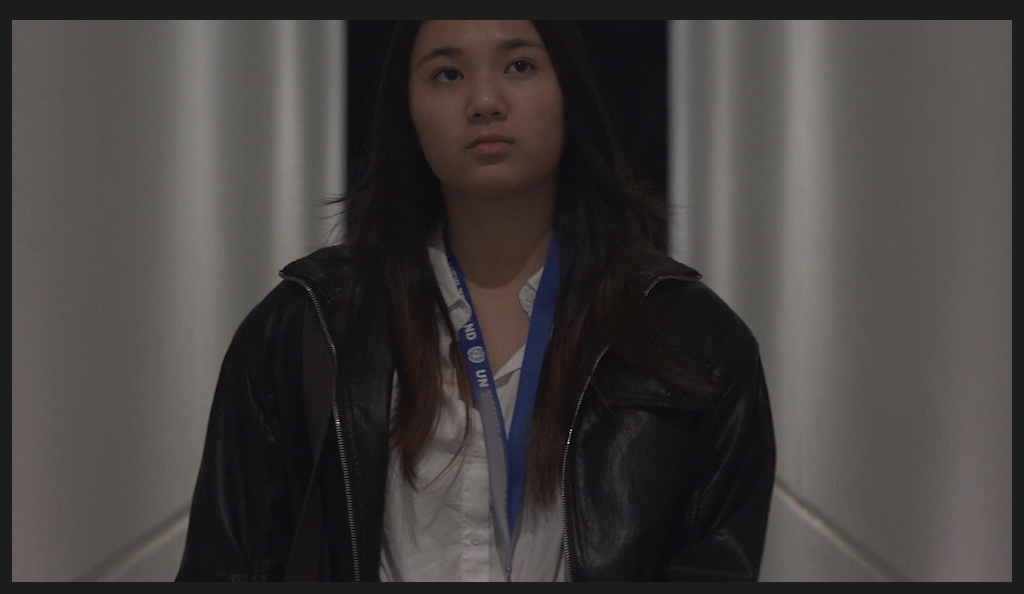
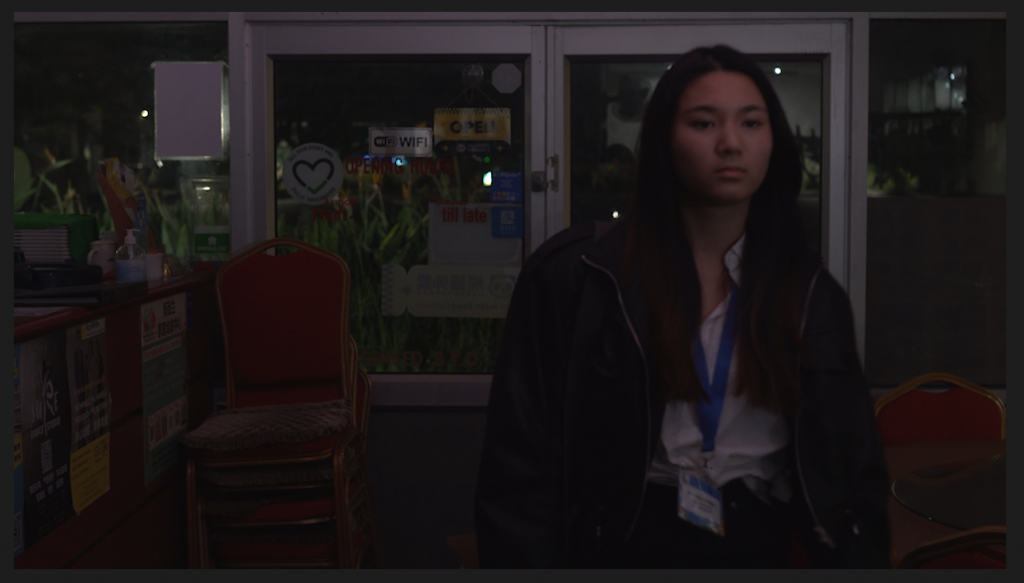
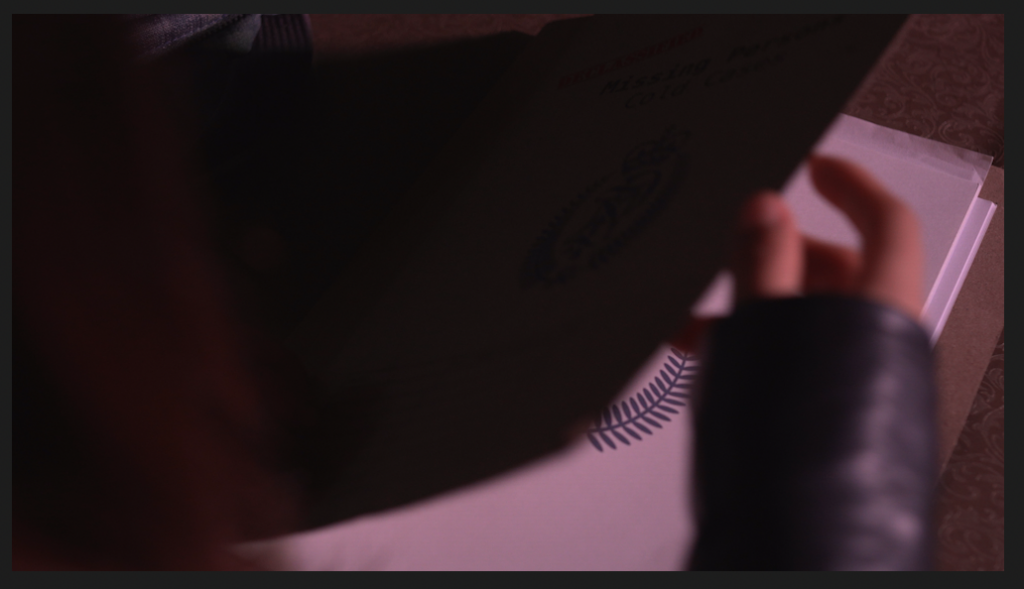
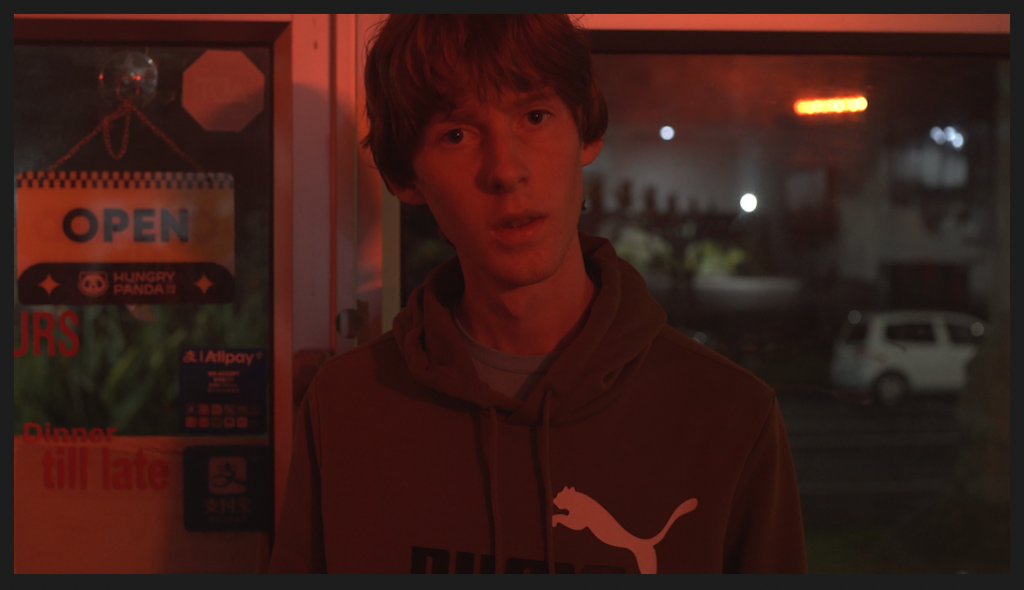
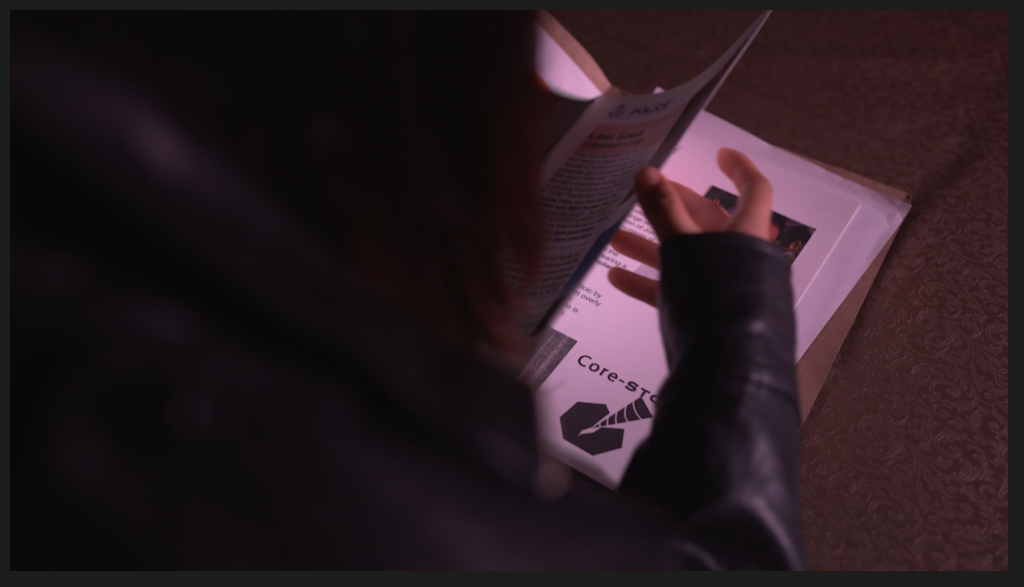
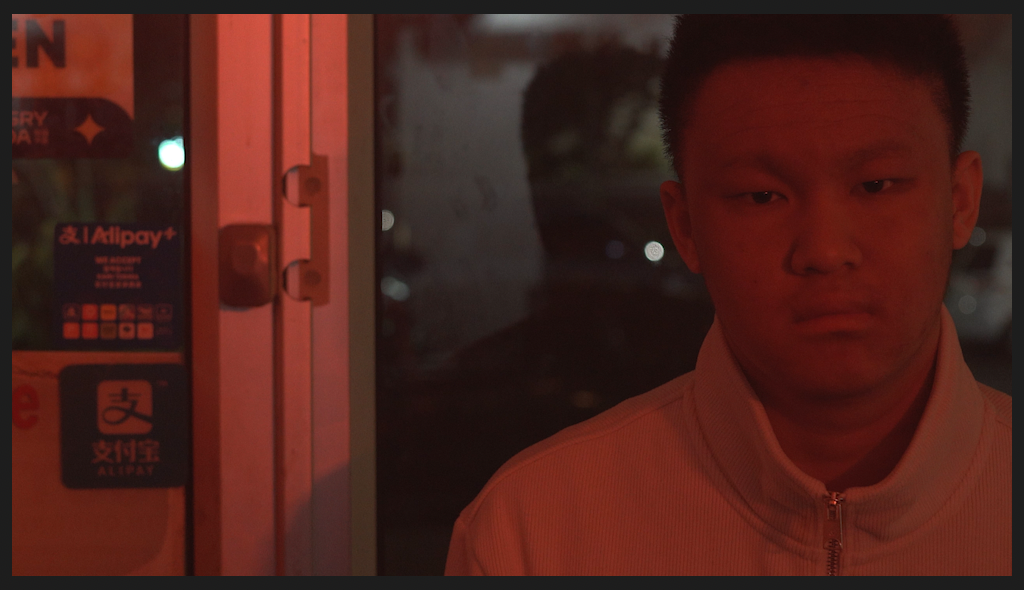
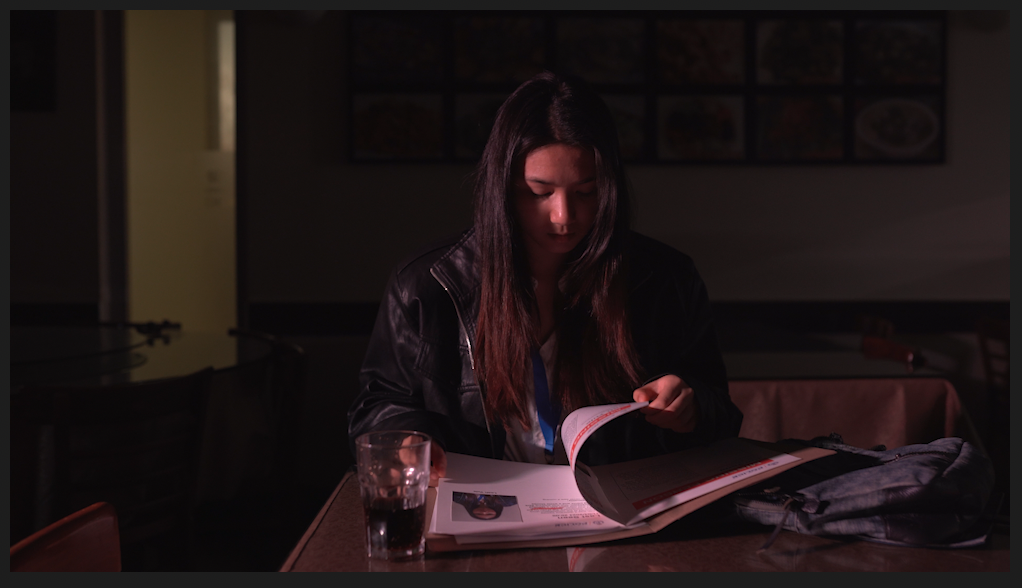
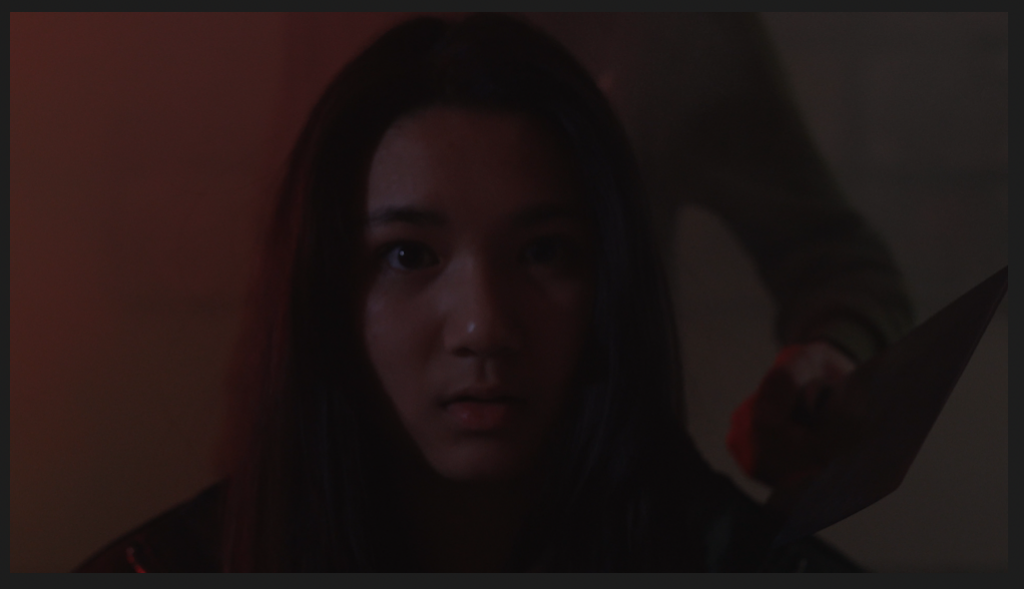
Or… even less words.
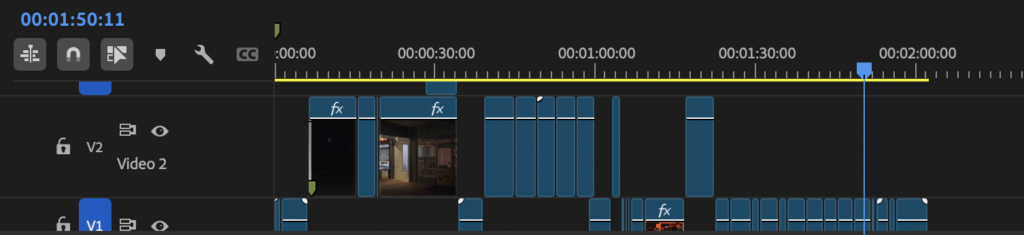
You may notice the several miniscule sections of clip, most of those are me speeding parts of the clip up to reduce the overall time taken, this timeline also includes both the previously mentioned production logo animation and the yet to be mentioned film title animation. I also removed the innate sound from… most clips. This was done because many of the clips had incessant camera clicking, people talking (“one two three”) or were otherwise inappropriate for the intended atmosphere being created.
I am very pleased with how this timeline turned out, if I had to say any potential improvements, it’s that the clip has imperfect pacing for two minutes, it is also three seconds over two minutes, so at some point I will probably need to cut it down just a little bit more. However, for the plot and content I had, I actually think that the pacing was pretty much as good as it could possibly be, I made sure to include a reasonably large variety of camera angles to showcase good knowledge of the micro-element of camera, such as:
– Tracking shot / tilt / zoom
– Establishing/master shot
– Close up
– Over the shoulder
– Open frame
– Pull shot / focus changes (these could definitely be improved)
– Mid shot
– Insert shot
– Eye-level shot
– Action match
– Sort of shot/reverse shot (but not quite perfect)
Many of these techniques are visible in the collage above.
Also, while I am aware this is editing, the timeline has perfect continuity/linearity, which makes sense for the plot, which although mysterious, should be coherent enough for the audience to have a general understanding or come to their own conclusions.
It’s also worth noting, that the research I did learning how to use premiere pro was naturally very helpful in not only thinking of the timeline, but actually compiling it in the adobe software.
Feedback
It was at this point that my group presented the film opening to the class and my teacher. My group used a Microsoft Form to acquire feedback, as every class member answered the form during or after the opening.
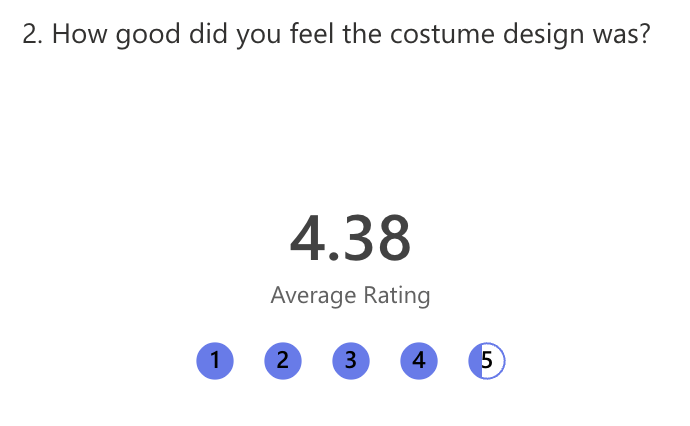
First I will show the consensus on various parts of the film:
This rating for the costume design is very much respectable, and I would say it is high enough to justify not refilming any of the scenes for specifically costume design purpose, as most characters reflected the roles
they/the era it takes place in well. Talking to people, the main reasons for not getting a full 5 stars is both the waiters clothing and the text on the lanyard at the beginning, “UN youth.” I made great effort to solve the latter.
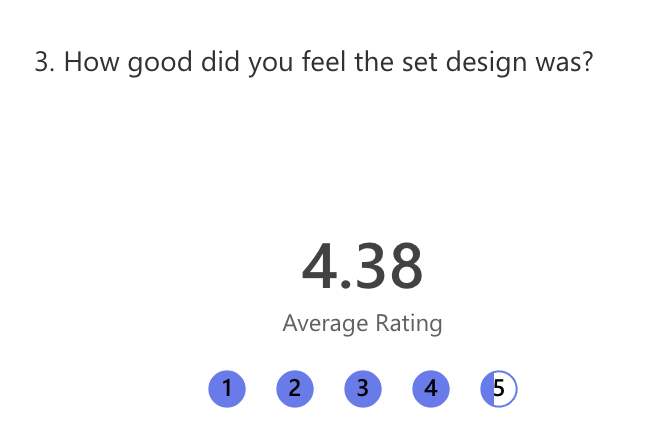
Again, a very much respectable rating for set design,
in terms of things that went well, it’s mostly that the set just
looked really creepy in a good way, this atmosphere is perfect for a horror-thriller-mystery movie,
which is what we want to do. For improvements, the most common criticism was that,
1 lighting was inconsistent in colour, and 2 that it was too dark for a normal operating cafe.
The 1st criticism was actually contradictory to the major consensus, as many liked it. While the 2nd was somewhat intentional, to raise questions in the audience as to what Leah was doing there.
Specific critiques:
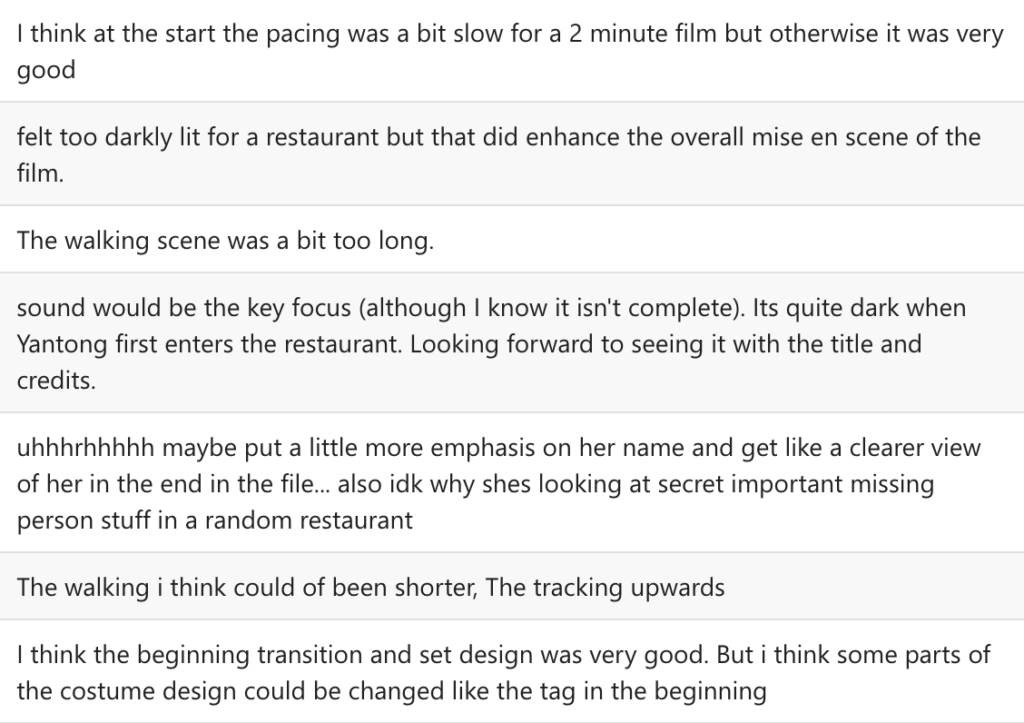

I will now address most pieces of criticism (not including repeats) and how we can use it constructively:
“The hallway scene was a bit long”
This is understandable, on the first draft of the film the hallway scene actually cut from her walking, to an insert of the lanyard, to her walking again, I believe the first two shots are important for costume purposes, as reading the lanyard tells you she is in the police force. The solution was to remove the cut back to her walking, reducing the time spent on the hallway scene while still maintaining what was important
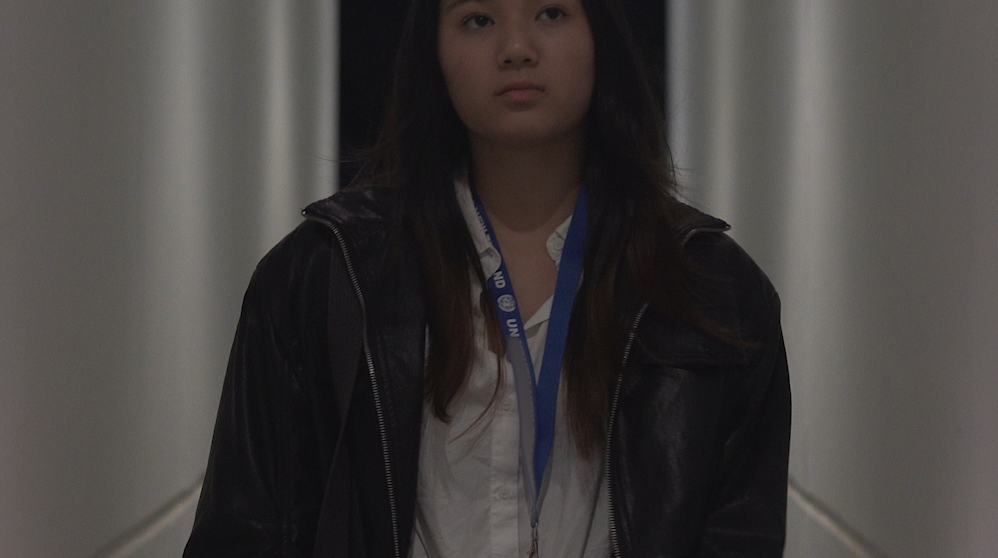
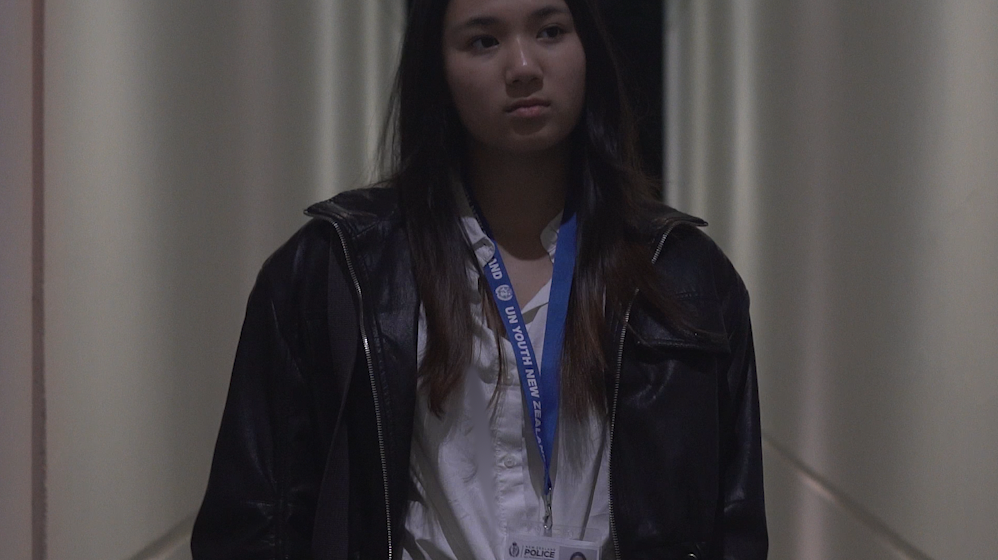
From the above, to the below.
“Sound would be the key focus”
at the time of showing the draft, sound was simply not complete, so this feedback will be easily solved in the sound section of the blog which is what I plan on doing next.
“felt too darkly lit for a restaurant”
This is one of those pieces of criticism that is actually somewhat intentional, as we wanted the restaurant to seem somewhat off putting and a-miss which I think turned out well, this also goes well with the next piece of criticism.
“IDK why shes looking at secret important missing person stuff in a random restaurant?”
Not knowing is sort of the point, if every question was answered in the opening then it wouldn’t work very well for a horror.
“maybe put a little more emphasis on her and get like a clearer view of her in the file at the end”
For the former I increased the time spent on an insert of her lanyard at the beginning (which has her name.) For the latter, I did a little colour grading to hopefully make the view clearer.
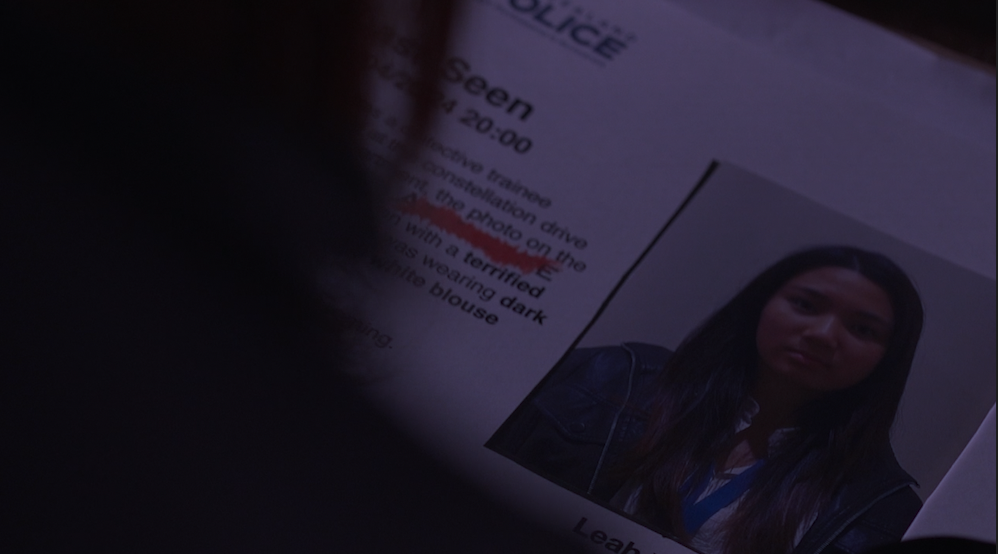
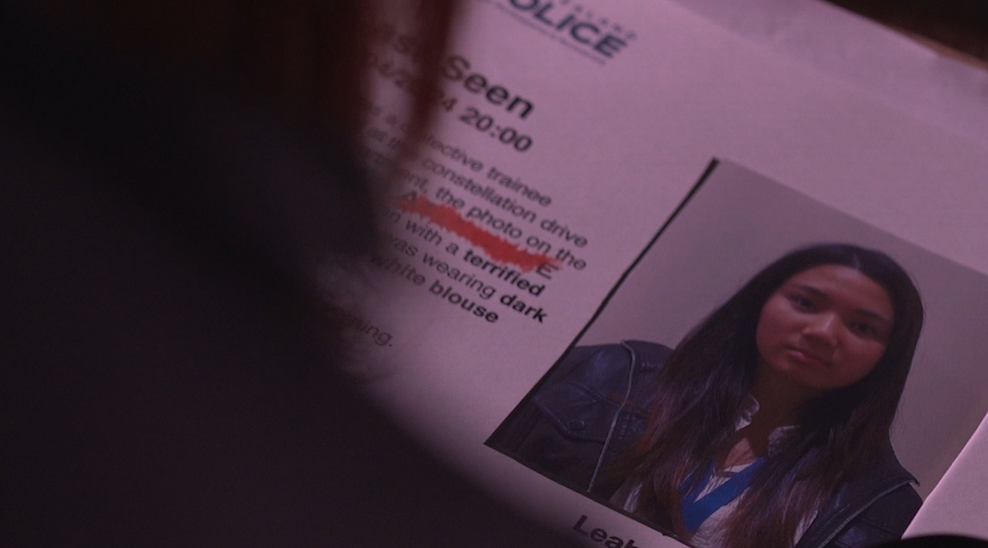
That addresses all of the main criticisms, but there is one thing left to solve. Which I mentioned earlier, and which came up in several of the class criticisms.
Teacher’s feedback:
“I think it’s looking really good! You nailed the costume design, which was needed without the original first scene. But my main critique would be the lanyard at the beginning which looks a little out of place.”
I knew that solving the lanyard would be the hardest so I left it for last. The problem is the text saying “UN youth” the solution is… i’m not sure? So naturally I did some research, I first watched the video on the right.
So credits to “Adobe in a Minute”
(the link is https://www.youtube.com/watch?v=8k7olOSHs0A)
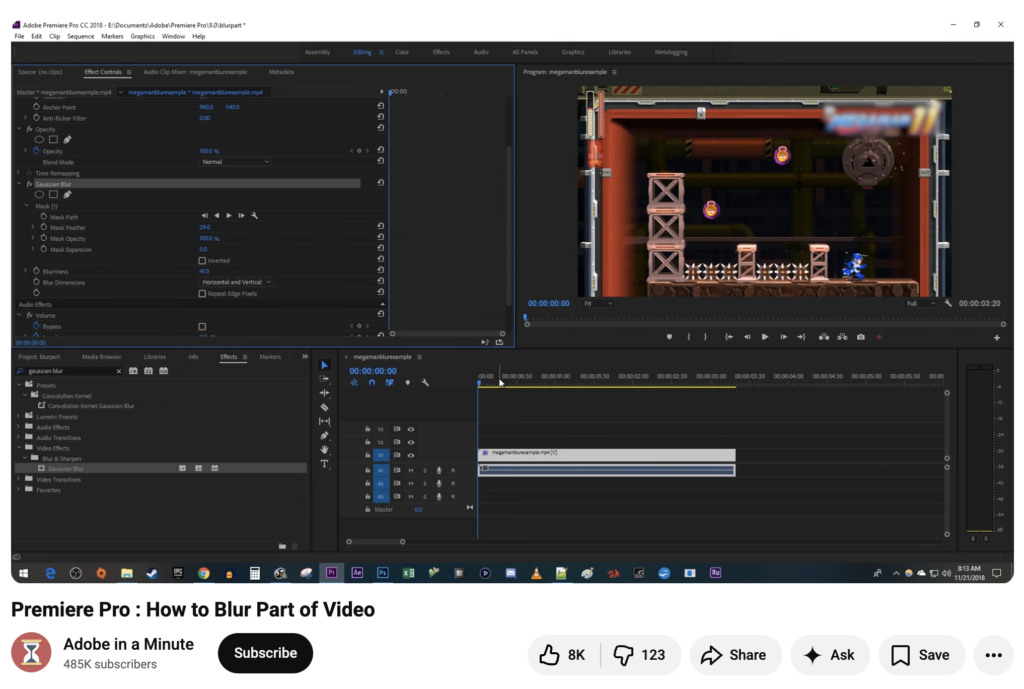
While the video was helpful, as I now knew to use “Gaussian blur” I noticed I was missing
the pen vector tools. I assume it was due to a difference in premiere pro versions.
But, I now needed to find an alternative way of masking, so I then looked at some forums to find a new way of masking or another place to find the masking tools. Eventually, I found that they had moved the masking tools to the toolbar (and changed the icon.) I managed to apply this to… one single frame of the video. Which is, well, pretty obviously not going to work.
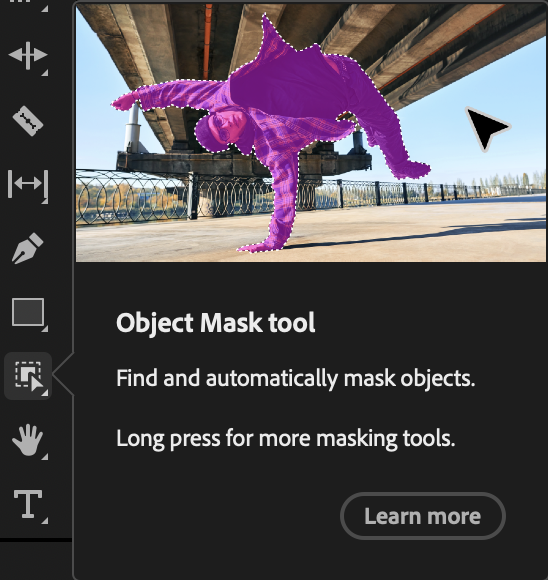
Luckily, I also noticed a “track forward” tool in the toolbar, I tried to apply it, and after a slightly excruciating amount of time, it automatically tracked it frame by frame. (Yes that white line is made up entirely of keyframes.)

I finally had a mask, and after even MORE tweaking of colour and opacity and feathering etc etc. I had finished covering the UN Youth text. It looks somewhat noticeable in a standalone frame, but when it is moving it becomes a lot less visible.
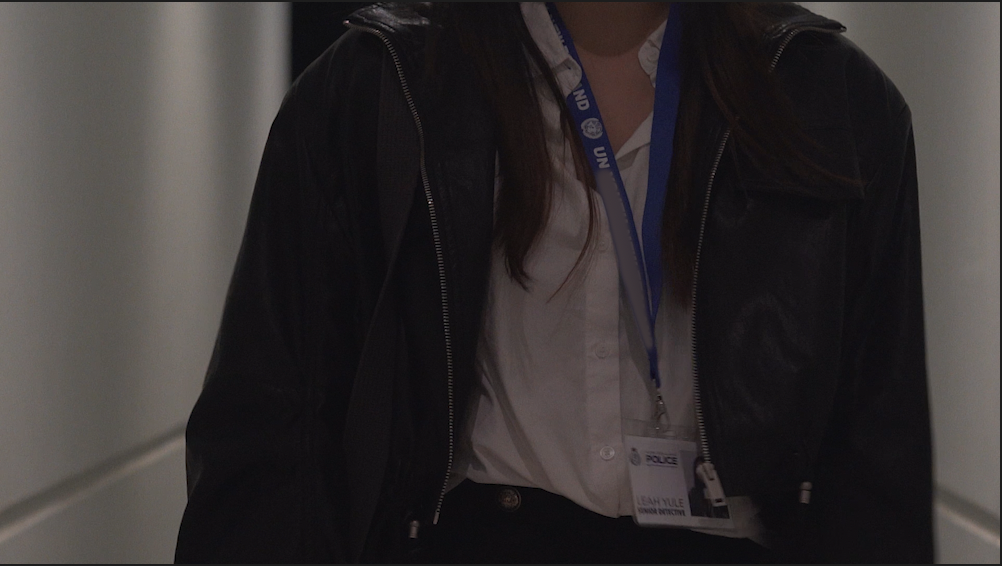
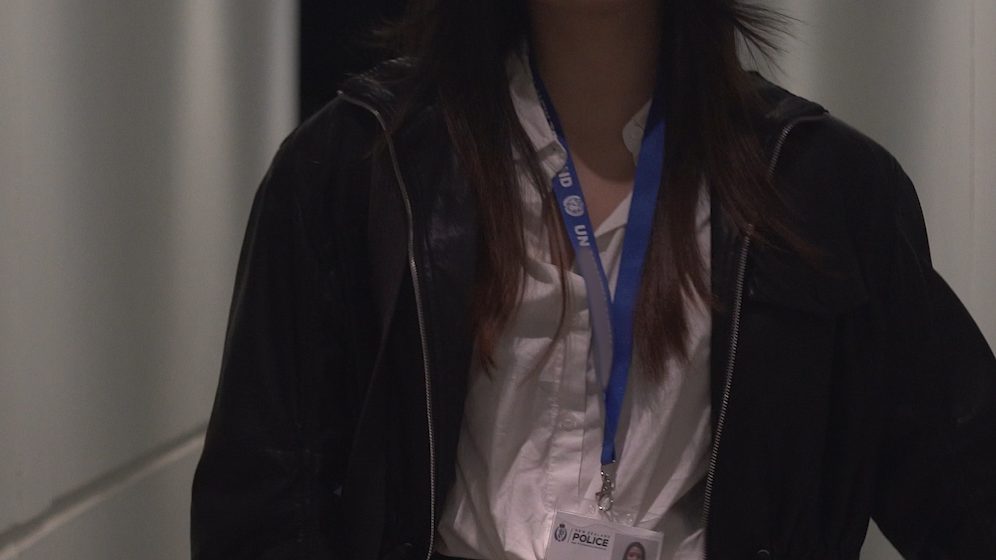
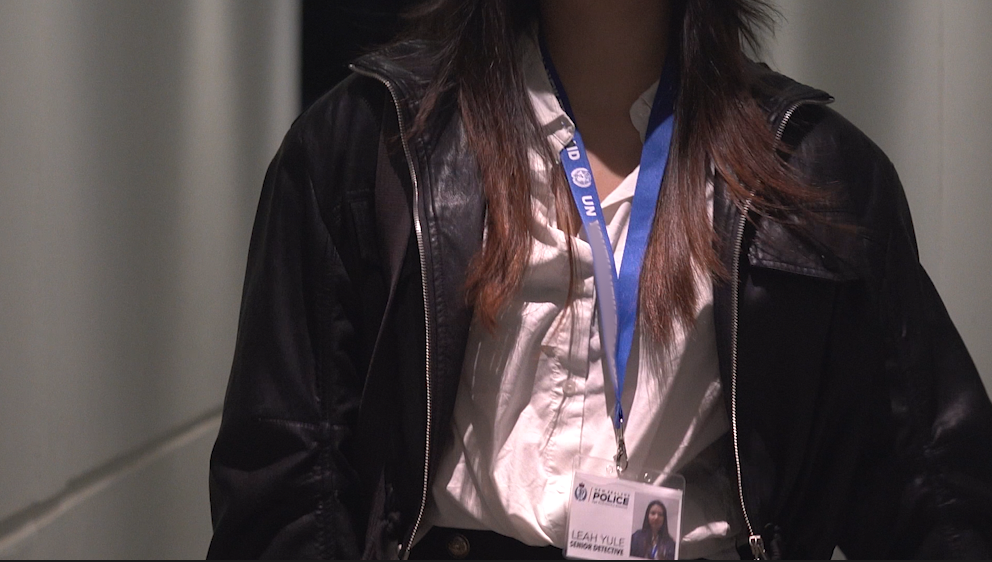
As for my reflection of my solutions to the critique provided by my class? I think that I did solve most of the major criticisms, while I am aware that my answer of “that was intentional” to some of the critique isn’t perfect, I believe it isn’t healthy to compromise on the original vision based on critiques that come down to personal preference, and if this opening were to be adapted into a full movie, I think these questions would serve as motivation to continue watching the movie. Otherwise, I think I am happy with how the feedback improved the movie. Suffice to say…
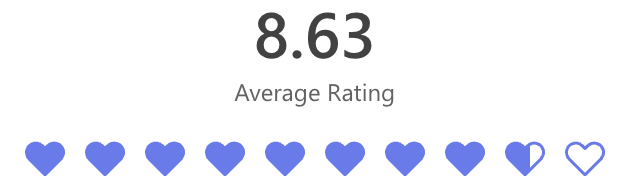
That is pretty good for a draft viewing!
Film title
First step in the process, choosing a name. Unfortunately, Yantong was away on an extended extra-curricular break, and the deadline was fast approaching (I did this after sound but thought it made more sense to place this here.)
We knew it had to involve one of the following words so that somebody could get a better grip on the plot just by reading the title: File, Missing, Case or Conspiracy.
We also wanted the title to rhyme to make it more catchy, so back to the random word generator for inspiration, we started with words beginning with ‘F’ and almost immediately found one that stuck. We landed on ‘Final File.’ Obviously the word file directly relates to what is seen in the opening, but final also has several connotations, final could be that this file is of importance, but also has the implication that this is the ‘final’ file you will see.
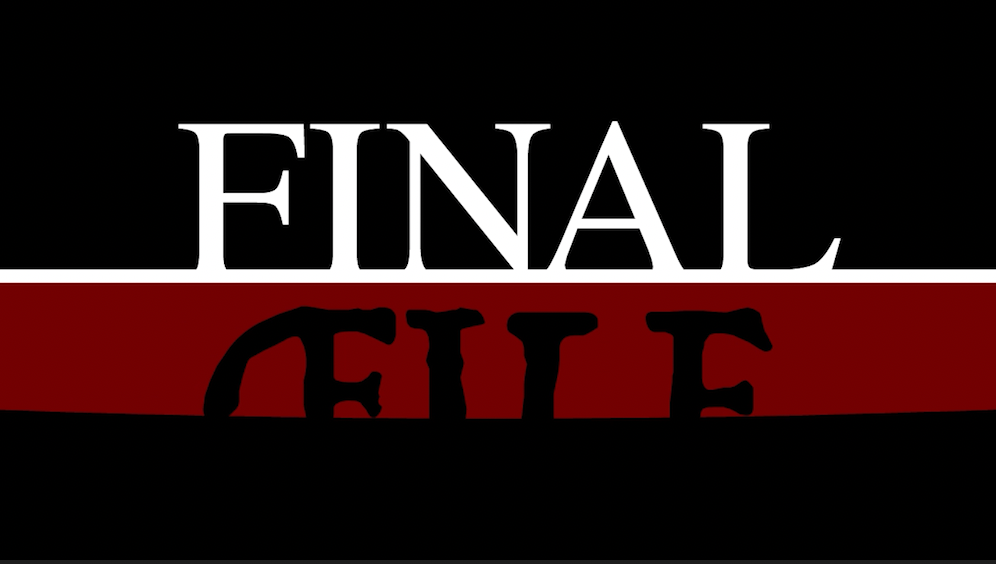
Next up, the design, using my previously acquired adobe animate skills I started up a project. Starting with the typography, I wanted ‘final’ to feel imposing, so I used times new roman to give a nice seraphed look, and a black and white colour scheme to provide clarity. For ‘file’ I wanted it to be somewhat bloody in order to fit with the horror-mystery genre, as if the entire title was in times it would look imposing but could be misinterpreted as a documentary or piece of investigative journalism. So I used an interesting looking font called Trattatello, which looks unstable, I then put this in black and over-layed it against a crimson red to make it look like a message in blood.



I am happy with how it turned out, but it needed an animation to really come to life. After careful consideration I came up with an order of events.
After the Leah is presumably slashed with a cleaver (not shown on screen but implied.) Sound will cut out as the screen jarringly cuts to black.
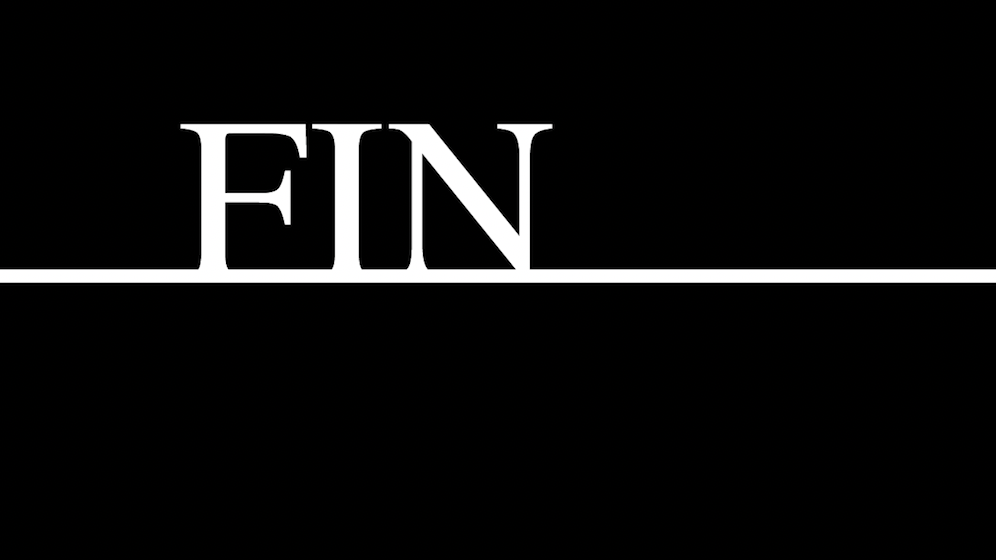
A white rift will then open on the screen, expanding until reaching the width of the line under ‘Final’ seen above. The letters of FINAL will then appear one at a time from left to right. As the final letter appears, blood will pour down from the line, revealling the word ‘FIle.’ Afterwhich the blood will drain leaving the credits for Yantong, Bruce and I. Here is the animation, some slight tweaks may be made with keyframes in the final cut.
Reflection
Overall, I am happy with how the title animation came out, I think if I was a little more skilled at adobe animate I could make the blood animation more convincing, the credits are also quite hard to see unless you are fullscreen, so I have to turn the exposure on them up. Sound effects will also be important in enhancing the title animation. Other than that, I think I took appropriate inspiration from horror genre conventions to make a reasonably convincing title.
Sound design
My team and I decided it would be better if we didn’t have a sound track and instead opted for ambience, this slightly breaks from genre conventions of horror films, but we think it fits better for an unsettling opening, where ambience is intended to stifle.
A horror film is NEVER complete without eerie sound effects/ambience however. Here is everything I knew we would need:
Knife sound
Folding paper sound
Door sound
Bell sound
White noise
Unsettling ambience for both missing people
Unsettling ambience for final person (killer)
Sound effects for production animation
Sound effects for title animation
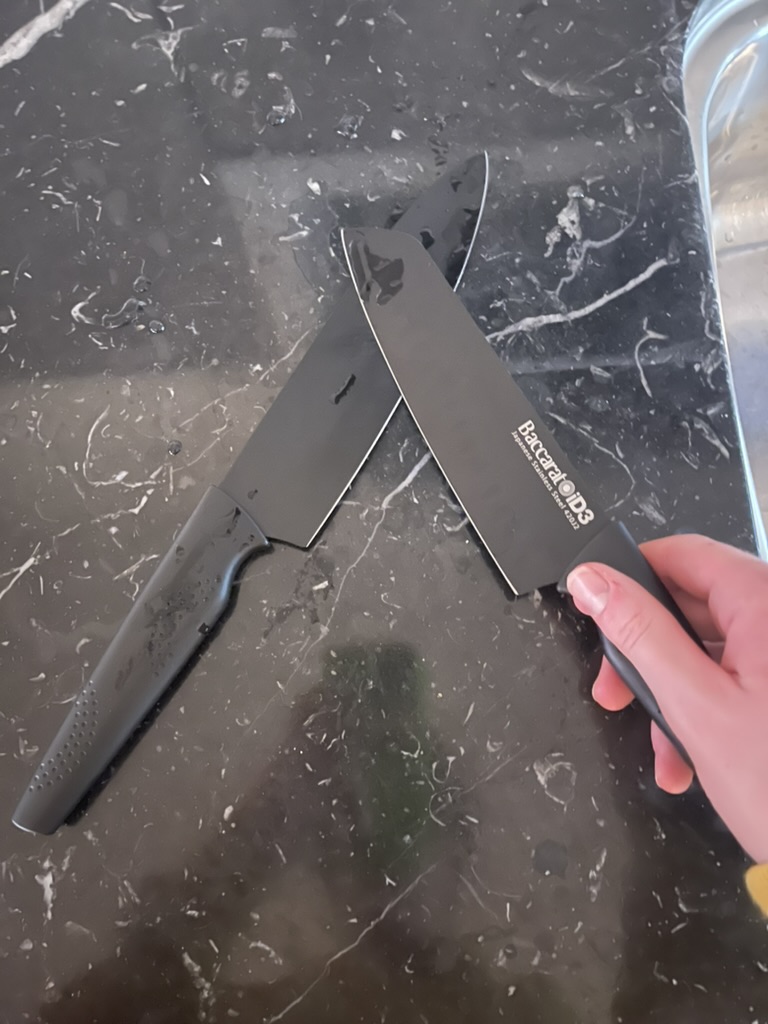
Starting from the top (literally.) For the knife sound I found two kitchen knives at home, ensuring that I was following proper safety protocols, I started the recording on adobe premiere directly and slide the knives flat sides against each other, I managed to do this in about two takes for a good sound effect! This is used when the killer walks behind her with a knife, as it is otherwise difficult to tell it’s a knife.
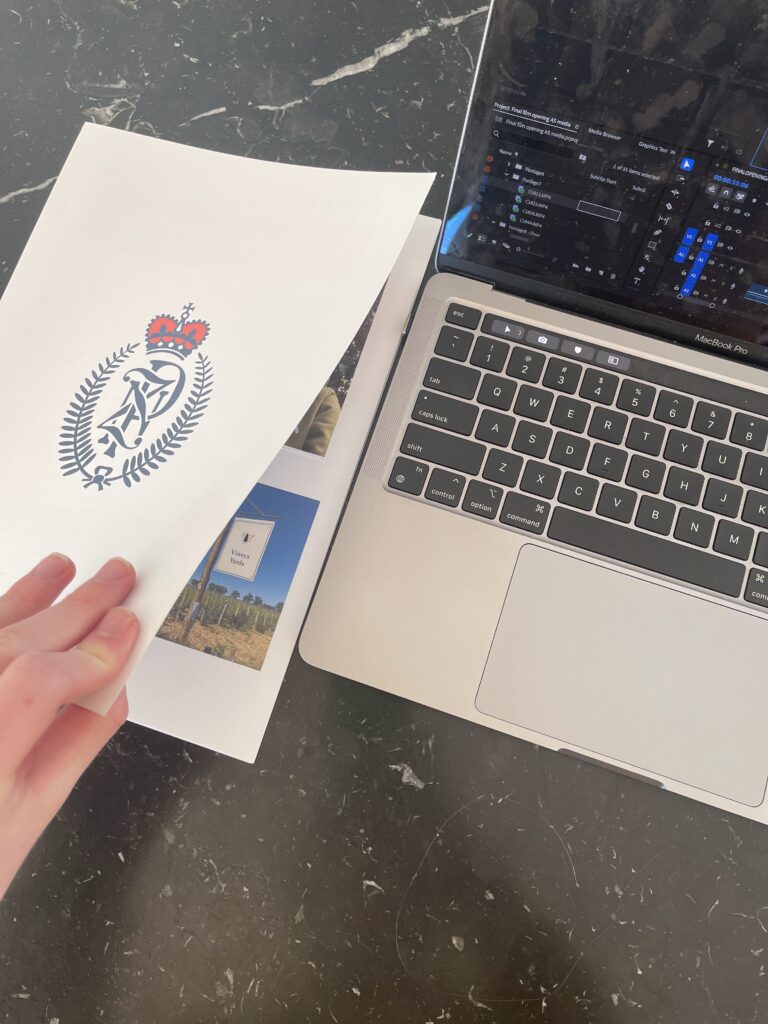
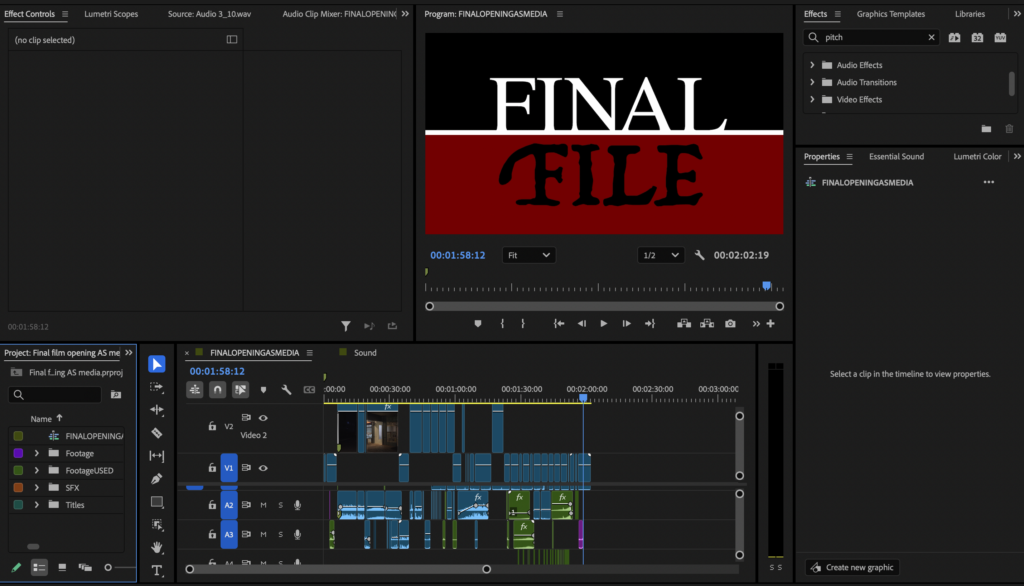
For folding paper, I recorded just that… not much more to say. This one did require a lot more “in pose adjustment” where I used the pitch shifter function adobe has as well as slowing it down and increasing amplitude to make it sound better. This is naturally going to be when Leah flips pages.
I found the squeakiest door my house had and recorded that a few times. This took several takes and required much pitch shifting in post. This is used for whenever a missing person enters the cafe, particularly useful when it happens off-screen.
I just used a bell, and then repeated the sound on top of itself in the timeline, this is also used whenever a missing person enters the cafe.
For white noise I took an extract from some of the camera footage that didn’t have clicking, normalised the amplitude and then looped it. This is used pretty much all the time when Leah isn’t outside or a missing person isn’t actively watching her.
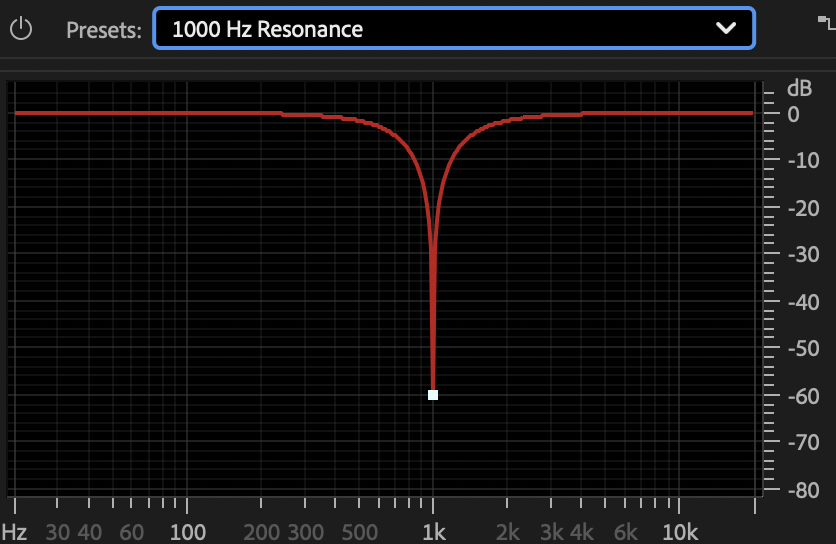
This was quite funny, for the unsettling sound of missing persons #1 & #2 I actually used the footsteps which were in the camera sound from the beginning and then utilised a ‘Dehummer’ effect, setting the resonance to 1000, this cancelled out the footsteps leaving an uncanny buzzing sound, then using keyframes I gradually increased volume while she was being watched, in the sound byte you might notice the footsteps, but when played with ambience you can’t hear them. This is used when Leah is being watched by #1 & #2.
This is the climax so I had to make sure it was REALLY good. First I recorded heart-beat sounds by thumping my chest with my fist, I then put these in the timeline and lowered pitch while increasing the volume as the sound byte goes on. I think recorded the ambience on top of itself to create an echoing effect that rises in pitch and volume. I then added the knife sound. I then made a sudden cut off as the scene ends, leading to this highly unsettling SFX/background track that plays as Leah is presumably killed (at least from the audiences perspective.)
For the production title, I used the paper sound with an echo, and a snap during the animations where the name is revealed and the hand snaps respectively.
For the title animation, I recorded myself exhaling loudly, and then greatly distorted it using the pitch shifter, this plays when the letters come in one by one and when blood pours down from them.
Reflection
I am very happy with the sound, most of it is pretty much exactly what I had envisioned, and I really think it brings the opening together, obviously there are always some improvements I can think of, I really struggled to get the audio mixing for ambience right, and the bell might take away a bit of the tension from the final scene, but overall I am very very pleased with the sound design.
And that’s everything, not just the sound, but everything.
This project has been incredibly fun, and I am very happy with how the final product turned out, this blogging experience took me about 50 hours all in all, I am particularly proud of my breakdowns of reviews and storyboarding.
In the final film opening I think we particularly hit the key genre conventions of Horror-mystery media well, the ambience, sound design and even framing all came out really well for immersing the audience in the opening, which is really important in horror for unsettling the audience, so in that regard I am very content. One big improvement that could have been made would be reducing the suspension of disbelief, a lot of the feedback we got from peers and the teacher was that the opening was simply unbelievable, often saying that it is illogical that a restaurant would be so dark, or that a detective would just read a case file in the open. I completely understand this criticism, and I did attempt to remedy a lot of it through editing, however there is only so much post production can do, and if I were to film/storyboard this again, I would certainly keep this in mind. Luckily, this sort of problem is exactly the kind of thing that a full film would solve, as openings often leave unanswered question, making this more of a format problem than a full systematic problem. I do think that the opening had more positives than negatives overall, as the micro-elements were quite strong.
Finally…