✧ ˚. ˖⋆。 .
Planning for Production 1 – Premier Pro Workshop
We had a full day editing workshop for Adobe Premier Pro on the 25th of May. I learned how to colour grade, insert text, and use transitions. I hope to be able to get more opportunities to experiment with colour grading as well as how to change and add sound easier in the future. Below is my final product from the workshop.
Planning for Production 2- Idea creation and brainstorm
Here are some brainstorms that we had done in class in order to come up with our film’s premise.
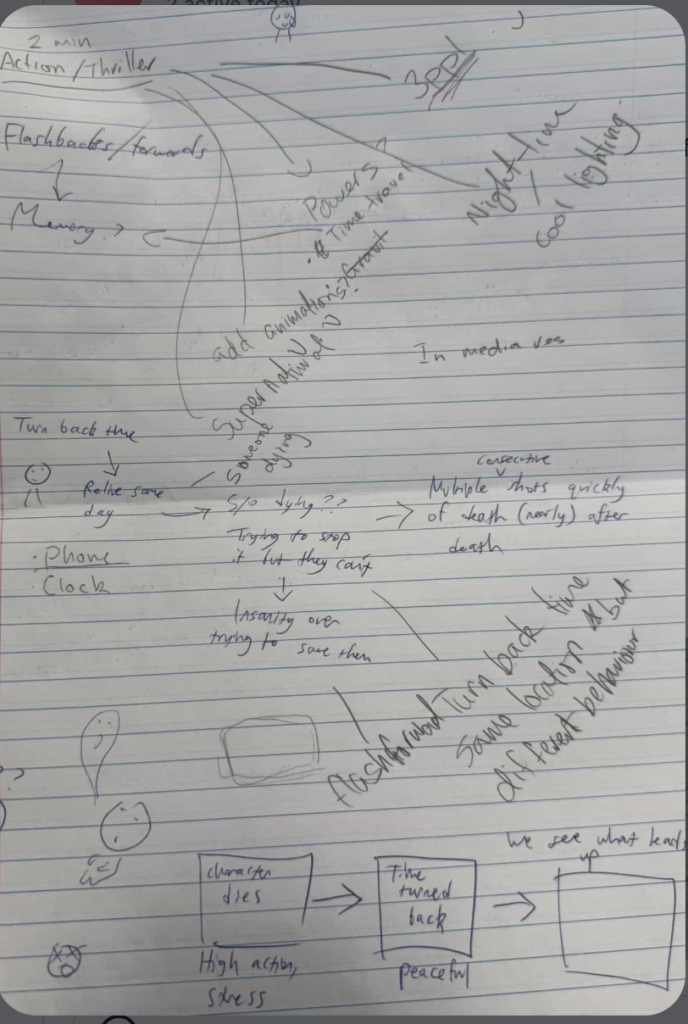
We started brainstorming ideas and eventually settled upon a supernatural premise as well as coming up with some ideas that we’d like to include to further inform our final decisions. (Props, scene/shot ideas, themes)
We also had a conversation about what our film’s name should be, going through several ideas before settling upon ‘Again’. Some names included ‘Rewind’, ‘Loop’, and ‘Once More’.
We chose ‘Again’ because it wasn’t as direct but also fit the idea of being able to be repeated (“Again and again and again”) which would also be reflected in our final title screen.
Planning for Production 3- Moodboard
My group members created a moodboard in order to create a clearer idea of our film’s atmosphere and ideas.
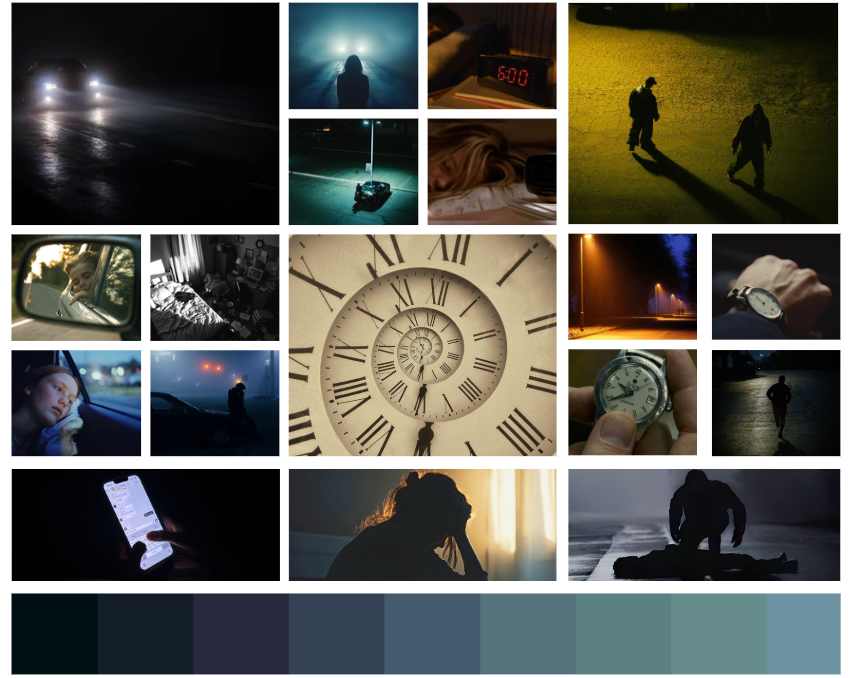
However, despite including many clocks in our moodboard, we eventually decided on forgoing this time imagery as we had difficulty thinking up of shots to include them that wouldn’t be awkward.
Planning for Production 4- Roles and responsibilities
In class we delegated responsibilities for our film, though when needed, group members would help to fill in for others if they were not available or busy with other tasks.
Below are our roles.
- Casting director- Celina (Coco and I were both rather indecisive, and Celina was decided to be the ‘team leader’ of sorts)
- Health and safety- Coco (Coco would be good at pointing out flaws or dangers in our plans)
- Storyboarding- Chloe, Coco (We both had iPads, drawing programs, and general experience in storyboarding/art)
- Script writer- Chloe (I am a fast typer and quick at coming up with ideas and more ‘naturalistic’ dialogue)
- Location scout- Celina (Celina knows the area well and has a good eye for fitting locations)
- Costume designer- Celina (Celina had a well curated Pinterest feed as well as being better than the two of us at choosing fitting clothing)
- Editor- Chloe (We failed to figure out how to create a team project in Adobe Premier Pro, Coco’s iPad had the mobile version of Premier Pro, and Celina was often quite busy after school, so I took on the role of editor)
- Blair- Chloe (I volunteered to act since I take Drama as well and have had acting experience)
- Eve- Coco (We decided on Celina being the camerawoman since her hands were steadiest, so that left Coco to play Eve)
Planning for Production 5- Storyboard
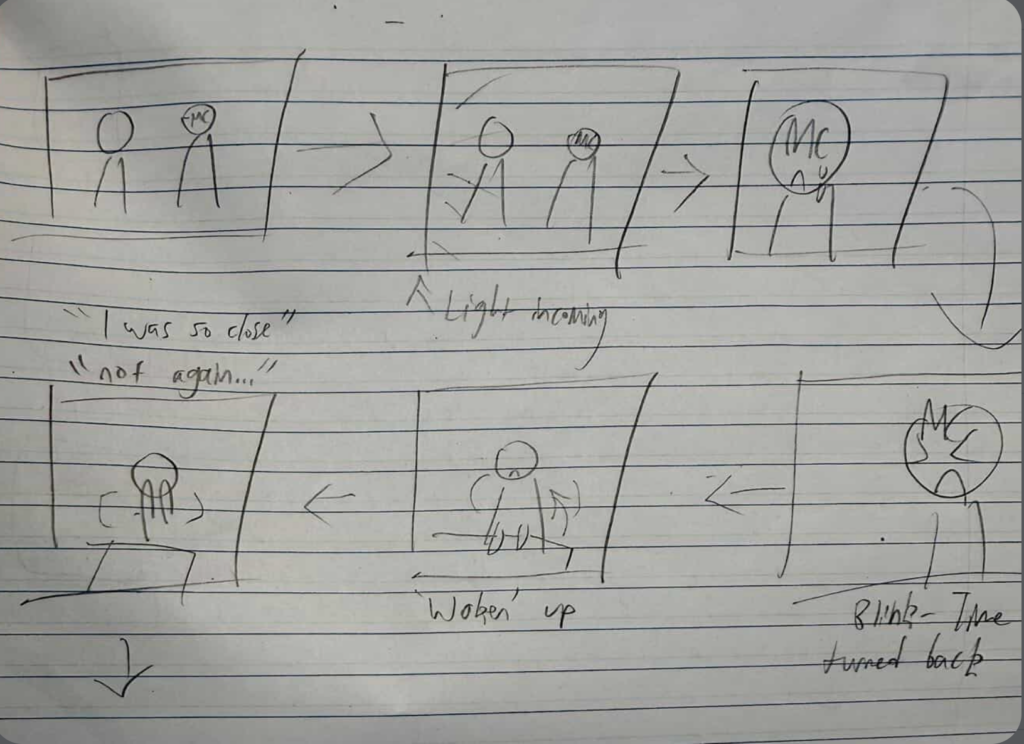
Upon coming up with our general idea for our story (time loops) I created the earliest version of our storyboard. This was just to test how our ideas translated into something on screen as well as to get a feel for how long we would have for the film.
Using our newfound experience in creating storyboards from previous preliminary tasks, Coco and I created several smaller storyboards for our film opening.
These proved to be much more efficient and easier to change as well as being able to get the point across as we discussed shots.
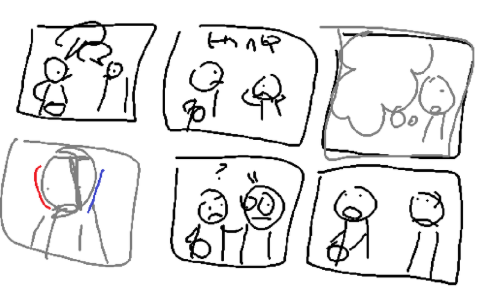
This is an initial rough draft that was created in Microsoft Paint in order to get an idea of events in the opening.
Planning for Production 6- Production process
Though a rough script had been created, it was too long for 2 minutes and so, while filming, majority of the dialogue was cut down and improvised.
Filming locations were scouted by Celina:
- A bedroom in her house
- The parking lot of a playground across from Mitre10
When we arrived at the initial parking lot we had decided on, we found that there were several health and safety hazards, so then decided to change to a different parking lot near a bus station. Unfortunately, a biker/car meetup was taking place there shortly after we had begun filming, so we eventually returned to a parking lot close to our original filming location.
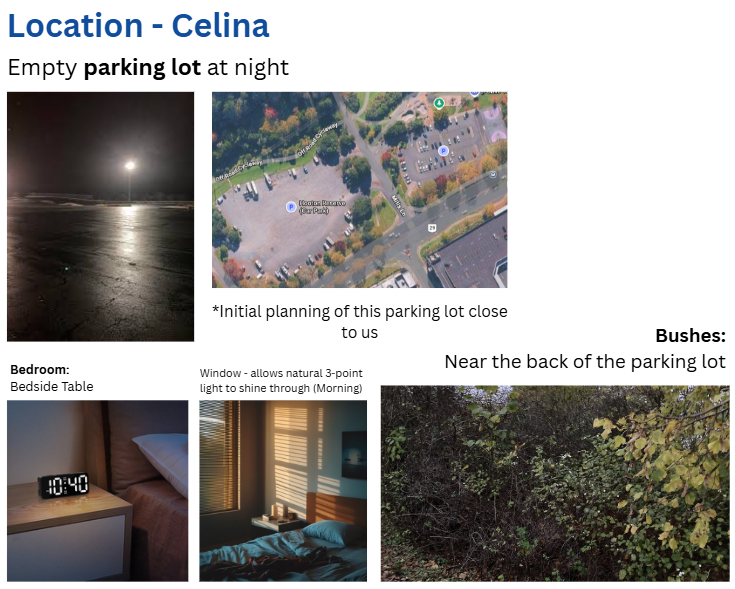
As a group, we agreed that Celina and I would meet at her house first to film the beginning scenes, then meet Coco at the parking lot to film the rest.
Celina decided on costumes, however there were no specific costumes that were required as the characters are regular people. We did decide that Blair should wear darker clothes to reflect her spiralling while Eve should wear lighter clothing to reflect her naivety to the situation.
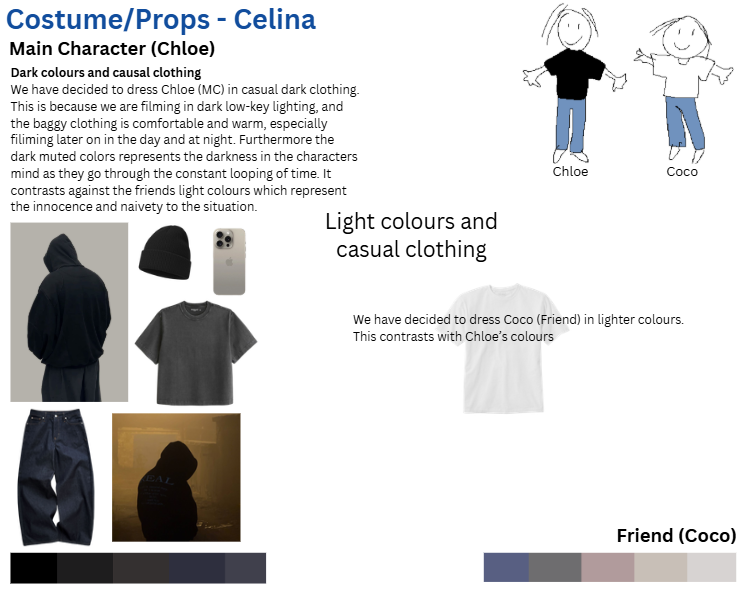
We developed the characters as we wrote the script and created the storyboard, though from the beginning we knew that they would be best friends. I eventually had the idea that Eve should be wearing a bracelet that would break or fall off whenever she died.
As for casting, our entire group was open to the idea of playing a role in the film, though we eventually decided on Coco and I to play the 2 characters.
Below is our first version of our film comprised entirely of clips from our first filming session. We gathered feedback for it and later used this feedback to improve the film in our second filming session for our final version.
My personal ‘next time’ goals are to work more efficiently via being more prepared on the filming day itself (eg. comprehensive shot list, clear storyboards) as during filming we had faced several challenges such as scheduling constraints, difficulty finding a suitable location that matched our vision, and equipment malfunctions (our lighting equipment did not work)
Planning for Production 7- Filming + Peer review/feedback
First filming session
It was rather difficult to find good filming times, as majority of our group’s schedule did not line up very well with each other. Luckily, we decided on Sunday to film on as we were all free.
On our first filming session, Celina and I met up at her house in the afternoon to get all the initial (and final) bedroom scenes.
We had wanted to make use of all the gear that we had brought (tripod, gimbal, and film light) though we came across some difficulty with getting the film light to work, and ultimately ended up not using it.
Afterwards, we met with Coco at our planned filming location, the Albany bus station, but once again were met with roadblocks as we had accidentally found ourselves at the location of a car/bike meetup. Eventually, we decided to move to filming at the nearby parking lot of the Albany skate park.
Due to the time of day we had chosen to film, many of our shots were brighter than others, and there were several inconsistencies between them.
Overall, this day was useful as we gathered the shots that would be more difficult to get in later filming days as well as gained experience to know what we could improve on next time.
Below are some of our unused shots from this filming session as well as the full rough cuts video.
Peer review/feedback
After showing our class the first draft version of our film, we gave them a form to fill out to receive feedback from our peers.


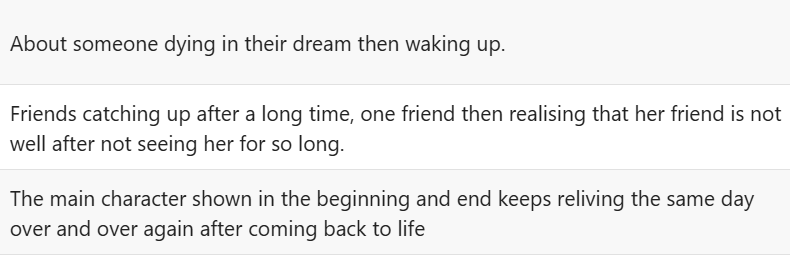
- Some classmates were confused about the story from what was shown, so we aimed to refilm some scenes to create a clearer narrative.
- We were also told that some of the colour grading in certain scenes, as they were too dull.
- Virtually all feedback relating to our company logo was positive.
- Most were able to guess our film’s genres based off of our opening and use of conventions (mystery, thriller)
Second filming session
After gathering feedback for our first draft, we decided to meet up once more to refilm several scenes, notably the ones in the park.
This feedback included making it clearer as to what exactly happens within the story as well as changing our colour grading to better match the tone, so we decided on filming later at night so that it would be darker. We also made sure to refilm all of our later key scenes, as that would help with context as to what happened.
This filming session went a lot more smoothly than our previous one as we had both a clear idea of what we needed to get done as well as how to use our equipment.
Ultimately, we spent around 1 hour refilming our scenes before wrapping up with little issues.
Below are some of our unused shots for this filming session.
Planning for Production 8- Production company + logo developement
During class we brainstormed together to create a production company logo, at which I then took our final draft on paper and created an animated logo in Alight Motion.
We used our previous research on famous production company logos in order to create ours, pulling inspiration mainly from A24’s simplicity.
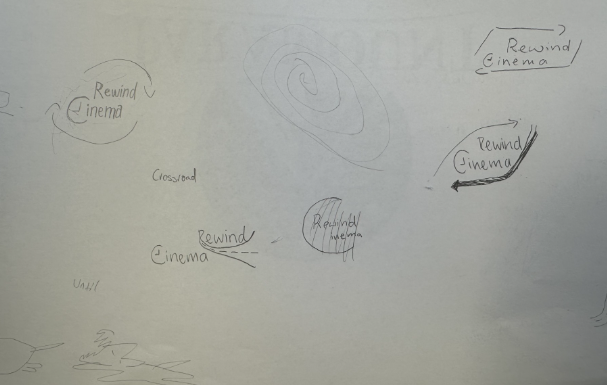
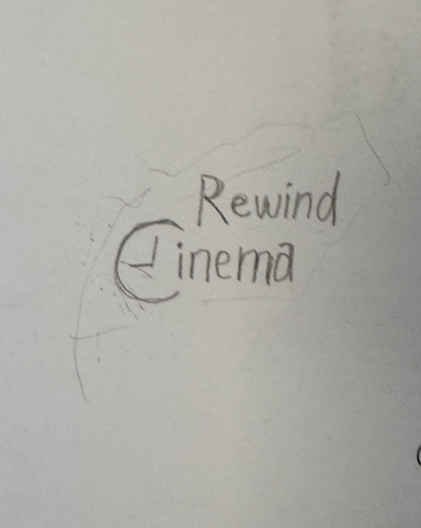
Below is the first draft of the animated logo.
After receiving feedback, we decided to reverse the direction of the clock hands so as to align more properly with our company name: ‘Rewind Cinema’
Below is the final animated logo.
Planning for Production 9- Rough cuts
Below is our rough cuts for our film.
Planning for Production 10- Editing
Since I was chosen to be the editor of our film opening, I came out of this experience with a lot of newfound knowledge.
Adobe Premier Pro, our editing software, was completely foreign to me at first. I had never used a professional program as complex as it before, and so needed a lot of help from online tutorials.
While I can say that majority of it was a repeated cycle of combing through clips, editing them, running into an issue or requiring a function that I didn’t know how to access, and then searching through the internet to find a solution, a large part of it that made later stages of editing streamlined was our Adobe Premier Pro workshop.
The knowledge of how to even access basic colour grading tools was a massive assistance, and had I not known that knowledge, I might have put in a lot more tears and sweat than I already have.
Much of the editing was also a process of trial and error, such as not knowing that importing clips or photos would put them into a different sequence to the main one, and then freaking out over losing progress.
My workflow looked something like this, though I did go back onto previous steps many times:
- Import clips
- Pick out desired shots
- Go through and cut out parts from the beginning/end of the clips
- Adjust sound levels
- Add sound effects
- Colour grade
- Add the titlecard at the end
- Adjust aspect ratio
- Export
I particularly found it tedious to sort through the clips and find suitable sound effects, though the most challenging part would have been the colour grading and adding the ‘flash’ effect when Eve is hit by a car. That sequence, however, is what I am most happy with as well as the beginning shot of the window with birdsong.
Some particular editing choices that I made also include:
- Colour grading the initial bedroom scenes a warmer tone than the rest of the opening which holds a colder, darker tone. This not only creates contrast between the two parts but also foreshadows the first death of the film after jumping from a warm, gentle room to a sharp, dark environment.
- The sequence of straight cuts from 1:40 to 1:43 creates a jarring yet effective scene which reflects the reality of the loops for Blair, putting the audience into Blair’s perspective. The jump from the parking lot to the bedroom once more furthers this contrast.
Below is a near-final iteration of our film opening which has little difference from our final, aside from the ending titlecard which ended up getting a build up sound effect added at the end to reflect a film’s opening more.
All in all, I’m very pleased that I got to work as an editor for our film as the newfound experience and knowledge that I’ve gained is sure to aid me for future endeavours with Premier Pro.